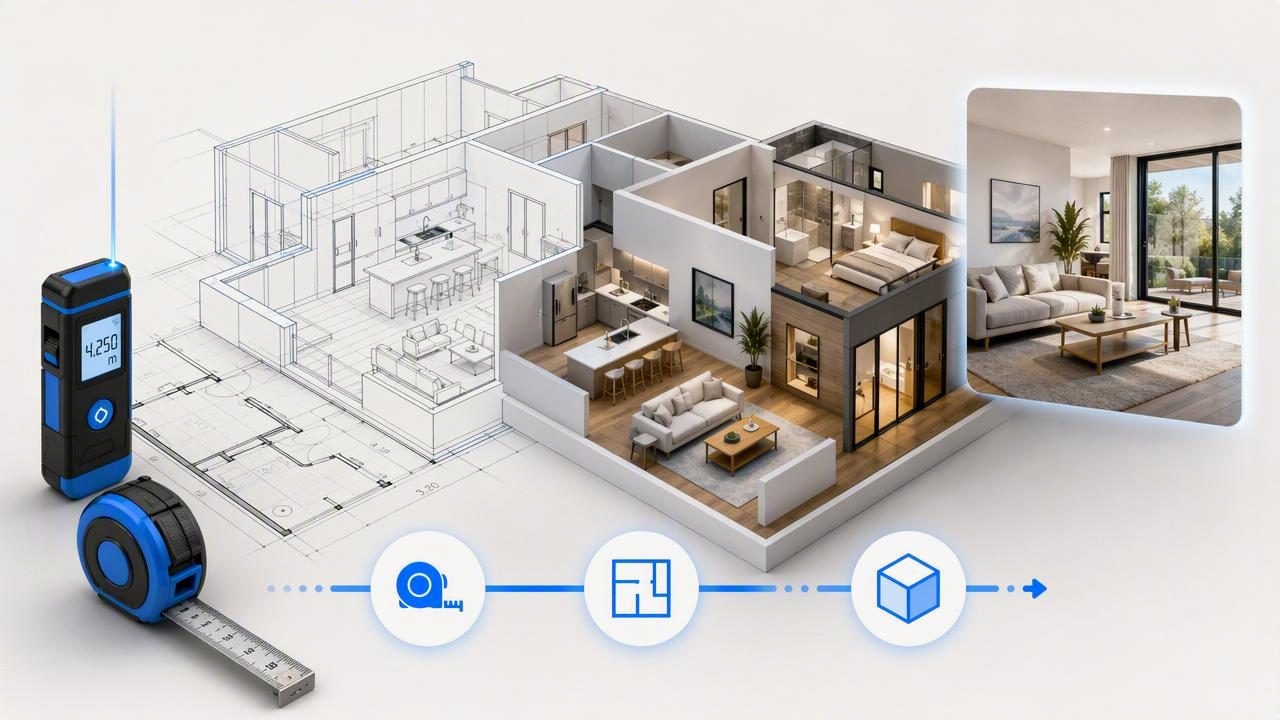
A modern home design app can carry you from a simple floor plan to a richly detailed 3D model you can evaluate from every angle. Whether you are rearranging a living room, planning a kitchen update, or preparing a full renovation, the right digital workflow gives you clarity before you spend on materials or layouts that do not fit. This guide covers how to choose an app, set up your project for accuracy, and move from scan to 3D with confidence.
What makes a great home design app
Not all tools are built for the same job. Some focus on sketching and quick layouts, others specialize in precision and realistic rendering. Use this checklist to evaluate your options and match them to your goals.
| Feature | Why it matters | What to test |
|---|---|---|
| Accurate scale and dimensions | Ensures furniture fits, doors swing, and circulation works | Calibrate to a known wall; verify multiple dimensions align |
| Floor plan import | Speeds setup by tracing scanned plans or PDFs | Photo, scan, or PDF import; adjustable opacity and snapping |
| Wall, door, window tools | Defines structure and openings precisely | Wall thickness, door swing, window height and sill controls |
| 3D visualization | Checks sightlines, spatial feel, and proportions | Orbit and walkthrough, section views, realistic lighting |
| Furniture and materials | Tests real-world fit and style options | Parametric furniture sizes, custom textures, finish swatches |
| AI and automation | Accelerates tracing and room detection | Auto-wall detection, room labeling, or layout suggestions |
| Export options | Communicates design to clients and contractors | Scaled plans, high-resolution renders, annotated images |
| Mobile capture and AR | Makes onsite measurement and previewing easier | Camera scanning, LiDAR support, AR placement |
| Performance and reliability | Prevents crashes on large layouts or 3D scenes | Smooth navigation, autosave, version history |
Set up for success: a pre-design checklist
Good inputs lead to good outputs. Before opening your home design app, spend a bit of time gathering the facts on the ground.
- Measure the shell: overall room length and width, wall thickness, soffits, ceiling height, and slopes.
- Capture openings: door locations, swing direction, widths and heights; window sizes, sill heights, and types.
- Note fixed utilities: radiators, vents, electrical panels, outlets, water lines, and drains.
- Photograph each wall straight-on and at corners; annotate photos with key dimensions.
- Record constraints: load-bearing elements, immovable cabinetry, column locations.
- Create a style board: two or three material families, light or dark tones, texture references.
- List functional goals: seating capacity, storage targets, workspace, accessibility, and budget.
Workflow: from plan to 3D spatial confidence
- Import or capture the base plan
Scan or photo: Use even lighting and take the image perpendicular to avoid perspective distortion. If using a PDF, ensure the original scale is visible. - Calibrate scale
Identify a known dimension, such as a 4 m wall. Calibrate once, then cross-check with a second known measurement to verify accuracy. - Trace structure
Draw exterior and interior walls with correct thickness. Add columns, stairs, and soffits. Set ceiling height. - Add openings
Place doors and windows with precise sizes, heights, sill measurements, and swing or slide direction. - Define rooms
Label spaces and set floor finishes. Assign zones such as cooking, prep, dining, work, or lounge. - Place fixtures
Insert sinks, toilets, tubs, appliances, and built-ins. Observe clearances and building code requirements in your region. - Furnish with intent
Start with anchor pieces: sofa, bed, dining table, desk. Add secondary seating, storage, and lighting. - Check circulation
Confirm paths between doors, task areas, and seating. Ensure routes feel generous, not just passable. - Evaluate sightlines
Switch to 3D and walk the model. Confirm focal points, TV viewing angles, and window views. - Light the space
Test ambient, task, and accent lighting. Validate contrast and reflectance in day and night scenes. - Iterate fast
Produce A/B layouts and compare. Keep notes on what improves comfort, storage, and light. - Export deliverables
Generate scaled plans for measurement checks and high-resolution 3D images for review.
Scale math made simple
Calibration is the foundation of a trustworthy model. If your image import includes a known wall length, you can compute the conversion and keep your model consistent.
// Example: derive a pixel-to-real conversion in a scripting context
// knownReal is 4.0 meters; knownPixels is measured from the image
const knownReal = 4.0
const knownPixels = 812
const metersPerPixel = knownReal / knownPixels

// Convert any measured pixel distance to meters
function pxToMeters(px) {
  return px * metersPerPixel
}

// Example check: a doorway that looks like 94 pixels
const doorMeters = pxToMeters(94) // about 0.463 m; adjust to a standard width
Pro tip: after the first calibration, spot-check a second dimension on another wall. If the error exceeds about 1 percent, re-scan or adjust your reference line to reduce distortion.
Clearances you will use again and again
Dimensions vary by region and spec, but these common targets help prevent crowding. Adjust based on local codes and your furniture sizes.
| Use case | Target clearance | Notes |
|---|---|---|
| Primary walkway | 90 to 105 cm | Entry and main paths |
| Around dining table | 90 cm behind chairs | Allows pull-out and passing |
| Living room seating distance | 150 to 250 cm | Eye-to-screen for typical sizes |
| Bed sides | 60 to 75 cm | Comfortable access and linens |
| Desk legroom depth | 60 cm minimum | More for deep keyboards and monitors |
| Kitchen work aisle | 105 to 120 cm | Two people can pass and prep |
Lighting and material choices that elevate your 3D
Lighting and materials shape how your space feels and how accurate your 3D reads. Test scenes for both daylight and evening conditions.
- Daylight: Place windows accurately, set orientation, and preview morning versus afternoon sun.
- Ambient: Establish baseline brightness with dimmable fixtures or soft bounced light.
- Task: Add targeted light at counters, desks, vanities, and reading chairs.
- Accent: Use wall washers or directional spots to highlight art or texture.
- Materials: Combine matte for glare control and semi-gloss for cleanability; keep contrast for depth.
Design with the light you will live with, not just the light you render. Validate evening scenes to ensure tasks are comfortable and glare is controlled.
Collaboration and export: what to hand off
Great design lives or dies in communication. Package your work so decisions are easy, even for non-designers.
- Scaled plan with dimensions: wall lengths, door and window sizes, and key clearances.
- Furniture plan: labeled with sizes and clearances drawn as arcs where relevant.
- 3D hero images: wide shots for overall feel; close-ups for materials and joinery.
- Finish schedule: list of floors, walls, counters, and hardware with references.
- Lighting plan: fixture positions, beam spreads, and estimated output.
- Variant layouts: a short A/B comparison to facilitate decision-making.
Common mistakes to avoid
- Skipping calibration: being off by a few centimeters compounds across a room.
- Ignoring door swings: even sliding doors need wall clearance for pockets and handles.
- Overfilling rooms: more pieces can mean less usable function and tighter circulation.
- Flat lighting: previewing only daylight hides evening glare and shadows.
- Uniform material reflectance: without contrast, spaces appear flat and scale is harder to read.
- Single viewpoint validation: always walk the model to assess sightlines and focal points.
- No version control: save milestones so you can roll back from dead ends quickly.
Pro tips for small spaces and multiuse rooms
- Scale anchors first: right-size the sofa, table, or bed, then let secondary items flex.
- Use double-duty pieces: storage benches, nesting tables, fold-down desks.
- Float storage: make use of vertical space to keep floors clear and sightlines open.
- Define zones with light: pendant over dining, wall lamp at reading chair, under-cabinet for prep.
- Color strategy: limit the palette to a few related tones; vary texture rather than hue for depth.
- Acoustics: add soft finishes in high-echo rooms; rugs and curtains can rebalance sound quickly.
- Accessibility: target wider paths and lever handles; confirm turning radii where required.
An example mini-case: from blank to believable
Imagine a 4.8 by 3.6 m living room with one large window and a door near a corner. The goal: seat four, maintain TV visibility, and keep a primary path to the door unobstructed.
- Calibrate to the 4.8 m wall from the scan. Spot-check the 3.6 m depth. Adjust if off by more than 1 percent.
- Place the sofa centered on the window wall, leaving 80 cm to 90 cm walk space behind if possible.
- Add a 160 by 230 cm rug to set the seating zone; maintain about 40 to 50 cm from sofa to coffee table.
- Position the TV opposite, at a height where center sits near eye level when seated.
- Test two chair placements: flanking the TV wall for a conversational U-shape or opposite corners for flexibility.
- Walk the 3D path from the entry to the window. Confirm no tight pinch points at the coffee table corners.
- Set ambient lighting to a warm evening level, add a reading lamp near a chair, and a wall wash behind the TV to reduce eye strain.
- Export two hero images and a dimensioned plan showing clearances. Share with stakeholders to choose between chair layouts.
Organizing your files and decisions
Keep your design data searchable and auditable. A simple naming convention and notes file can save hours later.
# Suggested folder structure
project-home-living-room/
  01_inputs/
    scan.jpg
    measurements.md
  02_models/
    v1_plan.traced
    v2_doors_windows.traced
    v3_furnish.layout
  03_renders/
    v3A_hero_day.png
    v3B_hero_night.png
  04_docs/
    plan_scaled.pdf
    finish_schedule.md
Each milestone should state what changed and why. When stakeholders ask why a sofa moved or a finish shifted, you will have a clear record.
Choosing the right tool for your platform
If you work primarily on mobile, prioritize an app with robust camera capture and smooth 3D navigation on your device. If you need deep BIM or construction documentation, ensure your chosen tool can export to the formats your partners expect. For concept validation and presentation, focus on accuracy, fast iteration, and high-resolution export.
Bringing it all together
A thoughtful workflow in a home design app removes guesswork and reduces costly revisions. Start with accurate measurements, calibrate your plan, build up structure and openings, and iterate in 3D to test sightlines, light, and flow. Share concise exports so decisions happen quickly. With a clear process, even complex rooms become manageable, and your final space will match your expectations in function and feel.
If you are on iOS and need to turn a black-and-white plan into a faithful 3D model for room planning, consider trying Floor Plan to 3D for accurate conversion and high-resolution export.
