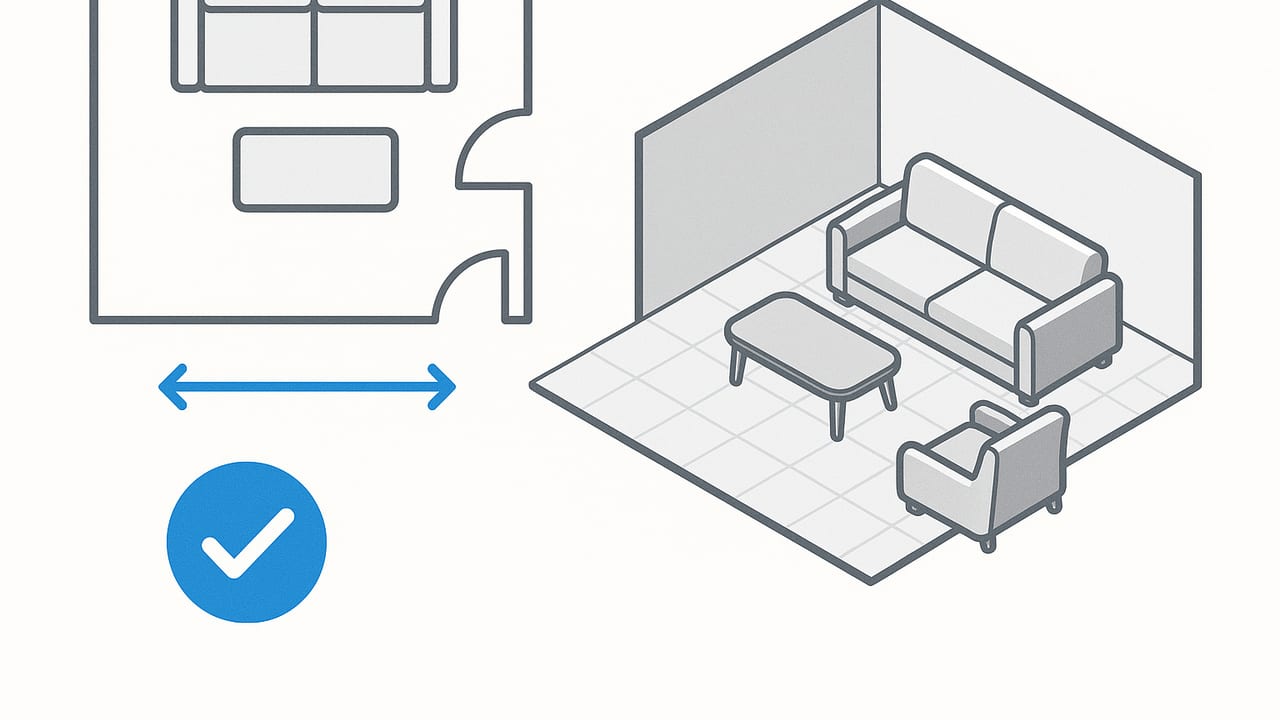
If you want to visualize furniture placement from a floor plan with confidence, you need a repeatable workflow that respects scale, ergonomics, and circulation. Whether you’re planning a living room refresh, a bedroom redesign, or a workspace layout, the key is to translate a 2D plan into spatial decisions that feel right when you actually walk through the room. This guide gives you the exact steps, clearances, and checks to move from abstract lines to layouts that work in real life—and look great in 3D.
Understand Scale, Symbols, and What the Plan Tells You
A floor plan is a map. To use it well, decode its scale, symbols, and fixed elements first.
- Scale: Common residential scales include 1:50, 1:75, or 1/4" = 1'-0". If no scale is printed, look for dimension strings on walls and derive it.
- Symbols: Doors (with swing arcs), windows, stairs, columns, radiators/vents, outlets, plumbing fixtures, and built-ins. These are your constraints and opportunities.
- Heights: Elevations aren’t on the plan, but ceilings, window heads, and sill heights affect tall furniture, bookcases, and sightlines.
Quick Scale Check
Verify that printed or scanned plans are true to scale. If you measure a 3000 mm labeled wall and your ruler shows 60 mm on paper, the scale is 1:50 (3000/60). In digital tools, set one known dimension to calibrate, then lock it.
A Step-by-Step Workflow to Visualize Furniture from a Floor Plan
- Collect and calibrate the plan. Use the latest plan. Confirm scale with one known dimension. If you’re working from a photo of a plan, straighten the image and calibrate dimensionally in your tool.
- Trace the fixed elements. Mark door swings, windows, radiators, vents, low bulkheads, outlets, and focal walls. Note anything that must remain accessible.
- Define zones. Split the room into activities: seating, dining, sleeping, circulation, storage, work. Label them lightly on the plan.
- Create a furniture library with real sizes. Record actual dimensions (width x depth x height). If you don’t know, use industry averages (see below).
- Apply clearance standards. Build in walking, reach, and pull-out clearances so nothing looks right in 2D but fails in reality.
- Lay out anchors first. Place the largest or most immovable pieces (bed, sofa, dining table, desk) relative to focal points (windows, TV wall, fireplace) and constraints.
- Test circulation paths. Draw routes from doors to major destinations. Avoid pinching paths below recommended minimums.
- Iterate in 2D, validate in 3D. Once a 2D arrangement looks viable, view it in 3D to check sightlines, heights, and ergonomics at eye level.
Clearance and Ergonomic Guidelines (Quick Reference)
Use these ranges as starting points; always reconcile with product specs and local codes.
| Use | Min Clearance | Recommended | Notes |
|---|---|---|---|
| Primary circulation paths | 30" (760 mm) | 36–42" (915–1065 mm) | Between room entries and key zones |
| Secondary paths | 24" (610 mm) | 28–32" (710–815 mm) | Between furniture edges |
| Sofa to coffee table | 16" (405 mm) | 18–20" (455–510 mm) | Reach without leaning too far |
| TV viewing distance | 1.2 × diagonal | 1.5–2 × diagonal | Shorter for higher-res screens |
| Dining chair pull-back | 24" (610 mm) | 30–36" (760–915 mm) | Behind each chair |
| Aisle behind dining seats | 36" (915 mm) | 42–44" (1065–1120 mm) | For pass-through traffic |
| Bed sides | 24" (610 mm) | 30–36" (760–915 mm) | Comfortable access and bedding |
| End of bed to wall/dresser | 30" (760 mm) | 36–42" (915–1065 mm) | Room to walk and open drawers |
| Closet walkway | 30" (760 mm) | 36" (915 mm) | Reach and turn comfortably |
| Desk depth | 24" (610 mm) | 27–30" (685–760 mm) | Monitor distance and work surface |
| Behind desk chair | 30" (760 mm) | 36–42" (915–1065 mm) | Stand and move freely |
| Door swing clearance arc | Clears furniture | 36–44" free arc | No obstructions in swing path |
Room-by-Room Examples That Work
Living Room (Seating + Viewing)
Scenario: 13'9" x 11'2" (4200 x 3400 mm) living room with one entry and a TV on the short wall.
- Anchor: Place an 86" (2200 mm) sofa opposite the TV wall. Keep 18" (455 mm) to the coffee table.
- Viewing distance: For a 55" TV, aim for 7–9 ft (2.1–2.7 m). If you’re short on space, use a tilting wall mount and a slightly smaller coffee table.
- Paths: Maintain 36" (915 mm) clear path from entry to seating. Float the sofa 4–6" off the wall to run cable and avoid baseboard interference.
- Flex seats: Add two compact accent chairs (24–28" wide) positioned to keep a minimum 30" circulation loop around the arrangement.
Bedroom (Comfort + Storage)
Scenario: 12' x 10' (3650 x 3050 mm) bedroom with a queen bed and reach-in closet.
- Anchor: Center a queen bed on the longest wall; target 30" (760 mm) on both sides.
- End clearance: Keep 36" (915 mm) from bed end to dresser, so drawers can open safely.
- Closet doors: Ensure door swing clear of nightstands; consider sliding doors if tight.
- Vertical checks: If a window sill is low, use a lower headboard to preserve daylight and views.
Dining Nook (Tight but Functional)
Scenario: 9'6" x 8' (2900 x 2440 mm) nook off the kitchen.
- Table choice: Round 42" (1070 mm) table seats four and softens circulation.
- Chairs: Allow 24–30" (610–760 mm) pull-back per chair and 36–42" (915–1065 mm) aisle behind the seat on the traffic side.
- Adjacency: Keep a clear path between kitchen and table; consider bench seating on the wall side to save space.
Home Office (Ergonomics First)
Scenario: 10' x 9' (3050 x 2750 mm) spare room office.
- Desk depth: 27–30" desk for comfortable monitor distance; keep 36–42" behind the chair.
- Storage: Tall cabinets should not conflict with window openings; check sill and head heights in 3D.
- Lighting: Position desk to avoid screen glare from windows; use task lighting balanced with ambient light.
From 2D to 3D: Why Visualization at Eye Level Matters
Plans confirm fit. 3D confirms feel. After your 2D layout passes clearance checks, spin it in 3D to see:
- Sightlines: Can you see the TV over the coffee table? Does the bed block the view or daylight?
- Heights and bulk: Cabinets, tall shelves, and headboards can feel overbearing even if they fit in plan.
- Window and door conflicts: In 3D you’ll spot where a door handle hits a console or a casement window hits a tall plant.
- Lighting: Visualize daylight reach and where lamps or pendants should go to complement the layout.
Pro tip: Evaluate at multiple camera heights—seated (42–48" eye height), standing (60–64"), and child-height if relevant. What feels balanced in one view can feel crowded in another.
Common Mistakes—and Quick Fixes
- Ignoring scale drift: A slightly skewed scan throws off every measurement. Calibrate with two known dimensions at opposite ends to reduce error.
- Overfurnishing: If you can’t maintain 30–36" paths, remove pieces or combine functions (storage ottoman, bench with drawers).
- Blocking door swings and vents: Redraw swing arcs and HVAC locations on top of your layout; keep them clear.
- Forgetting wall thickness and baseboards: A 2" baseboard plus 1" outlet depth can change how close furniture sits. Float large items an inch or two off the wall to avoid cable pinch.
- One focal point only: In flexible spaces, consider dual focal points (TV and view) with swivel chairs or a pivoting wall mount.
A Simple Data Structure for Testing Layouts
Even without advanced CAD, you can structure your furniture and clearance rules in a lightweight format to run quick checks or communicate specs to collaborators.
{
  "scale": "1:50",
  "room_mm": { "width": 4200, "depth": 3400 },
  "doors": [ { "x": 0, "y": 1200, "width": 800, "swing_deg": 90 } ],
  "windows": [ { "x": 3000, "y": 0, "width": 1200 } ],
  "furniture": [
    { "name": "Sofa", "w": 2200, "d": 900, "clear_front": 450 },
    { "name": "Coffee Table", "w": 1100, "d": 600 },
    { "name": "TV Console", "w": 1600, "d": 400 }
  ],
  "rules": [
    { "type": "distance", "between": ["Sofa", "Coffee Table"], "min_mm": 455 },
    { "type": "viewing", "viewer": "Sofa", "target": "TV Console", "min_factor": 1.5, "unit": "screen_diagonal" },
    { "type": "path", "from": "Door_0", "to": "Sofa", "min_mm": 915 }
  ]
}
The idea isn’t to code a full planner; it’s to make your standards explicit, so each proposed arrangement is checked against the same criteria.
Pattern Library: Reliable Layout Recipes
- Conversation cluster: Sofa + 2 chairs around a coffee table, all edges 18–20" away from the table, with a 36" perimeter path.
- Narrow living room: Use a single long sofa, a wall-mounted console, and nested side tables. Keep the coffee table on the small side and float the sofa to center the path behind it.
- Small bedroom: Queen bed centered, one full nightstand + one narrow shelf, dresser in the closet (if depth allows) to free path space.
- Studio zone divider: Low storage or open shelving perpendicular to a wall defines sleeping and living zones without blocking light.
How to Validate Your Layout Before You Buy
- Masking tape mockup: Tape furniture outlines on the floor to test walking paths and door swings. It’s fast and revealing.
- Cardboard stand-ins: For bulky items (sofas, beds), full-size cardboard footprints let you sit and stand to judge ergonomics.
- 3D walkthrough: A quick 3D pass helps you refine heights, lighting, and balance. Check that tall pieces don’t crowd windows or art.
- Measure twice: Verify elevator, corridor, and door clearances for delivery—don’t ignore the path into the room.
Checklist: Final QA Before Committing
- All key paths are 30–36" (760–915 mm) or more.
- Door swings, windows, and vents are unobstructed.
- Seating distances and dining pull-back clearances are met.
- Bed access on both sides is 24–36" (610–915 mm).
- Desk area allows 36" (915 mm) behind the chair.
- TV distance aligns with screen size and resolution.
- Lighting plan supports tasks and ambiance; no harsh glare.
- Power/outlet locations align with lamps, TV, and desk gear.
- Tall furniture respects window heights and sightlines.
- Delivery logistics (doorways, stairs, elevators) confirmed.
Putting It All Together
To visualize furniture placement from a floor plan effectively, anchor your layout with real dimensions, respect ergonomic clearances, and validate with a quick 3D pass. The plan tells you where furniture can go; your clearance rules and 3D checks tell you how it will feel. When in doubt, remove one piece, widen the path, and let the room breathe.
If you prefer a fast, accurate 3D check, an iOS tool like Floor Plan to 3D can convert a black-and-white plan into a scale-true 3D scene you can explore, ensuring your furniture choices match the original layout and dimensions.
Note: Always consider local codes and accessibility requirements for safety-critical areas.
