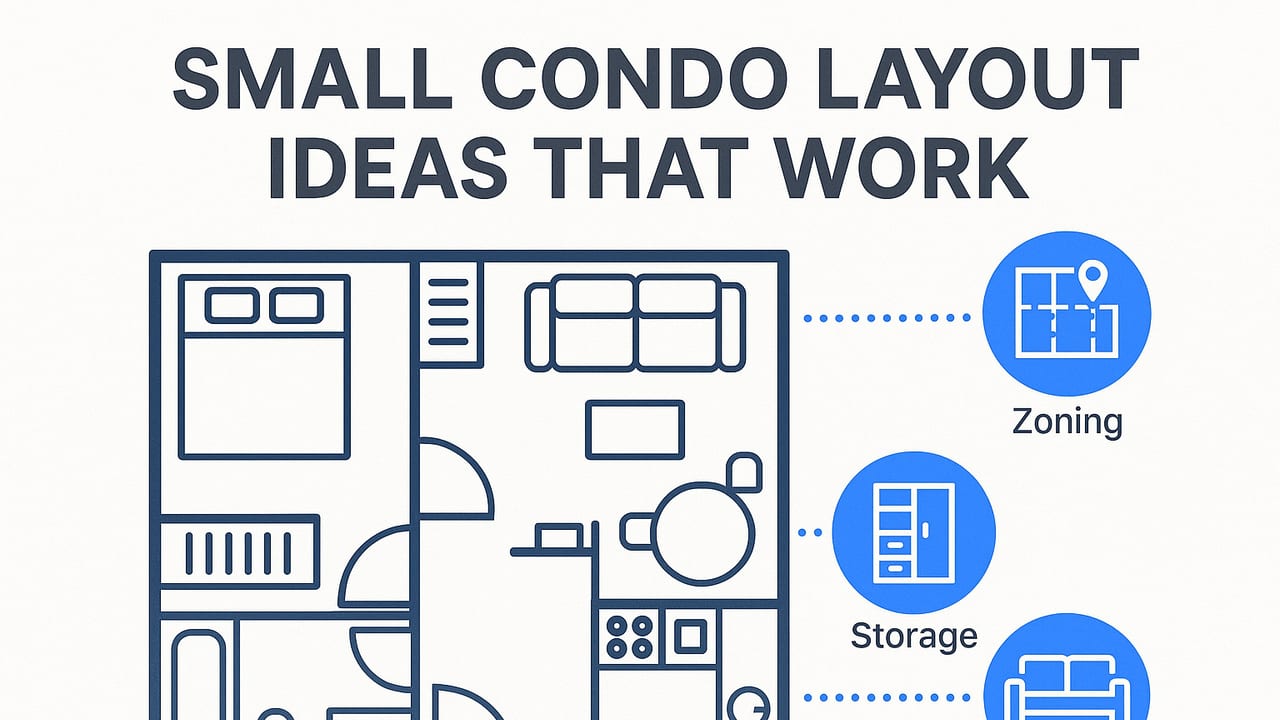
Designing a compact home is less about square feet and more about strategy. The right small condo layout ideas can make a studio feel generous, a one-bedroom live larger, and a two-bedroom function with real comfort. Whether you’re planning a refresh, furnishing from scratch, or reconfiguring a tricky plan, this guide distills proven principles, room-by-room solutions, and real-world examples to help you optimize space without sacrificing style.
What Makes a Small Condo Work?
Successful small layouts prioritize light, flow, and multi-function. Keep these principles front and center:
- Zoning over walls: Create areas for living, dining, sleeping, and working using rugs, lighting, and furniture orientation rather than solid partitions.
- Clear circulation: Maintain 30–36 inches of walkway around key routes; avoid placing furniture where you naturally move.
- Scaled furniture: Choose pieces that fit your longest wall and clearest corner; compact depth (28–34 inches for sofas) matters more than width.
- Verticality: Use the height of the room for storage, lighting, and visual rhythm. Tall bookcases, ceiling track lighting, and curtain rods near the ceiling draw the eye up.
- Dual-purpose solutions: Prioritize furniture that folds, nests, or hides storage—so you can host friends without living in clutter.
- Consistent finishes: Fewer materials and a coherent color story connect zones and visually expand the space.
Quick-Win Small Condo Layout Ideas
- Float the sofa: Instead of pushing your sofa against a wall, float it to form a living zone; use a narrow console behind for drop-zone storage.
- Swap a coffee table for nesting tables: Stagger as needed for guests and tuck away for everyday living.
- Use a peninsula table: Extend a counter-height table from the kitchen as both a food prep area and dining for 2–4.
- Define dining with lighting: A single pendant or track spotlight over a dining surface carves out a “room” without walls.
- Create a headboard wall: In studios, a freestanding bookshelf or low credenza at the bed’s head offers privacy and storage without blocking light.
- Wall-mount where possible: Wall lamps, floating nightstands, and a media shelf free floor space and reduce visual clutter.
- Go pocket or barn door: Replacing a swing door can reclaim 10–14 square feet of usable area.
- Mirror for light bounce: A large mirror opposite windows amplifies daylight; keep frames slim to stay airy.
- Use one rug, two zones: An 8×10 can unify living and dining; place front legs of seating on the rug and dining chairs fully on or off to avoid wobble.
- Build the grid: Align key pieces (sofa, dining table, bed) to a simple axis; alignment reduces visual noise and makes rooms feel ordered.
Clearance and Dimension Cheat-Sheet
Use these minimums as a starting point for planning. Adjust for building codes and accessibility needs:
| Element | Minimum Clearance | Pro Tip |
|---|---|---|
| Main walkway | 36 in (91 cm) | Can squeeze to 30 in in tight spots, not at doors. |
| Sofa to coffee table | 16–18 in (40–46 cm) | Comfortable reach without shin bumps. |
| TV viewing distance | 1.5× to 2.5× screen size | For a 55” TV: ~7–11 ft. |
| Dining table edge to wall | 36 in (pull-out), 30 in (banquette) | Banquettes reclaim space against walls. |
| Bed sides | 24 in min (61 cm) | 18 in acceptable for one side if necessary. |
| Kitchen aisle | 36 in (one cook), 42 in (two) | Go 48 in if you open appliance doors opposite. |
| Desk depth | 20–24 in (51–61 cm) | Shallow wall desk plus task lamp saves space. |
Room-by-Room Plays That Maximize Space
Entry
Install a shallow wall shelf (8–10 inches deep) with a mirror above and wall hooks nearby. A closed shoe cabinet keeps floors clear and visual clutter contained. Consider a washable runner aligned with your primary walkway.
Living
Pick a compact sofa (28–34-inch depth) with legs to keep the volume light. Add armless side chairs that can rotate to dining. Anchor the seating with a single generous rug and use layered lighting (floor lamp + dimmable ceiling light).
Dining
Round or racetrack tables are friendlier in tight spaces. A corner banquette grabs dead zones and opens the aisle. Choose stackable or lightweight chairs to flex for guests.
Kitchen
Go vertical: ceiling-height cabinets and a tall pantry pull-out. Opt for integrated or panel-ready appliances where possible. A rolling cart can serve as island, bar, or baking station, then tuck away.
Bedroom
Platform beds with lift-up storage reduce the need for dressers. Wall-mounted sconces free nightstand surface area. If the bedroom is small, center the bed and use symmetrical slim nightstands for calm and balance.
Bathroom
Install a recessed mirrored cabinet and a vanity with drawers (not doors) for better organization. Oversized wall tile with tight grout lines enlarges the look. A glass shower panel keeps sightlines open.
Balcony or Nook
Foldable bistro sets, an outdoor rug, and narrow planters extend living space seasonally. Indoors, claim a nook with a wall desk and a plug-in sconce to create a micro-office.
Layout Ideas by Unit Type
Studio (300–500 sq ft)
Goal: Clear sleep zone without blocking light. Place the bed on the quietest wall; use a bookcase or 42–48-inch-high console at the head to divide living and sleep areas. Keep the sofa perpendicular to the bed to create two distinct zones. A drop-leaf table behind the sofa flips up for dining or projects. Mount the TV on a swing arm so it serves both living and sleeping sides.
One-Bedroom (500–700 sq ft)
Goal: Separate living and dining while preserving flow. Float a compact sofa to face a media wall; position a round dining table near the kitchen with a pendant to define the area. Use a slim sideboard to store dinnerware and office supplies. In the bedroom, opt for a queen with built-in drawers and wall sconces to reduce furniture count. Consider a pocket door to reclaim floor area.
Two-Bedroom (700–900 sq ft)
Goal: Enable flexible work and hosting. Convert the smaller bedroom to a hybrid office/guest room with a wall bed and a fold-down desk. In the main living area, a racetrack table seats 4 daily and 6 occasionally; add a bench that doubles as entry seating. Use ceiling track lighting to zone living and dining independently.
Strategy Match: Where Each Idea Works Best
| Idea | Best For | Why It Works | Watch-Outs |
|---|---|---|---|
| Banquette dining | Studios, narrow one-beds | Uses wall-side space; easy traffic flow | Seat height and depth must match table height |
| Wall bed (Murphy) | Studios, hybrid guest rooms | Creates living area by day | Requires secure wall anchoring and clear swing space |
| Glass partitions | Dark interiors | Preserves daylight while creating zones | Consider privacy film or curtains for bedrooms |
| Sliding/pocket doors | All small units | Reclaims door-swing area | Check wall cavities for plumbing/electrical |
| Ceiling-height cabinets | Kitchens with 8–9 ft ceilings | Max storage without footprint | Use toe-kick drawers for rarely used items |
Scale Your Furniture Like a Pro
- Sofa: 70–80 inches wide, 28–34 inches deep; add a compact chaise only if it doesn’t block circulation.
- Dining table: 36–42 inches round for four; racetrack 60–72 × 36 inches for four to six.
- Bed: Queen fits most; if space is tight against doors or windows, use a full with a wider headboard to maintain balance.
- Storage: Go tall and shallow—12–16 inches deep wardrobes or bookcases limit protrusion and keep walkways clear.
- Rugs: Err larger. A too-small rug chops the room; an 8×10 often works even in small living rooms.
Lighting and Visual Tricks that Enlarge Space
- Layered lighting: Combine ambient (ceiling), task (sconces, desk lamps), and accent (picture lights, LEDs) to create depth.
- Higher curtain mounts: Mount rods 6–10 inches above window frames and extend 6–12 inches beyond to widen and elevate the feel.
- Color strategy: Keep walls light and warm; use one deep accent in a contained area (e.g., headboard wall) to add contrast without shrinking the room.
- Gloss and glass: Satin or semi-gloss on doors/trim bounces light; glass furniture disappears visually but needs careful cable management.
Common Pitfalls and Easy Fixes
| Pitfall | What Happens | Fix |
|---|---|---|
| Too many small pieces | Visual clutter, choppy circulation | Choose fewer, slightly larger items; unify finishes |
| Blocking windows with tall furniture | Loss of light and views | Keep tall storage on interior walls; use low pieces near windows |
| Ignoring door swings | Doors hit furniture; awkward paths | Map arcs; replace with sliders or pocket doors |
| Rugs too small | Zones feel disconnected | Size up so front legs of seating sit on the rug |
| No concealed storage | Clutter accumulates | Use closed cabinets, ottomans with lids, bed drawers |
Sample Layout Checklist (Copy/Paste)
Use this simple planning checklist to keep proportions and priorities straight:
# Small condo layout checklist
zones:
  - entry_drop_zone
  - living_conversation
  - dining_for: 2-4
  - work_nook
  - sleep_privacy
clearances:
  walkway_min: 36in
  sofa_to_table: 16-18in
  table_to_wall: 30-36in
furniture_scale:
  sofa_depth: 28-34in
  dining_table: 36-42in round or 60-72x36in
lighting:
  ambient: dimmable_ceiling
  task: sconces_or_desk_lamp
  accent: picture_or_led_strip
storage:
  vertical_cabinets: ceiling_height
  multiuse: ottoman_with_storage, bed_drawers
How to Test Your Small Condo Layout Before You Buy
- Measure precisely: Doors, windows, radiators, columns, and the swing of every door. Sketch on graph paper at 1/4 inch = 1 foot.
- Block out zones first: Place large rectangles for living, dining, and bed. Only then fit furniture within clearances.
- Mock up with tape: Use painter’s tape on the floor to confirm walking paths and reach.
- Model in 3D: Converting a 2D floor plan into 3D helps you catch sightline issues and scale mistakes before purchasing. If you already have a black-and-white plan, the Floor Plan to 3D iOS app can turn it into a dimensionally faithful 3D render you can visualize and export for presentations.
The Bottom Line
Great small condo layouts balance clarity and flexibility. Start with zones, protect circulation, choose scaled furniture, and maximize vertical storage. Use lighting and color to stretch the space visually, and test your plan digitally before committing. With these small condo layout ideas—and a clear checklist—you can create a home that feels calm, capable, and welcoming every day.
