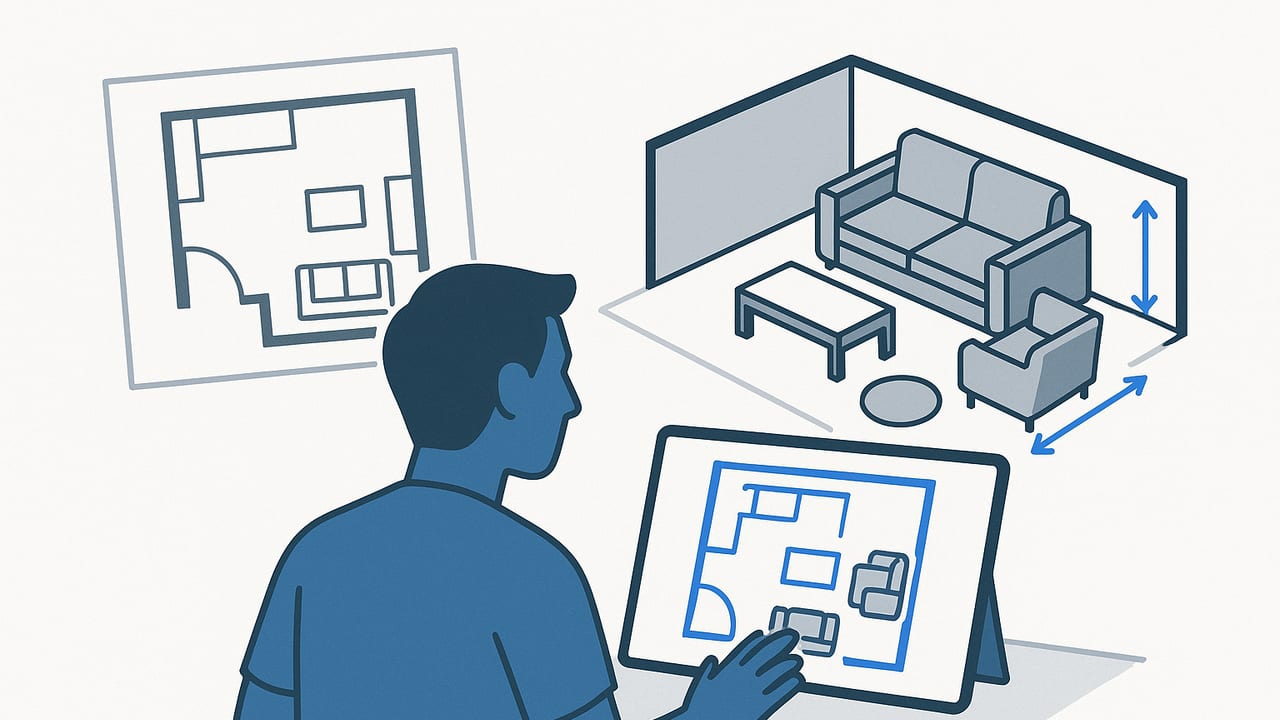
Moving a sofa six inches can transform a room. Moving it six inches the wrong way can make a room feel cramped, block sightlines, or jam pathways. That’s why the most reliable approach to planning a new layout is to work at true scale before you lift a finger. This guide explains how homeowners rearrange furniture with true scale using a simple workflow: capture the room, calibrate the dimensions, build a 3D model, and test arrangements against proven clearance rules. You’ll reduce guesswork, prevent costly mistakes, and make design decisions with confidence.
What “true scale” really means (and why it matters)
“True scale” means every object in your plan matches its real-world dimensions, so a 78-inch sofa in your model is exactly 78 inches in reality, and a 36-inch walkway in the model means you’ll actually have 36 inches to pass through. True-to-scale planning prevents the most common layout failures:
- Furniture fit errors: The sectional fits on paper but blocks a door or window in real life.
- Circulation pinch points: Pathways that look fine from above but feel tight once you move in.
- Proportion problems: A coffee table that’s too small for the sofa or a rug that visually shrinks the room.
Scale is your single source of truth. If it’s correct in the model, it will be correct on the floor.
How homeowners rearrange furniture with true scale: a step-by-step workflow
1) Capture accurate room measurements
You can start from an existing floor plan, a scan, or by measuring the room manually. Accuracy here sets the tone for everything else.
- Room shell: Measure each wall length, and verify diagonals to catch out-of-square corners.
- Openings: Record door widths (including swing direction), window widths, sill heights, and radiators or vents.
- Fixed features: Note fireplaces, built-ins, columns, and stair openings. Measure depth and height when they affect furniture placement.
- Ceiling height: Include soffits or beams that may impact tall storage or shelving.
Tip: If using a paper plan with a printed scale (e.g., 1/4" = 1'-0"), confirm it hasn’t been distorted by scanning or printing. Measure a known dimension on the page (like a 10-foot wall). If it’s not exactly 2.5 inches at 1/4" scale, you must calibrate.
2) Calibrate the plan (paper or digital)
Whether you’re importing a photo of a printed plan or a PDF, establish a scale factor so software can translate pixels to inches or centimeters:
- Select a known dimension in the drawing (e.g., a wall labeled 120 inches).
- Use your software’s measure tool to find that line’s length in pixels.
- Compute the conversion: inches per pixel = real inches / pixel length.
From that point on, every measurement is anchored to reality. If your tool doesn’t offer built-in calibration, this simple code snippet shows the math:
# Calibrate a scanned floor plan by one known dimension
known_real_in = 120     # real length in inches (e.g., a 10-foot wall)
known_pixels = 1800     # length of the same wall in the image (pixels)

in_per_px = known_real_in / known_pixels

def px_to_in(px):
    return px * in_per_px

def in_to_px(inches):
    return round(inches / in_per_px)

# Example: How many pixels is a 78-inch sofa?
print(in_to_px(78))
Result: your sofa, rug, and clearances will all be placed at the right size relative to the room shell.
3) Build a simple 3D room shell
A 3D view makes proportion and sightlines easier to judge. Create walls, define ceiling height, add doors and windows with the exact sizes you measured, and set their swing direction or sill height. If you have sloped ceilings or beams, model them too—they often affect tall cabinets, bookcases, or art placement.
4) Add furniture using real product dimensions
Don’t rely on generic objects unless you can edit the size. Pull dimensions from product pages (width, depth, height) or measure your existing pieces. Label each item so you can try alternates quickly: “Sofa-78” vs. “Sofa-86” makes comparisons straightforward.
- Scale-aware placement: Turn on snapping or alignment guides so edges line up cleanly with walls, rugs, and other furniture.
- Rugs: Model the exact size you plan to buy (e.g., 8×10 or 9×12). Rugs set visual zones and influence walkway widths.
- Lighting & switches: Note outlet and switch locations; they affect lamp placement and cable management.
5) Validate with clearance and ergonomics rules
Now pressure-test the layout. The table below summarizes widely used clearance guidelines. Treat them as starting points; adjust for your household and local codes.
| Scenario | Recommended Clearance | Notes |
|---|---|---|
| Main walkway | 36–42 in (91–107 cm) | High-traffic routes benefit from the upper end. |
| Secondary path | 30–36 in (76‑91 cm) | For infrequent passage or tight spaces. |
| Sofa to coffee table | 14–18 in (36–46 cm) | Comfortable reach for most seating depths. |
| Front of TV console to seating | 7–9 ft (2.1–2.7 m) typical living rooms | Adjust to screen size and viewing preference. |
| Dining table to wall/obstruction | 36 in minimum; 42–44 in ideal | Allows chair pullback and passing behind. |
| Bed sides to wall or dresser | 24–30 in (61–76 cm) | Plan more for two people and larger bedding. |
| End of bed to wall/closet | 36 in (91 cm) | Accommodates walking and drawer opening. |
| Desk chair clearance from wall | 36 in (91 cm) | Space to roll back and stand comfortably. |
| Door swing (hinge side) | Keep clear of furniture + 2 in buffer | Prevent handles colliding with edges. |
Common pitfalls (and how to avoid them)
- Calibrating from a distorted plan: If your photo is skewed, your scale will be off. Shoot straight-on, or use a tool that corrects perspective before calibration.
- Ignoring door swings: A layout can look great from above but fail when a door hits a cabinet. Always model the swing arcs.
- Forgetting vertical constraints: Radiators, window sills, and sloped ceilings can block tall storage or wall art. Include heights in the model.
- Using “close enough” furniture sizes: A five-inch difference on paper can be the difference between passing comfortably and bumping hips.
- Underestimating cable and hardware reach: Lamps, TV, and speakers need power. Model outlet locations or plan for cord routing.
Example: a 12′ × 15′ living room, solved in 3D
Let’s walk through a typical scenario to show how precision planning pays off.
Room: 12 ft (width) × 15 ft (length), one 36-inch entry door on the 12-ft wall, a 5-ft window centered on the opposite wall. Ceiling height 8 ft. Existing furniture: a 78-inch sofa, two 30-inch accent chairs, a 48×24-inch coffee table, a 60-inch TV console, and an 8×10 rug.
- Calibrate: Import the floor plan image, measure the 15-ft wall in pixels, and set inches per pixel accordingly.
- Room shell: Build the 12×15-foot box, add the 36-inch door swing and 5-foot window at measured heights.
- Place the rug: Center the 8×10 rug along the long axis to visually elongate the room. Leave ~12 inches of bare floor around the rug edges where possible.
- Sofa placement: Set the 78-inch sofa on the long wall opposite the window, ensuring the sofa front is 16 inches from the coffee table’s front edge. That satisfies the 14–18 inch comfort rule.
- TV console: Center the 60-inch console on the short wall opposite the sofa. Confirm a 7.5–8.5 ft viewing distance, comfortable for common TV sizes in living rooms.
- Accent chairs: Angle two 30-inch chairs to form an L with the sofa, preserving a 36-inch main path from the door to the seating area. Test an alternative where chairs are parallel to the sofa; keep at least 30 inches of clearance behind to the window wall.
- QA pass: Verify door opens fully without hitting the nearest chair arm. Confirm 36 inches between the coffee table and TV console to allow passage.
Result: The model proves that the 8×10 rug visually unites the seating while leaving a comfortable 36-inch circulation path from the doorway. The coffee-table reach is within 16 inches, and the TV sightline clears the chair backs. If the chairs feel tight, the model suggests swapping one chair for a 26-inch-wide slipper chair, increasing clearance by 4 inches without compromising seating count.
Strategies for small rooms and tricky layouts
- Use scaled surrogates: If you don’t have exact product specs yet, create proxies (e.g., a 30×32” lounge chair, a 36” round side table) so your plan respects typical footprints.
- Float, don’t cram: In tight rooms, floating the sofa 3–4 inches off the wall can improve sightlines and cable routing without changing clearances.
- Zone with runners: Narrow rooms benefit from a runner rug to protect the main path, with a separate area rug for seating. Model both to confirm proportions.
- Choose “leggy” furniture: Visually lighter pieces on legs maintain line-of-sight under the frame; scale still matters, but rooms feel airier.
- Mirror doors in the plan: If a door swing can be reversed, test that scenario in the model; mirrored swings can unlock otherwise blocked corners.
Quality assurance checklist before you move anything
- Every wall sums to the room’s overall length and width; diagonals verify squareness.
- All doors and windows are entered with correct widths and positions; swings are modeled.
- Furniture objects match real product dimensions within ±0.5 inch (1.3 cm).
- Clearances meet or exceed your target rules in the table.
- Electrical outlets align with planned lamp and media placements.
- Exported snapshots include dimension overlays so helpers understand spacing during the actual move.
From plan to photos: exporting and sharing
Once your layout passes the clearance checks, export high-resolution images: a dimensioned top view for move-day logistics, and a few perspective views for design sign-off. Label zones (Entry, Main Path, Seating) so family members or movers understand where each piece belongs. For multi-room reorganizations, create a simple legend with color-coded rugs and furniture, and include callouts like “36 in walkway maintained” to prevent improvisation that breaks your carefully modeled clearances.
Choosing tools that keep you in true scale
You can accomplish all of this with a range of tools, from graph paper to mobile apps and desktop design software. The key requirements are: (1) import or create a floor plan, (2) calibrate a known dimension, (3) place furniture with exact sizes, and (4) view in 3D for proportion and sightlines. Some iOS apps can convert a black-and-white floor plan photo into a 3D model automatically while preserving dimensions, which is ideal for quick exploration and high-resolution exports. If you’re on iPhone and want that workflow, consider trying Floor Plan to 3D as one such option.
Quick wins you can apply today
- Measure your three most-used pathways and bring each up to at least 36 inches in the plan.
- Resize your rug in the model to test one size up; larger rugs often improve scale and flow.
- Try a “two layouts” experiment: one optimized for conversation (sofa + chairs in a tighter grouping) and one optimized for TV. Compare clearances and pick the winner.
- Save a “Plan B” variant that preserves circulation in case a key piece arrives with slightly different dimensions.
True-to-scale planning removes uncertainty from rearranging rooms. Calibrate once, place everything to real dimensions, and judge your ideas in 3D before you move a single piece. It’s how professionals work—and the simplest way for homeowners to get professional-quality results at home.
