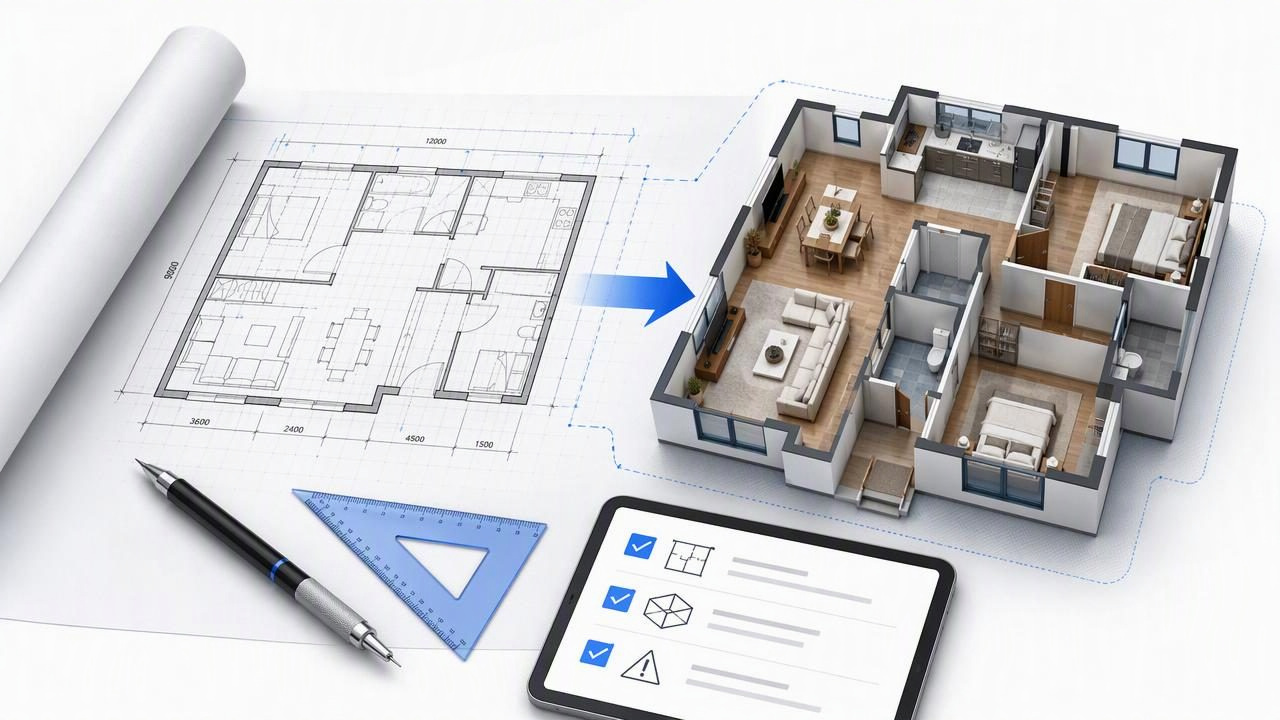
A 3D floor plan generator from blueprint can help homeowners, designers, and real estate professionals turn a flat drawing into a visual renovation or presentation concept. But the quality of the generated 3D render depends heavily on what the blueprint communicates. A faded scan, cropped dimensions, unclear room labels, or overlapping notes can make it harder to interpret the intended layout.
Preparing a blueprint does not mean redrawing it as a technical CAD file. It means making the original plan easier to read before you create a visual concept. With a clean source image and a structured review process, you can produce more useful 3D renders for discussing furniture placement, room flow, renovation priorities, and possible interior design directions.
This guide explains what to check before uploading a plan, how to work through a realistic example, and how to review the generated result responsibly.
Why Blueprint Preparation Matters for 3D Conversion
A blueprint contains visual information that a person can often interpret from context: wall lines, doors, windows, room names, measurements, symbols, and handwritten annotations. A 3D floor plan generator has less context when those elements are faint, incomplete, or visually crowded.
For example, a narrow gap in a wall may represent a doorway, a sliding door opening, or simply a break caused by a low-quality scan. Likewise, a small rectangle may indicate a kitchen island, a closet, a fixture, or a printer mark. The clearer the source plan is, the easier it is to compare the resulting 3D view with the original layout.
Preparation is particularly useful when you need a concept for:
- A renovation preview before discussing options with a contractor or designer.
- An interior design presentation that shows how rooms relate to each other.
- An empty-room staging concept for a property listing.
- A home redesign project where furniture circulation matters.
- A quick exterior refresh concept based on a property photo and design direction.
It is important to keep expectations realistic. A generated image can be an effective visual planning aid, but it is not a measured CAD or BIM model, an engineering approval, or a certified construction drawing. Even a crisp blueprint does not guarantee dimension-true geometry in a 3D render.
Start With the Best Available Blueprint Image
Your source can be a scanned architectural plan, a PDF export, a photographed floor plan, or a clean black-and-white drawing. Choose the version with the most complete and readable information, rather than simply the newest file.
Choose a plan that shows the full layout
Use an image that includes the outside walls and all relevant rooms on the floor you want to visualize. Avoid uploading a crop that cuts off part of a hallway, stairwell, exterior wall, or room label. Missing edges make it more difficult to understand the overall shape and circulation of the home.
If the project includes multiple floors, handle each floor separately unless your chosen workflow specifically supports a combined view. Label files clearly, such as Ground-Floor-Plan, Upper-Floor-Plan, and Basement-Plan, to prevent accidental mix-ups later.
Check readability at normal zoom
Open the plan on a phone, tablet, or computer screen and look at it without extreme zooming. Can you identify room boundaries, openings, and major labels within a few seconds? If not, improve the source before using it.
| Blueprint issue | Why it creates confusion | Practical fix |
|---|---|---|
| Low contrast | Wall lines blend into the page background. | Use a higher-contrast scan or adjust brightness carefully. |
| Skewed photo | Walls and dimensions appear distorted. | Crop and straighten the image before upload. |
| Heavy shadows | Parts of the plan become unreadable. | Rescan in even light or photograph from directly overhead. |
| Missing labels | Room purpose is harder to identify. | Add a simple note outside the plan if needed. |
| Dense annotations | Notes overlap doors, windows, or wall lines. | Create a cleaner copy for visualization. |
Remove Visual Noise Without Removing Important Details
Blueprints often include information intended for permitting, construction coordination, or technical reference. Not every note is equally useful for a visual floor plan conversion. The goal is not to erase useful context; it is to prevent non-layout marks from obscuring the elements that define the space.
Keep visible:
- Exterior and interior walls.
- Door locations and swing directions where shown.
- Windows, especially large openings and patio doors.
- Room names and major built-in features.
- Stairs, closets, kitchen counters, islands, and bathroom fixtures.
- Key dimensions that help you compare proportions later.
Consider hiding or setting aside items such as revision clouds, consultant stamps, electrical circuit symbols, long material schedules, and repeated construction notes. These are valuable in a technical document, but they can make a source image visually busy when your immediate objective is a 3D layout concept.
Do not edit walls or move openings just to make the drawing look simpler. If a feature is unclear, keep the original plan available and make a note about the uncertainty. That gives you a reference point when reviewing the generated image.
Use a Simple Input Checklist Before Uploading
Before sending a blueprint to a 3D floor plan generator, take two minutes to complete this checklist:
- Confirm the floor: Make sure the drawing represents the correct level of the property.
- Check orientation: Rotate the image so text is upright and the plan is easy to inspect.
- Verify the perimeter: Look for complete exterior walls, decks, porches, and attached garages if they matter to the concept.
- Identify openings: Mark uncertain doors, windows, and large archways for later review.
- Read room labels: Confirm that kitchen, bedroom, bath, utility, and living areas are distinguishable.
- Save the original: Keep an untouched copy of the plan for comparison.
- Set a purpose: Decide whether the render is for layout discussion, furnishing ideas, staging, or a renovation preview.
This final step matters because the right output depends on the question you want to answer. A furnishing concept may prioritize seating and circulation, while a renovation conversation may focus on the kitchen footprint, bathroom position, or relationship between indoor and outdoor areas.
Concrete Example: Preparing a Small Two-Bedroom Plan
Imagine you have a scanned plan for a single-story, two-bedroom home. The plan includes a living room, compact kitchen, one bathroom, two bedrooms, a laundry closet, and a rear patio. You want a 3D render to explore whether the living room can support a sofa, two chairs, and a small dining zone.
The scan has three problems: the page is slightly tilted, the label for the second bedroom overlaps a wall, and a handwritten note crosses the kitchen doorway. Instead of relying on the first image as-is, you can prepare it in a few focused steps:
- Crop away the title block and blank margins while retaining the entire building outline.
- Straighten the image so horizontal walls are approximately level.
- Increase contrast modestly so walls, windows, and door arcs are easier to see.
- Keep the original room labels where readable, but add a separate note identifying the obscured bedroom and kitchen doorway.
- Write down three details to compare afterward: the patio door location, the bathroom door location, and the open connection between kitchen and living room.
After generating a 3D concept, do not start by judging the furniture style. First, compare those three reference details with the source plan. Is the patio door on the correct wall? Is the bathroom accessible from the expected hall? Does the living room connect to the kitchen in the same general location?
If a doorway appears moved, a room seems merged, or a wall is missing, treat the image as an early concept rather than a decision-ready layout. Recheck the original image, clarify the source if possible, and generate a revised concept. This is a more reliable process than assuming every visual interpretation is exact.
Review the 3D Render in the Right Order
A compelling 3D render can make colors, finishes, and furniture feel immediate. Still, visual appeal should come after layout review. Use this sequence to assess a result:
- Perimeter: Compare the home’s overall outline with the blueprint.
- Room relationships: Check which rooms connect and where hallways lead.
- Openings: Review main doors, windows, patio doors, and stairs.
- Built-ins: Compare kitchen counters, closets, bathrooms, and major fixed elements.
- Proportions: Look for obvious rooms that appear unusually narrow, wide, or misplaced.
- Design concept: Only then assess furnishings, colors, finishes, and styling choices.
For a broader review framework, see this 2D to 3D floor plan rendering accuracy workflow. It can help you document questions before sharing a concept with a designer, contractor, client, or family member.
Know When a 3D Concept Needs Professional Verification
Use 3D renders to improve communication and explore options, not to replace professional documentation. You should seek qualified verification before making decisions involving structural changes, permits, building code requirements, electrical work, plumbing, load-bearing walls, accessibility, or precise material quantities.
In particular, do not use a generated 3D floor plan as the sole basis for ordering custom cabinetry, estimating flooring quantities, selecting window sizes, or instructing construction crews. Measurements, site conditions, wall thicknesses, and existing services must be checked separately.
A useful rule: use the blueprint and 3D render to discuss the idea; use verified drawings and on-site measurements to build it.
Turn a Clear Blueprint Into a Better Conversation
The strongest use of a 3D floor plan generator from blueprint is not simply producing an attractive image. It is making a layout easier to understand. A clean source plan, a defined design question, and a careful comparison between the original and output can reveal where you need more information before moving forward.
If you want to explore visual concepts from a floor plan while keeping the original layout details in view, Floor Plan to 3D & Home Redesign’s floor plan to 3D guide explains a practical way to begin. Review every generated layout against your source plan, and use the result as a conversation tool for your next renovation, interior design, or staging decision.
