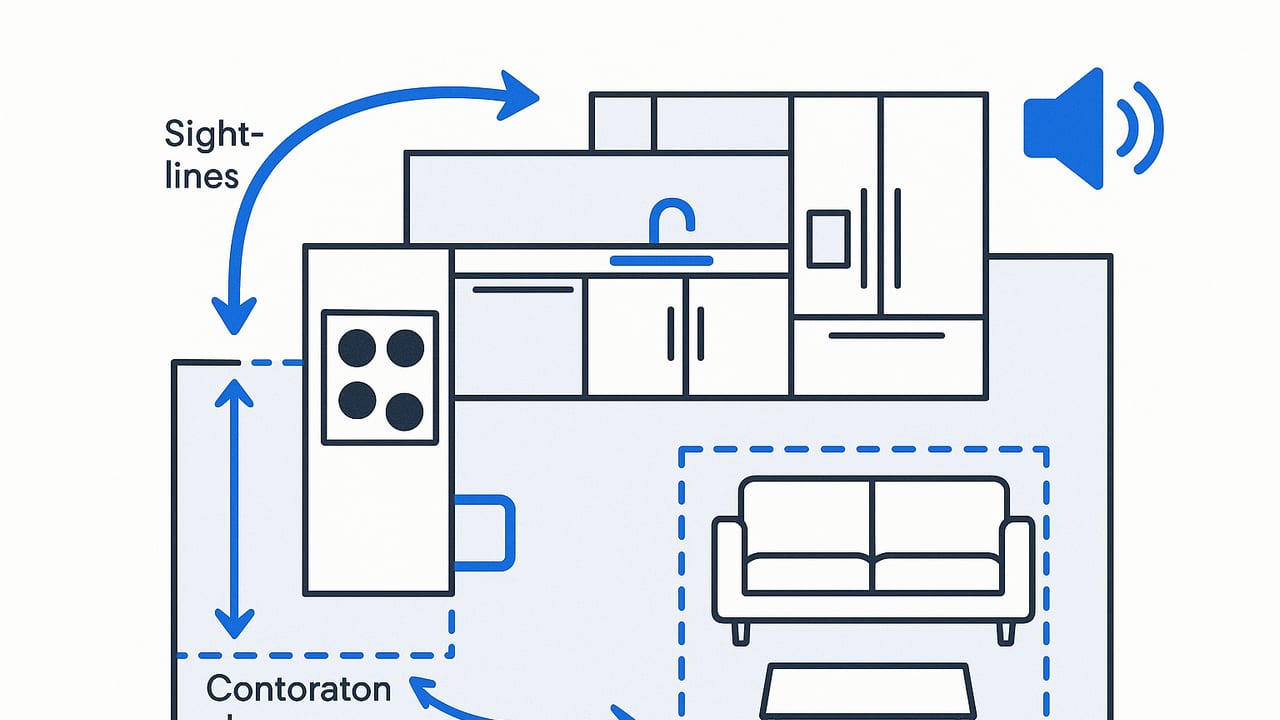
Open concept kitchen placement demands more than dropping an island into a big room. The best results balance everyday traffic with cooking workflow, protect sightlines, tame noise and smells, and keep dimensions honest. This field-tested guide walks through the decisions that matter, with clear clearances, layout rules, and practical examples you can apply to any great room.
Start with the shell: structure, services, and sunlight
Before sketching cabinets, map the immovable context. These constraints usually decide where an open kitchen naturally belongs:
- Structure: note beams, columns, stair openings, and bearing walls. Aisles should not collide with posts or low beams.
- Services: locate plumbing stacks, gas lines, and electrical panel. A wet wall can reduce rerouting costs for sink and dishwasher.
- Openings: doors to garage, backyard, or deck often dictate where the mudroom path meets the kitchen.
- Glazing: windows and sliders provide daylight and ventilation; face prep and cleanup toward light, place tall storage where it will not block views.
As a rule of thumb, center the kitchen where services are shortest and sightlines to dining and living remain wide and calm.
Traffic vs cooking workflow
Great rooms carry multiple traffic types: family circulation between entry, fridge, and sofa; entertaining circulation between drinks and dining; and task circulation between sink, cooktop, and pantry. Open concept kitchen placement succeeds when those flows intersect but do not conflict.
Zones outperform triangles in open plans
The classic work triangle remains useful, but open kitchens rely more on zones and landing spaces:
- Prep zone: sink + primary prep counter + trash/recycle.
- Cook zone: range/cooktop + oven(s) + pots/pans + spices.
- Clean zone: dishwasher + dish storage + towel pull-out.
- Cold zone: fridge + produce + snack drawer; place on the public edge so kids and guests do not cross the cook path.
- Pantry/coffee: a small counter near pantry doors or a tall cabinet with roll-outs keeps breakfast traffic off the cookline.
Recommended aisle widths
Aisle sizing is the fastest way to improve function. Use this quick reference:
| Condition | Minimum | Better |
|---|---|---|
| Work aisle (one cook) | 42 in (1067 mm) | 48 in (1219 mm) |
| Two-cook aisle | 48 in (1219 mm) | 54 in (1372 mm) |
| Between island and wall with seating | 48 in (1219 mm) | 54–60 in (1372–1524 mm) |
| Primary circulation path through great room | 42 in (1067 mm) | 48 in (1219 mm) |
Protect aisles that connect entries, the fridge, and the living room so people can pass without cutting through the cook zone.
Island or peninsula: size, seating, and spacing
In open concept kitchen placement, the island is both a workspace and a social boundary that organizes the great room. Right-sizing avoids crowding and awkward seating.
Island dimensions that work
| Use case | Recommended top | Overhang | Seating |
|---|---|---|---|
| Compact prep island | 60 x 30 in (1524 x 762 mm) | 10–12 in (254–305 mm) | 2 stools |
| Family island | 84 x 36 in (2134 x 914 mm) | 12 in (305 mm) | 3–4 stools |
| Entertaining island | 108 x 42 in (2743 x 1067 mm) | 12–15 in (305–381 mm) | 4–5 stools |
- Knee space: target 24 in (610 mm) width per stool and 15 in (381 mm) of clear legroom for counter height seating.
- Seats should not block fridge or pantry doors; end seats near traffic can be awkward, shorten the run or turn them to the quiet side.
- Peninsula works best when you need a traffic gate to redirect circulation away from the cook zone.
Sightlines and focal points
Open kitchens are part of the living room composition. Treat the elevation facing the great room like a feature wall.
- Place tall pieces (fridge, oven towers, pantry) at the ends or in a recessed niche to keep the center low and open.
- Give diners and sofa guests a calm view: favor a clean backsplash with a centered window or a sculptural range hood; avoid putting the sink directly facing the sofa if clutter will be visible.
- Hide task mess: a short return or shallow appliance garage masks toasters and espresso gear from the living zone.
- Align island centerline with room axes: center on a fireplace, TV, or main window to make the composition feel intentional.
Pro tip: if you can see the sink from the sofa, include a 6–8 in (152–203 mm) raised or layered ledge behind the faucet to shield dishes without blocking sightlines.
Acoustics, smells, and ventilation
Without walls, cooking noise and odors travel. Plan for both source control and absorption.
- Hood sizing: target 100–150 CFM per linear foot of cooking surface for wall hoods; island hoods need the higher end due to cross drafts.
- Air changes: aim for 6–10 air changes per hour in the kitchen zone. Exterior venting beats recirculating filters for fry-heavy cooking.
- Ducting: keep runs short with smooth, rigid pipe, minimal elbows, and a backdraft damper; oversize the duct if the run is long to lower noise.
- Sound absorption: rugs, upholstered pieces, lined drapery, acoustic panels, and soft-close hardware all reduce clatter in a hard-surface great room.
Lighting layers that flatter the whole room
Blend task, ambient, and accent light so the kitchen supports prep and still looks warm from the sofa.
- Task: under-cabinet lights at the front third of the cabinet, 2700–3000K, high CRI for food. Space puck or linear runs to avoid scallops.
- Island: two or three pendants or a linear bar, roughly one pendant per 24–30 in (610–762 mm) of island length; hang 30–36 in (762–914 mm) above the counter.
- Ambient: dimmable recessed cans or low-glare downlights spaced roughly one per 4–5 ft (1.2–1.5 m) in the kitchen area.
- Accent: toe-kick LED and cabinet interiors create nighttime glow and visual depth.
Appliances and clearances that prevent collisions
Doors and drawers must open without blocking each other or traffic. Reserve landing space where items will be set down.
| Item | Operating clearance | Landing zone |
|---|---|---|
| Fridge | Door swing + 3 in (76 mm); avoid opening into main aisle | 15 in (381 mm) min adjacent counter |
| Wall oven | 36 in (914 mm) in front of door | 15 in (381 mm) nearby counter |
| Dishwasher | 21 in (533 mm) in front of door | Counter on latch side; waste pull-out within 72 in (1829 mm) |
| Cooktop | 24 in (610 mm) clear above to hood per spec | 12 in (305 mm) one side, 15 in (381 mm) other, 24 in (610 mm) ideal both sides |
- Place dishwasher on the sink side away from the main aisle so open doors do not block circulation.
- Keep trash/recycle in the prep zone next to the sink, not across an aisle.
- Microwave at 36–48 in (914–1219 mm) height in a tall cabinet or island end keeps counters clear and kids safer.
Power, code, and convenience
Open plans add outlets and switching complexity because the kitchen is visible from multiple zones.
- Counter receptacles: space along the counter run so no point is farther than 24 in (610 mm) from a receptacle; use GFCI/AFCI protection per local code.
- Island power: install pop-ups or side-mounted outlets under the overhang, mindful of seating knees.
- Small appliance garage: a 24–30 in (610–762 mm) wide door with dedicated outlets keeps toasters and blenders hidden but ready.
- Switching: 3-way and 4-way switches for island pendants and under-cab light from both kitchen and living entries prevent awkward trips across the room.
Storage strategy by activity
Think in reach zones so the right items land within one or two steps of their use.
- Drawers over doors: 30–36 in (762–914 mm) wide deep drawers at cook zone for pots and pans; narrow pull-outs for oils and spices next to the cooktop.
- Everyday dishes: store near the dishwasher to minimize steps during unloading.
- Baking kit: cluster mixer, sheet pans, flour bins, and scale near a clear 30 in (762 mm) counter span, preferably by a window.
- Beverage zone: a 24 in (610 mm) undercounter fridge and coffee setup away from the cookline keeps guests self-sufficient.
Three proven placements for common great rooms
1) Long rectangle, windows on one long wall
Place the kitchen along the interior wall so tall cabinets can stack without blocking light. Float a centered island to separate dining from living.
Window wall | Dining  | Island | Kitchen run | Entry
------------+---------+--------+-------------+----->- Fridge and pantry at one end near entry for quick snack access.
- Range centered opposite island for a strong focal axis.
- 48 in (1219 mm) aisle both sides of island maintains through-traffic.
2) Square great room, central slider to patio
Use an L-shaped kitchen tucked into a corner with a peninsula forming a soft boundary. Keep the slider path open to the patio.
Living   | Peninsula | Kitchen L
Patio <--+-----------+----------
Dining | | Pantry- Peninsula seating faces living; no stools along the patio path.
- Sink on short leg of the L with window; cooktop on long leg with hood focal.
- Traffic from patio bypasses the cook zone entirely.
3) Open stair and a corner stack
When structure forces the fridge/ovens into a tower near the stair, compress tall elements together and stretch a low counter run across the view side.
Stair | Tall tower | Low run with window | Island | Lounge- The tower cluster reduces visual clutter; island aligns to the window for symmetry.
- Place beverage fridge at the island end closest to lounge to serve guests.
Quick dimension checks
Use these numbers to sanity-check your layout before you fall in love with a sketch.
- Prep counter: 36 in (914 mm) clear next to sink; 48–72 in (1219–1829 mm) is luxurious.
- Minimum island footprint with seating on one side: 72 x 36 in (1829 x 914 mm) plus clearances.
- Total width for an island with two 48 in (1219 mm) aisles: cabinet depth (24 in/610 mm) + island depth (36–42 in/914–1067 mm) + 2 x 48 in (1219 mm) = 13–14 ft (4.0–4.3 m).
- Stool count: island length in inches divided by 24, round down.
Tiny calculator for aisle fit
# All in inches
room_width = 180  # example 15 ft
island_depth = 42
cabinet_depth = 24
target_aisle = 48
fits = room_width >= cabinet_depth + island_depth + 2 * target_aisle
If fits is false, shrink the island, reduce overhang, or pick a peninsula so one side can open to a wider path.
Sightline-friendly materials and heights
- Keep most surfaces at counter height (36 in/914 mm). Tall elements should be grouped or recessed.
- Waterfall edges on islands visually finish the kitchen while blending with living-room furniture language.
- Matte finishes on tall pieces reduce glare across the room; reserve gloss for small accents or the backsplash.
Common mistakes and fast fixes
- Stools in the main path: move seating to the quiet side or widen the aisle to 54–60 in (1372–1524 mm).
- Fridge buried deep in the cook zone: relocate to the room edge with a landing counter so snack traffic stays out of the way.
- Island sink centered on living view showing dish chaos: offset sink 12–18 in (305–457 mm) and add a ledge or taller tap deck.
- Underpowered hood with long, noisy duct: upgrade CFM, increase duct diameter, and reduce elbows; consider a makeup air plan in tight homes.
- Too many tall cabinets across the room view: consolidate into a single pantry wall and add open shelves or windows elsewhere.
Bringing it together: a step-by-step placement workflow
- Mark structure, windows, and services on a to-scale plan.
- Draw the primary traffic path between entries, patio, and sofa; keep it out of the cook aisle.
- Place sink and prep counter near daylight; position cooktop on a wall where a real hood can vent.
- Locate the fridge on the public edge with 15 in (381 mm) landing space.
- Size the island or peninsula by back-solving from required aisles.
- Allocate storage by zone so the cook rarely crosses an aisle during prep.
- Refine sightlines: compose the elevation toward the living room with a clear focal and minimal tall mass.
- Finalize lighting and power; dimmers everywhere.
- Model the result in 3D and walk the routes. Adjust clearances until collisions disappear.
Validate open concept kitchen placement in 3D
Even a perfectly dimensioned plan can feel different at eye level. A quick 3D check will reveal if pendants block a view, if a post pinches an aisle, or if the island feels too dominant. Converting a measured floor plan into a simple 3D model helps you test option A vs B before committing to cabinets. If you need a fast way to turn a black-and-white floor plan into a dimensional 3D model on iPhone or iPad, the Floor Plan to 3D app can generate a faithful 3D representation from a photo or scan so you can validate sightlines, aisles, and furniture placement.
Approach open concept kitchen placement as part choreography, part composition. Protect the cook, serve the crowd, and keep the view serene. When flow, clearances, sightlines, and acoustics all align, the kitchen feels inevitable — and that is the goal.
