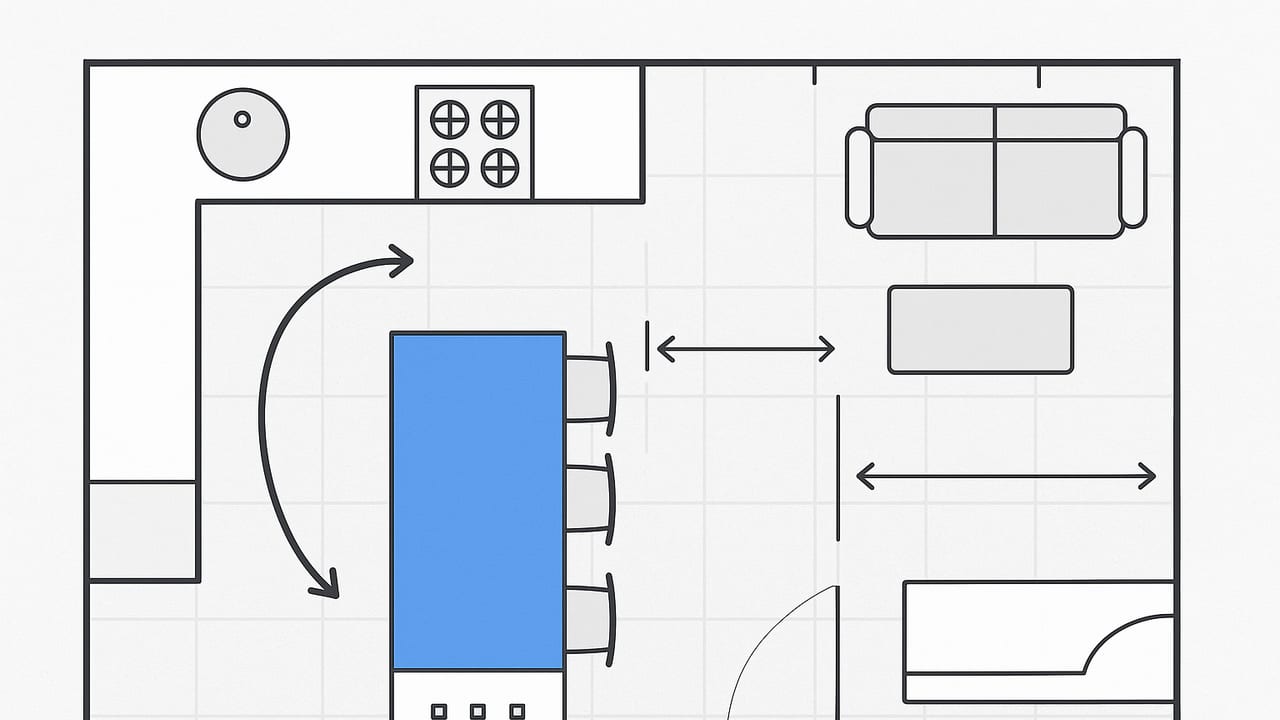
Getting open concept kitchen placement right is the difference between a space that feels effortless and one that constantly fights you. The goal is simple: cook, dine, and live without collisions. The path there requires smart positioning, trustworthy dimensions, and an honest look at your constraints. This guide distills practical layout rules, common-sense workflows, and proven clearances so you can plan an open kitchen that looks great and actually works.
Start with Goals and Constraints
Before you drag an island into the middle of the room, define what success looks like and what could block you:
- Primary goals: How many cooks? Everyday meals or frequent entertaining? Seating at the island? Keep or hide mess from the living area?
- Adjacencies: Do you want direct lines to the dining table, balcony, or pantry? Is the TV wall fixed?
- Utilities: Where are plumbing, gas, electrical, and vent routes? Moving them is possible but affects budget and timeline.
- Structure: Load-bearing walls, columns, and beams dictate what can open up and where you can span.
- Light and views: Place prep and seating to borrow daylight and enjoy sightlines without glare on screens.
Core Principles for Open Kitchen Placement
Work Triangle vs. Work Zones
The classic work triangle (sink–range–fridge) still helps, but modern kitchens perform better when you define zones that can overlap:
- Prep zone: Sink + 24–36 in of uninterrupted counter, trash pull-out, knives.
- Cooking zone: Range or cooktop + 12–15 in landing on both sides, spices, utensils.
- Clean-up zone: Dishwasher within 36 in of sink, dish storage nearby.
- Snack/coffee zone: Fridge access without crossing hot surfaces, small-appliance landing.
Place zones so two people can work without crossing paths across heat, knives, or open dishwasher doors.
Traffic Lanes and Sightlines
Open plans concentrate movement. Keep a 36–42 in clear traffic lane that routes around (not through) the prep and cooking zones. Orient the cleanup sink toward the living space if you like to chat while washing, and the prep sink toward light or a view to make chopping pleasant.
Pro tip: Let the island manage the room. Use it to block traffic from cutting through the hot zone, to anchor pendant lighting, and to create a natural edge for living-room furniture.
Dimensions and Clearances You Can Trust
The numbers below come from field-proven guidelines and are conservative enough to work in most homes.
| Element | Minimum | Preferred | Notes |
|---|---|---|---|
| Work aisle (one cook) | 42 in | 45 in | Edge of counter to edge of counter/appliance |
| Work aisle (two cooks) | 48 in | 54 in | Avoid back-to-back collisions at sink and range |
| Walkway (no work) | 36 in | 42 in | Main circulation past the kitchen |
| Island width | 36 in | 42–48 in | +6 in if you include a sink or cooktop |
| Island length (with seating) | 72 in | 84–96 in | Allow 24 in width per seated person |
| Counter seating overhang | 12 in | 15 in | Use brackets/corbels if overhang exceeds 10–12 in |
| Clearance behind stools | 36 in | 44–48 in | To walk behind seated guests comfortably |
| Landing at sink | 18 in one side | 24 in one side + 18 in other | Keep one clear run where you actually prep |
| Landing at cooktop/range | 12 in each side | 15–18 in each side | Hot pans need safe drop zones |
| Dishwasher–sink distance | ≤ 36 in | Adjacent | Prefer same run; avoid blocking drawers |
| Refrigerator landing | 15 in | 24 in | Place on the open side of the kitchen |
| Pendant height over island | 30 in | 32–36 in | Measured from counter to bottom of pendant |
Older triangle rules (each leg 4–9 ft; total 13–26 ft) still work as a sanity check, but do not let them override good zone planning in an open plan.
Where to Place the Kitchen in an Open Plan
Single-Wall + Island
Great for long, narrow spaces. Put tall storage (fridge, pantry) at one end to reduce visual bulk. Center the sink on the wall with prep space between sink and cooktop. Use the island for seating and a prep sink if possible. Keep 42–48 in between the wall run and island.
L-Shaped with Island
Balances openness with storage. Place the range on the shorter leg to keep the hood from dominating the main wall. Put the main sink on the longer leg facing the room or window. The island becomes the buffer that diverts traffic away from the hot zone.
Peninsula (Small Spaces)
When there’s no room for an island, a peninsula gives you seating and separation. Avoid placing the range on the peninsula in compact homes; smoke and splatter face the living area. A sink or uninterrupted prep on the peninsula works best.
Open Galley
Two parallel runs with one side open to dining or living. Keep tall units consolidated and avoid placing the fridge directly opposite the dishwasher. If seating is needed, widen one run into a “table-height” extension or a narrow island (as little as 24–30 in deep) with 12–15 in overhang.
U-Shaped Opening to Living
Offers the most counter, but requires careful aisle widths. Put the opening on the dining side to reduce direct views into the cleanup zone. Use the center leg for the range with symmetrical landing zones for a clean focal point.
Light, Ventilation, and Noise
- Daylight: Prep where the light is best. Borrow light by keeping upper cabinets off the window wall or using open shelves strategically.
- Ventilation: Target 150–300 CFM for standard ranges and 600+ CFM for high-output cooking. Duct outside whenever possible. In open plans, size up slightly to control odor spread.
- Acoustics: Use soft materials (rugs, upholstered chairs, acoustic panels) and a quiet dishwasher (<45 dBA) to keep conversation comfortable.
- Glare control: Align pendants to avoid hot spots on the TV. Dimmer switches and layered lighting (ambient, task, accent) are non-negotiable.
Utilities and Structure Check
- Plumbing: Moving a sink or adding an island prep sink requires drain routing and venting; islands often need an air admittance valve or under-slab plumbing.
- Gas/Electric: Gas lines may be costly to reroute; induction simplifies placement but verify power capacity (often a 240V circuit).
- Range hood duct: Exterior walls simplify venting. Long or bent ducts reduce performance—keep runs short and straight.
- Structure: Removing walls may need beams or columns. Confirm spans and loads with a structural pro.
- HVAC: Do not block supply/return air. Large islands can disturb airflow if registers are covered.
Safety and Code Considerations
- Electrical (typical requirements vary by jurisdiction): GFCI-protect countertop outlets. Provide enough receptacles so no point along the counter is more than 24 in from one. Islands/peninsulas need at least one.
- Clear egress: Maintain 36 in minimum to exits. Do not let seating choke the path.
- Heat and splash: Keep combustible materials away from the range area; add heat-resistant backsplash where needed.
- Child safety: Put the fridge and microwave on the room side; range and knives deeper inside.
Three Real-World Scenarios
Studio or Small Condo (450–700 sq ft)
Use a single-wall kitchen with a 36–42 in deep island for dining and prep. Place the fridge at the end closest to the entry so guests can grab a drink without entering the cook zone. Choose a 24 in dishwasher, an induction cooktop, and compact microwave drawer. Keep a 42 in aisle so island stools don’t collide with the wall.
Family Home with Island Seating
L-shaped with an 8 ft island seats four. Center the sink facing the room so you can supervise kids. Add a prep sink on the island opposite the range so two people can work without crossing. Plan 44–48 in behind stools to the back of a sofa or sideboard, and use pendants on dimmers for kid homework vs. dinner parties.
Loft with Columns and Beams
Open galley aligned between two columns. Consolidate tall storage into a “pantry wall” that also hides a structural pier. Float a slim 30 in deep island for occasional seating. Use ceiling tracks to route power to island pendants without invasive work on the slab.
Step-by-Step Planning Workflow
- Map traffic: Sketch the main path from entry to sofa to balcony. Keep it outside the hot zone.
- Fix the focal point: Decide what the room should see (range and hood, sink and window, a beautiful pantry wall).
- Place the sink: Put the primary sink where you’ll prep most—near light and trash. Add a prep sink if you host or cook as a team.
- Set the range: Ensure landing zones and a duct route. Avoid placing it where splatter faces the living room.
- Position the fridge: Make it easy to access from dining and entry without cutting through the cook zone.
- Size the island/peninsula: Check aisle widths and stool clearances. Adjust length to your seating count.
- Confirm utilities and structure: Verify feasibility before you fall in love with a rendering.
- Layer lighting: General (recessed), task (under-cabinet), and accents (pendants). Put them on separate dimmers.
- Mock the space: Use painter’s tape or cardboard to trace the island, clearances, and swing arcs. Walk it.
- Iterate with feedback: Cook a “dry run” by moving in your kitchen triangle in your current space to test reach and storage.
Open kitchen quick rules:
- Keep a 42–48 in work aisle; widen to 54 in for two-cook households.
- Island seating: 24 in width + 15 in overhang per person, 44 in behind stools.
- Fridge on the room side, range deeper inside, sink where you prep.
- Route traffic around, not through, the cooking zone.
- Duct the hood outside; size up slightly for open plans.
Frequent Mistakes and Fast Fixes
- Island too big for the room: Shrink depth to 36–39 in, reduce seating, or switch to a peninsula to reclaim aisle width.
- Range on the living-room face: Swap with sink or add a 4–6 in raised guard and deeper counters (27 in) to cut splatter.
- Dishwasher blocks traffic: Move it to the prep side of the sink or add a second, narrow dishwasher if you entertain often.
- Nowhere to drop hot pans: Add heatproof landing surfaces beside the range or move the oven to a wall with a counter.
- Shadowy prep zone: Add under-cabinet lights and brighten task surfaces to 300–500 lux.
- Seating jammed into circulation: Rotate the island 90° or shift seating to a banquette that hugs a wall.
Putting It All Together
Open concept kitchen placement succeeds when the space supports the way you actually live: simple routes, separate zones, comfortable clearances, and lighting that adapts from breakfast to late-night cleanup. Start with honest constraints, commit to a layout that protects the cook zone from through-traffic, and validate your decisions with hard numbers and a walkable mockup. If you want to visualize changes before you build, you can export a 2D plan and generate quick, accurate 3D views with tools like Floor Plan to 3D to test island sizes, sightlines, and seating clearances.
