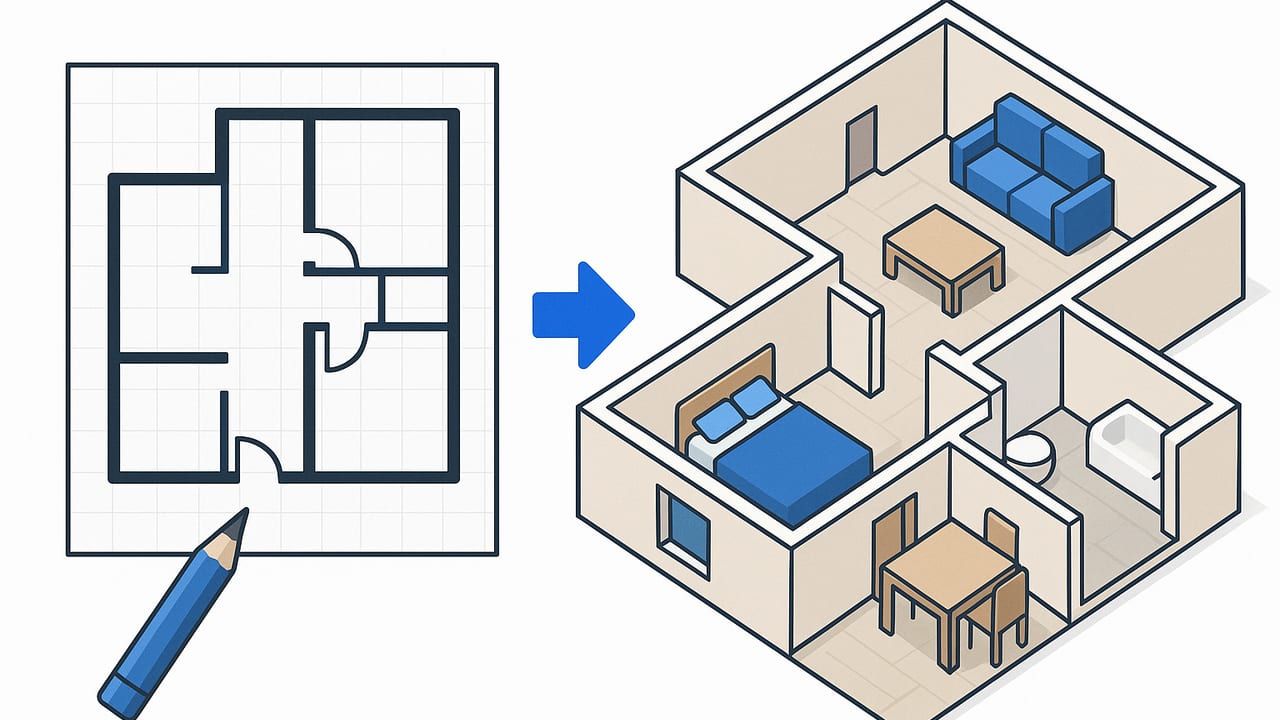
Whether you’re planning a renovation, presenting to a client, or optimizing listings, 3d floorplans are one of the fastest ways to turn abstract layouts into spaces people can understand instantly. A well-executed 3D floor plan communicates scale, flow, materials, and furniture placement in a single view—bridging the gap between technical drawings and lived experience.
This guide walks you through how to create accurate, compelling 3d floorplans from any 2D layout. You’ll learn the core workflow, tool options, accuracy best practices, styling tips, common pitfalls to avoid, and how to export renders that look great on screens and in print.
What is a 3D Floorplan?
A 3D floor plan is a rendered perspective or axonometric view of a space built from a scaled layout. It extends a traditional 2D plan with wall heights, finishes, lighting, and furnishings to provide a realistic or stylized visualization. The best 3d floorplans:
- Preserve accurate dimensions and proportions from the original floor plan.
- Show walls, doors, windows, and circulation clearly.
- Include contextual elements like flooring, paint, and key furniture.
- Use lighting and camera angles to tell a clear spatial story.
Why Use 3D Floorplans? Key Benefits and Use Cases
- Clarity for non-technical stakeholders: Clients who struggle with linework can instantly grasp layout and scale.
- Faster decision-making: Compare options A/B/C for kitchens, bathrooms, or office layouts in minutes.
- Marketing advantage: Listings with 3D visuals often receive better engagement and time-on-page.
- Pre-construction validation: Spot conflicts (clearances, swing paths, furniture fit) before they’re costly.
- Design iteration: Rapidly test materials, colorways, and light conditions.
The 2D-to-3D Workflow: From Paper Sketch to Polished Render
There are many paths to quality 3d floorplans, but most workflows follow these steps:
- Gather inputs: Scan or photograph the 2D plan (at least 300 DPI if scanning). Collect dimensions for key spans: overall width/length, wall thickness, door/window sizes, ceiling height.
- Set scale: In your modeling tool, align the drawing to a known dimension. Even a single verified measurement (e.g., “living room is 4200 mm wide”) can anchor the entire model.
- Trace structure: Recreate walls, doors, windows, and stairs. Use layers or categories to separate architectural elements from furniture.
- Place openings and fixtures: Insert doors, windows, plumbing fixtures, and built-ins at exact positions.
- Add furniture and appliances: Start with correct footprints; then refine with realistic models as needed.
- Apply materials: Choose finishes (flooring, paint, tile) to communicate the design intent without overcomplicating the scene.
- Light the scene: Add daylight, ambient fill, and simple area lights. Avoid harsh contrasts that wash out details.
- Choose camera(s): Axonometric bird’s-eye views work well for overviews; sectional perspectives help explain vertical relationships.
- Render and refine: Test low-resolution drafts for composition and color before exporting finals.
Preparing Your 2D Assets
Quality input equals quality output. For scans, use 300–600 DPI; for photos, ensure the camera is leveled and shot straight-on to reduce distortion. If the plan is hand-drawn, thicken wall lines and annotate at least three dimensions (overall, a key room width, and one door/window) to resolve scale.
Modeling Essentials
- Wall thickness: Residential walls are often 90–120 mm (3.5–4.75 in) plus finishes; commercial cores vary widely. Model what’s specified.
- Heights: Typical ceiling heights range 2400–3000 mm (8–10 ft). If unknown, choose a sensible default and label it.
- Tolerances: Aim for ±1–2% accuracy relative to the measured dimensions, especially for kitchens, baths, and built-ins.
Furnishing, Materials, and Lighting
Use furniture libraries with correct footprints to validate circulation. For materials, resist the urge to over-texture—subtle PBR materials or flat colors often read more clearly in 3d floorplans intended for planning. For lighting, combine an HDRI or skylight for overall illumination with a few interior fills; keep color temperature consistent to avoid muddy tones.
Annotation and Context
Add subtle annotations where they aid comprehension: scale bars, north arrows, and room labels. Consider a thin outline or rim light on furniture to maintain legibility against similar floor finishes.
Choosing the Right Tool for 3D Floorplans
There’s no one-size-fits-all tool. Your choice depends on team skills, speed, budget, and the fidelity you need.
| Approach | Strengths | Best For | Learning Curve | Output Quality |
|---|---|---|---|---|
| CAD/BIM (e.g., Revit, Archicad) | Parametric accuracy, documentation-ready | Professional AEC workflows | High | High with proper materials and lights |
| 3D DCC (e.g., SketchUp, Blender) | Flexible modeling, rich rendering tools | Design visualization, concept iteration | Medium | High with plugins/engines |
| AI from 2D plan | Fast conversion, preserves layout | Quick turnarounds, proposals | Low–Medium | Medium–High (varies by app) |
| AR/Scan-based | Captures as-built conditions | Existing spaces, remodels | Low–Medium | Medium |
Pro tip: If speed is critical, start with an AI conversion from a clean black-and-white plan to generate a base model, then refine materials and lighting in your preferred tool.
Accuracy and Scale: Non-Negotiables for Trustworthy 3D Floorplans
Good-looking 3d floorplans that misrepresent size are worse than no visuals at all. Protect accuracy with these practices:
- Anchor scale early: Match the longest known dimension first to reduce compounding errors.
- Use consistent units: Decide on metric or imperial and stick to it. Label units on the exported image or legend.
- Spot-check clearances: Door swings, appliance openings, corridor widths, and ADA/accessible turns are common pain points.
- Validate ceiling heights: Even a 150 mm discrepancy can change perceived volume significantly.
- Document assumptions: If you have to assume wall thickness or finish buildup, say so in a caption or note.
Styling for Purpose: Minimal vs. Photoreal
Not all 3d floorplans need photorealism. Choose a style that supports your goal:
- Minimal/diagrammatic: Flat colors, simple shadows, thin outlines. Perfect for planning and quick approvals. Faster renders, smaller files.
- Warm/illustrative: Gentle textures, soft lighting, curated furniture. Great for marketing where mood matters.
- Photoreal: High-resolution materials, physically based lighting, complex assets. Best for hero images and flagship listings, but heavier and slower.
Maintain consistency across a set. A unified palette and camera angle makes multiple options comparable at a glance.
Common Mistakes—and Quick Fixes
- Overstuffed layouts: Too much furniture hides circulation. Fix: Start with essential pieces; leave 900–1000 mm (36–40 in) clearances where people walk.
- Blown-out lighting: High exposure flattens the scene. Fix: Lower exposure, add gentle fill, and avoid pure white materials.
- Texture tiling artifacts: Repeated patterns break realism. Fix: Use larger textures, adjust rotation, or switch to solid color for clarity.
- Incorrect door swings: Mirrored or wrong-hand doors confuse flow. Fix: Cross-check against the 2D plan before rendering.
- Unlabeled scale: Without a reference, viewers misjudge size. Fix: Add a scale bar or annotate one key dimension.
Exporting: Formats, Resolution, and Delivery
The final mile matters. Optimize exports to look sharp everywhere:
- Resolution: For web, 1920–2560 px on the long side balances clarity and load time. For print, 300 DPI at the target print size.
- Formats: PNG for transparency and crisp UI overlays; JPEG/WebP for smaller file sizes; PDF for print sets; OBJ/GLB/USDZ if you need 3D handoff.
- Aspect ratios: 16:9 or 4:3 for web; square for galleries; proof a vertical crop for mobile-first pages.
- Color management: Work in sRGB for web-bound images to avoid dull colors after upload.
- Accessibility and SEO: Use descriptive alt text (e.g., “3d floorplan of two-bedroom apartment with open kitchen”) and compressed assets for fast loads.
Collaboration and Version Control
Even simple 3d floorplans benefit from organized collaboration. Share early drafts, record decisions, and name files consistently. A clean naming convention makes revisions painless:
ProjectName_Space_Option_Version_Resolution.ext
Riverview_Apt2B_KitchenA_v03_1920w.png
Maintain a changelog (date, change summary, who approved) in your project notes or cloud folder. For multi-stakeholder projects, approve the 2D plan and dimensions before modeling to avoid rework.
Publishing 3D Floorplans on Your Website
If you’re posting renders online, a few SEO practices amplify visibility and UX:
- Structured data: If used in listings, consider schema for products/real estate where applicable.
- Descriptive filenames: Include keywords naturally (e.g., loft-2br-3d-floorplan.png).
- Alt text and captions: Summarize layout and key features; avoid keyword stuffing.
- Image optimization: Serve responsive sizes (srcset) and modern formats (WebP/AVIF) when possible.
- Page speed: Lazy-load gallery images and limit above-the-fold weight.
A Quick Checklist for Reliable Results
- Clean, high-contrast 2D plan with at least three verified dimensions
- Consistent units and a defined wall thickness/ceiling height
- Essential furniture placed with realistic clearances
- Materials chosen to support legibility over novelty
- Balanced lighting and a camera angle that tells the story
- Exported at appropriate resolution with alt text and clear filename
- Notes on assumptions and any deviations from the original plan
Frequently Asked Questions
How many views should I export?
Two to three is typical: one overall axonometric or bird’s-eye, plus close-ups for kitchens/baths or an entry sequence. Keep the set consistent across options.
Do I need photoreal furniture?
No. For planning, accurate footprints and simple shading suffice. Switch to higher-fidelity assets when marketing demands it.
What if I only have a photo of a plan?
Correct lens distortion if possible, crop tightly, and use a known dimension for scale. Many tools can work effectively from a clean, high-contrast photo.
Final thought: The most persuasive 3d floorplans are the ones people can trust. Prioritize accuracy, clarity, and purpose-driven styling over sheer detail. Build a repeatable workflow, annotate assumptions, and export with your end use in mind. If you prefer a mobile-friendly path from black-and-white layouts to accurate 3D renders, an iOS app like Floor Plan to 3D can speed up the conversion while preserving scale.
