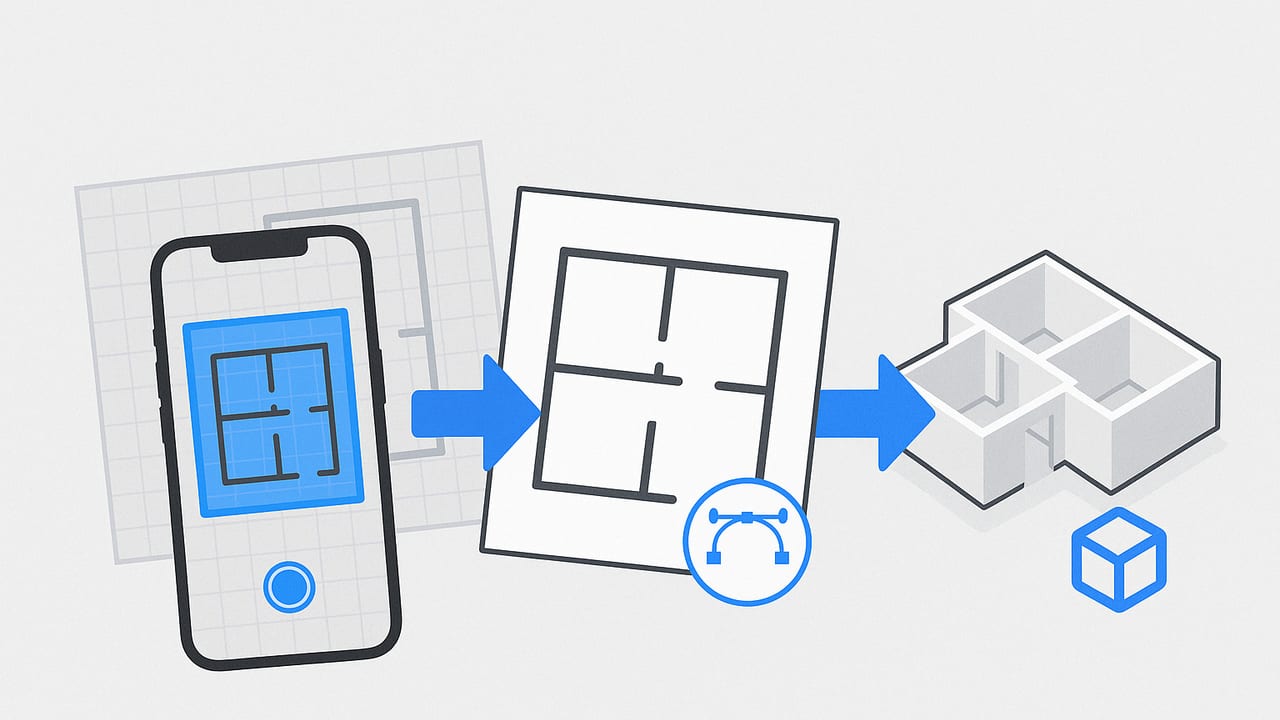
The iPhone and iPad have quietly become powerful tools for floor plan capture and 3D visualization. With LiDAR-enabled devices, improved camera calibration, and mature 3D frameworks, you can go from a sketch or PDF to a realistic 3D layout without a workstation. This guide walks through a practical iOS floor plan workflow: how to capture, scale, validate, and export accurate visuals you can use for design decisions, client presentations, or real-estate listings.
The iOS Floor Plan Workflow at a Glance
- Capture: Start with a source—photo of a printed plan, scanned PDF, traced sketch, or AR room scan.
- Calibrate Scale: Set one known dimension to anchor all measurements.
- Trace and Structure: Define walls, doors, windows, stairs, and zones.
- Assign Semantics: Label rooms, door swings, window heights, and materials.
- 3D Generation: Extrude walls, apply thicknesses, and add basic furniture to validate fit.
- QA: Check dimensions, adjacency, circulation, and clearances.
- Render and Export: Produce high-resolution stills or walkthroughs and share.
Choose Your Capture Method
On iOS, there are three primary ways to kick off a floor plan. The right choice depends on what you have (a 2D plan or a blank slate) and the level of accuracy you need.
1) Scan a 2D Floor Plan (Photo or PDF)
Photograph a printed plan or import a PDF, then calibrate scale. This is ideal when you already have a black-and-white layout or as-built drawing.
- Pros: Fast start; preserves original geometry; easy to share.
- Cons: Requires careful scaling; low-res photos can introduce distortion.
- Tip: Shoot plans square-on with good lighting; avoid perspective skew by aligning edges to the frame.
2) AR Room Scan on iPhone/iPad
Use the device camera (and LiDAR if available) to walk the space and auto-detect walls. Great for quick concept layouts and verifying room sizes.
- Pros: Super fast capture; live measurements; good for existing spaces.
- Cons: Corners and thin walls can be noisy; furniture can occlude walls.
- Tip: Clear line-of-sight to corners; scan slowly and keep the device stable.
3) Manual Tracing on iPad
Trace over a plan with Apple Pencil, snapping to orthogonal or angled guides. Preferred when precision is critical or when redlining in the field.
- Pros: High control; clean vector geometry; ideal for consultants.
- Cons: Slower than scanning; requires steady workflow discipline.
- Tip: Use layers for walls, doors, fixtures, and annotations. Lock the underlay once scaled.
| Method | Speed | Accuracy | Equipment | Best For |
|---|---|---|---|---|
| 2D Plan Scan | Fast | High with good scale | iPhone/iPad camera | Existing drawings, proposals |
| AR Room Scan | Very fast | Medium–High (LiDAR improves) | iPhone/iPad (LiDAR preferred) | As-builts, feasibility checks |
| Manual Trace | Medium | Very High | iPad + Pencil | Consultants, detailed layouts |
Scale and Accuracy Fundamentals
Scaling is the linchpin of dependable measurements. Once one length is correct, every other dimension inherits that accuracy. Use a known hallway width, gridline dimension, or title-block scale bar to set scale.
“Measure twice, model once. Your scale anchor is the difference between a rough sketch and a trusted deliverable.”
- Recommended tolerance: ±1–2% for space planning; ±0.5% if specifying millwork or built-ins.
- Calibration targets: Door width, structural grid, room dimension labels, scale bars.
- Checkpoints: After scaling, spot-check at least three distances in different areas.
Quick Scale Math
If you know a dimension in the plan (say, a 10'0" room), compute a scale factor from pixels to meters or inches:
// Given two points in image coordinates (pixels)
let p1 = CGPoint(x: 142, y: 388)
let p2 = CGPoint(x: 982, y: 392)
let pixelDistance = hypot(p2.x - p1.x, p2.y - p1.y) // px

// Known real-world distance (e.g., 10 feet = 120 inches = 3.048 meters)
let realMeters: Double = 3.048

// Scale factor: meters per pixel (m/px)
let metersPerPixel = realMeters / Double(pixelDistance)

// Convert any other measured pixel length to meters
func meters(fromPixels px: Double) -> Double { px * metersPerPixel }
For prints photographed at an angle, apply a perspective correction before scaling to reduce error. Many iOS apps include a keystone/perspective tool—use it whenever edges aren’t parallel to the frame.
From Plan to 3D: Materials, Lighting, and Camera
Once walls and openings are structured, turn the flat plan into a believable 3D scene that answers layout questions:
- Wall thickness: Typical interior 3.5–4.5 in (90–115 mm); exterior walls often 6–8 in (150–200 mm) plus finishes.
- Door swings: Verify handing and clearance arcs so doors don’t collide with casework or furniture.
- Windows: Set sill and head heights; ensure consistency room-to-room for realistic elevation cues.
- Materials: Use low-gloss PBR materials. Overly shiny floors exaggerate reflections and look artificial.
- Lighting: Combine an HDRI environment with a few well-placed area lights. Keep color temperatures consistent (2700–3000K for warm residential interiors).
- Cameras: 24–28 mm equivalent feels natural for interiors; avoid ultra-wide distortion for client views.
Room-Planning Rules of Thumb
Even a perfect model fails if circulation and clearances don’t work. Use these standards while placing furniture in 3D:
- Hallways: 36 in (915 mm) minimum comfortable width; 42 in (1065 mm) ideal for higher traffic.
- Door clearances: Maintain 4–6 in (100–150 mm) from door swing arc to adjacent furniture.
- Dining: Allow 24 in (610 mm) per seat at table; 36–44 in (915–1120 mm) circulation behind chairs.
- Living rooms: 18 in (450 mm) from sofa to coffee table; 36 in (915 mm) for walkways.
- Bedrooms: 24–30 in (610–760 mm) on sides of beds; queen bed 60×80 in (1525×2030 mm).
- Kitchens: 42–48 in (1065–1220 mm) between counter runs; islands minimum 36 in (915 mm) deep for seating.
QA Checklist Before Rendering
Run this quick audit prior to final renders to avoid costly rework:
- Scale: Re-check one long and one short dimension after any plan edits.
- Adjacency: Verify room relationships (kitchen near dining, baths near stacks).
- Openings: Confirm all doors/windows have correct heights, swings, and head alignments.
- Ceiling heights: Model dropped ceilings and bulkheads that affect sightlines.
- Fixtures: Check clearance around appliances, sinks, and WC per manufacturer specs.
- Furniture fit: Use scaled blocks for sofas, beds, and tables; avoid oversized staging.
- Navigation: Ensure a clear path from entries to primary destinations.
Export Settings and Deliverables
Clean exports help clients and colleagues evaluate options quickly.
- Image resolution: For print at 300 DPI, target 3300×2550 px for 11×8.5 in (landscape).
- Aspect ratios: 16:9 for slides; 1:1 for social; 4:5 for certain platforms.
- Views: Provide a plan view, at least two hero perspectives, and a circulation diagram if relevant.
- Annotations: Add dimensions and labels sparingly; focus attention on key decisions.
- File types: PNG for lossless images, JPG for smaller emails, PDF for multi-page sets, and OBJ/GLB for 3D sharing.
Data Formats and Interoperability
Knowing what your collaborators use saves time when you hand off.
| Input/Output | Use | Notes for iOS |
|---|---|---|
| JPG/PNG | Plan underlays, rendered images | Good for quick shares; watch compression on text labels. |
| Scaled drawings, multi-page sets | Retains vectors; ideal for trace-and-scale workflows. | |
| OBJ/GLB/USDC | 3D exchange and AR previews | GLB for portability; USDZ for Apple ecosystem and AR Quick Look. |
| DXF/DWG | CAD handoff | Many iOS tools import/export; verify units and origin on export. |
Swift Snippet: Calibrate Scale from a Known Dimension
If you’re building custom tooling or automations around an ios floor plan workflow, here’s a compact Swift example to compute a scale factor and convert pixel lengths to real units:
import CoreGraphics

struct ScaleCalibrator {
    let metersPerPixel: Double

    init(pointA: CGPoint, pointB: CGPoint, knownMeters: Double) {
        let dx = Double(pointB.x - pointA.x)
        let dy = Double(pointB.y - pointA.y)
        let px = (dx*dx + dy*dy).squareRoot()
        self.metersPerPixel = knownMeters / px
    }

    func meters(fromPixels px: Double) -> Double { px * metersPerPixel }
    func inches(fromPixels px: Double) -> Double { meters(fromPixels: px) * 39.3701 }
}

// Usage example:
let a = CGPoint(x: 120, y: 420)
let b = CGPoint(x: 920, y: 420)
let knownMeters = 3.048 // 10 feet
let scaler = ScaleCalibrator(pointA: a, pointB: b, knownMeters: knownMeters)
let doorPx = 180.0
let doorInches = scaler.inches(fromPixels: doorPx) // ≈ 32–36 in expected
Common Pitfalls (and Fixes)
- Skewed photos: Use perspective correction; capture perpendicular to the plan.
- Unit mismatches: Label your internal unit (inches, mm, meters) and stick to it from scale to export.
- Missing wall thickness: Extrude walls with realistic thickness or your furniture won’t fit accurately.
- Door/win heights omitted: Add sill and head heights to avoid odd render shadows and unrealistic light.
- Overdressed materials: Neutral, matte materials keep focus on layout decisions.
- Too few QA checks: Verify at least three distances and one diagonal for global sanity.
Use Cases and Examples
- Apartment refurb: Import a realtor’s PDF, calibrate to the living room length, place standard furniture blocks to test sofa orientation, and produce two camera views for the client.
- Office test-fit: Quick AR scan to confirm core dimensions, then overlay a modular desk system. Export a plan view and a wide-angle render for stakeholder review.
- Short-term rental: Trace a host’s sketch, validate bed sizes and walkway widths, and generate staged images that reflect true circulation.
- Kitchen update: Calibrate to the range opening, set appliance clearances per manufacturer spec sheets, and render with balanced, warm lighting for material selection.
Performance Tips for Smooth iOS Workflows
- Organize assets: Keep a small library of scaled furniture blocks for rapid layout testing.
- Use layers/groups: Separate structural, MEP, and furniture to toggle faster and reduce errors.
- Incremental saves: Version files per milestone (e.g., v1-scale, v2-openings, v3-furniture).
- Device headroom: Close background apps and keep 10–20% storage free to avoid slowdowns while rendering.
Final Thoughts
An effective iOS floor plan process blends fast capture, careful scaling, and thoughtful 3D visualization. When you anchor dimensions, check clearances, and keep materials realistic, your images do more than look good—they inform decisions. Whether you’re planning a renovation, presenting to clients, or validating sightlines and flow, the right workflow turns your phone or tablet into a dependable spatial design tool. If you want a simple way to turn black-and-white 2D plans into accurate 3D renders directly on iPhone, the app Floor Plan to 3D provides that capability while preserving proportions and making high-resolution exports easy.
