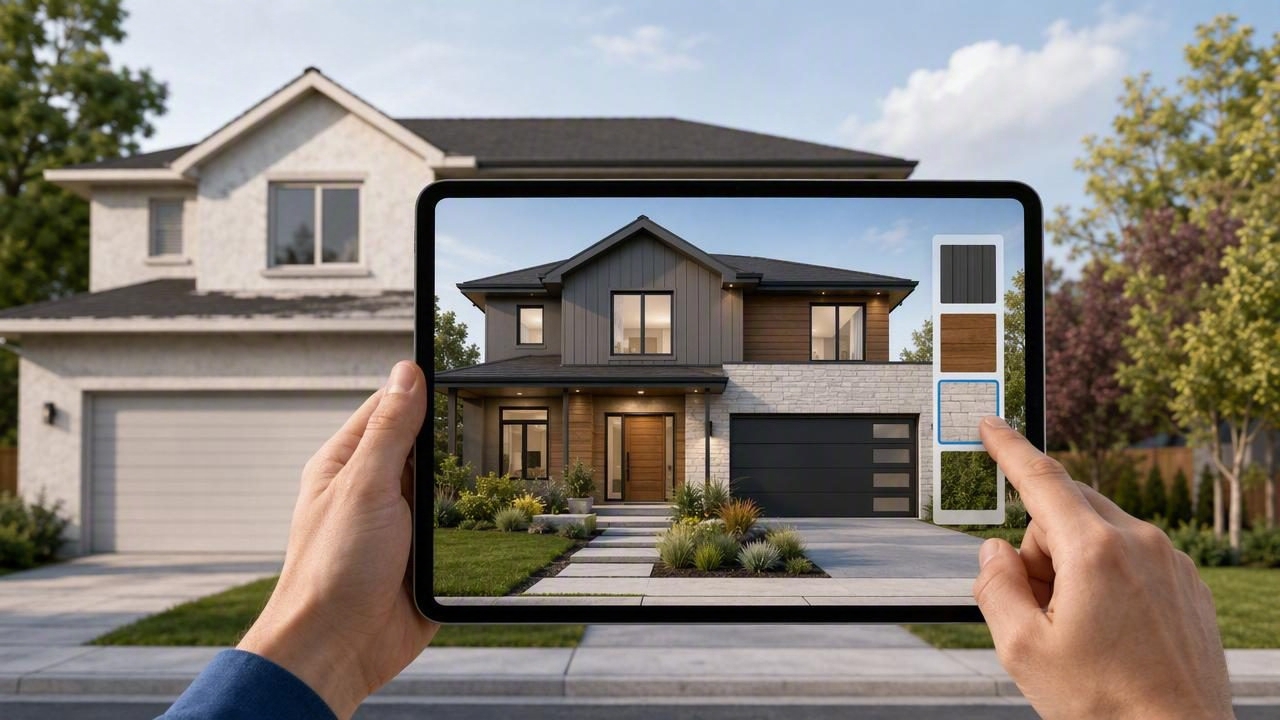
Planning an exterior renovation can be exciting, but it is also easy to make costly decisions based on incomplete ideas. A new paint color may look different in natural light. A front porch addition can affect the balance of the facade. Even a simple landscaping update may feel disconnected from the home’s architecture if it is not visualized carefully.
An exterior design app helps homeowners, designers, contractors, and real estate professionals explore these decisions before construction begins. By turning photos, floor plans, or rough concepts into visual renovation previews, these tools make it easier to compare styles, materials, layouts, and curb-appeal improvements.
This guide explains how to use an exterior design app effectively, what features matter most, and how to turn early inspiration into a more practical renovation plan.
What Is an Exterior Design App?
An exterior design app is a digital tool that helps users visualize changes to the outside of a property. Depending on the app, users may upload a property photo, work from a floor plan, create a 3D model, or use AI-generated redesign concepts to explore different possibilities.
Typical exterior design projects include:
- Updating siding, trim, brick, stone, or exterior paint colors
- Testing roof colors and architectural materials
- Adding porches, decks, patios, pergolas, and entry features
- Planning landscaping, walkways, planting beds, and outdoor lighting
- Refreshing a dated facade for resale or rental marketing
- Visualizing a renovation from an existing floor plan or blueprint
Unlike a mood board, which communicates general style, an exterior design app can show how an idea may look on a specific building. This gives users a clearer way to evaluate proportion, contrast, scale, and visual flow.
Why Visualizing Exterior Changes Before Building Matters
Exterior renovations often involve multiple connected decisions. Changing one surface can influence every other design element. For example, a warm beige siding color may work with dark bronze window frames, but it may clash with a cool gray roof. Likewise, a modern horizontal fence may look excellent with clean-lined landscaping but feel out of place beside a traditional colonial facade.
Visual previews help identify these issues earlier, when changes are less expensive and easier to make. They can also improve communication between property owners and professionals.
| Planning Challenge | How Exterior Visualization Helps |
|---|---|
| Choosing colors | Compare paint, trim, roof, and door combinations in context. |
| Evaluating additions | Review the scale of a porch, deck, awning, or garage extension before committing. |
| Aligning landscaping | See whether paths, planting beds, lighting, and hardscape complement the house. |
| Explaining ideas | Share clear renovation previews with contractors, partners, clients, or planning teams. |
| Prioritizing budgets | Compare high-impact updates and focus spending on the most visible improvements. |
Key Features to Look for in an Exterior Design App
Not all visualization tools are built for the same workflow. Some focus on inspiration, while others help users create more accurate 3D renders from plans or photos. The best choice depends on whether you are testing a quick exterior refresh or planning a more detailed renovation.
Photo-Based Exterior Redesign
Photo-based tools let you upload an image of the front, side, or rear of a home and test new design directions. This is especially useful for paint changes, updated cladding, new doors, window shutters, and landscaping concepts.
For better results, use a bright, straight-on photo with minimal obstruction. Remove vehicles, bins, and temporary outdoor items from the image when possible. A clear photo gives the app more usable visual information and makes material changes easier to judge.
Floor Plan Conversion and 3D Context
If a renovation includes structural changes, floor plan conversion is often more useful than a single photo. A 2D plan can provide room dimensions, wall positions, openings, and the overall building footprint. Converting it into a 3D view makes it easier to study how an exterior addition connects to interior spaces.
For example, a kitchen expansion may require a new rear elevation, wider patio doors, and a revised deck layout. Looking at the design in 3D helps prevent an outdoor feature from blocking circulation, reducing daylight, or overwhelming the original structure.
Material and Color Testing
Look for tools that allow you to experiment with combinations rather than selecting one isolated finish. The most convincing exterior design decisions consider the relationship between major surfaces, including:
- Roofing and gutters
- Siding, brick, stucco, or stone
- Window frames and trim
- Front doors, garage doors, and shutters
- Decking, railings, and fencing
- Pathways, retaining walls, and landscape edging
Use material previews as a decision-support tool, not as an exact product match. Lighting, screen settings, local climate, and material texture can change the final appearance. Always confirm final selections with physical samples.
High-Resolution 3D Renders
High-resolution 3D renders are valuable when an idea needs to be shared beyond the initial planning stage. They can be included in a contractor brief, homeowner association submission, renovation proposal, or real estate presentation. A clear render also reduces vague feedback such as “make it more modern” by giving everyone a concrete image to discuss.
A Step-by-Step Exterior Design Workflow
The strongest renovation previews begin with organized input. Follow this process to move from a broad idea to a more useful design direction.
- Document the existing property. Take photos from several angles and gather any available floor plans, measurements, property surveys, and elevation drawings.
- Define the goal. Decide whether the priority is curb appeal, weather protection, outdoor living, resale value, accessibility, or a full architectural refresh.
- Choose a design direction. Collect a small number of references that match the home’s shape and era. Avoid mixing too many unrelated styles.
- Create a base visual. Upload a photo or convert a floor plan into a 3D starting point. Check that major walls, windows, doors, labels, and proportions are represented correctly.
- Test large changes first. Start with siding, roof, massing, porch forms, and landscaping zones before adjusting small decorative details.
- Compare two or three options. Create distinct versions rather than making dozens of tiny variations. For instance, compare a traditional update, a transitional look, and a modern refresh.
- Review feasibility. Discuss the preferred concept with qualified local professionals who can assess codes, drainage, structural needs, and product availability.
“A renovation preview is most useful when it answers a specific decision: Which materials fit the home, what should be built first, and how will each change affect the whole exterior?”
How to Design a Cohesive Exterior
A polished exterior is not necessarily the one with the most expensive finishes. It is the one where architectural elements feel connected. Use an exterior design app to assess the composition as a whole rather than focusing only on a single attractive feature.
Start with the home’s architectural character. Traditional homes often suit balanced window trim, classic entry details, and natural materials. Contemporary homes may support stronger geometry, minimal trim, large openings, and restrained color palettes. Transitional designs can blend familiar forms with simplified detailing.
Then create a hierarchy of visual elements. The main body material should occupy the largest area. A secondary material, such as stone veneer or vertical siding, can define the entry or a feature wall. Accent colors should be limited to smaller areas like the front door, shutters, or railings.
Landscaping should reinforce this hierarchy. Large shrubs or small trees can frame the home, while paths should guide visitors naturally toward the entrance. In a renovation preview, check whether plants obscure windows, compete with key architectural features, or appear too small for the facade.
Common Mistakes When Using Exterior Visualization Tools
Even the best exterior design app cannot replace accurate measurements, local expertise, or practical construction planning. Avoid these common mistakes:
- Ignoring proportions: A beautiful porch or awning may look wrong if it is too narrow, too tall, or poorly aligned with windows.
- Using unrealistic materials: Choose finishes that are available, maintainable, and appropriate for the local climate.
- Forgetting the side and rear elevations: A front facade should connect visually with the rest of the property.
- Overdesigning the exterior: Too many colors, textures, and focal points can make a home appear busy rather than updated.
- Treating AI concepts as construction documents: AI room planner and exterior visualization outputs are excellent for ideation, but they are not a substitute for architectural drawings or permits.
Using Exterior Previews to Make Better Renovation Decisions
The biggest advantage of exterior visualization is confidence. When you can compare options before buying materials or hiring labor, you can make choices based on the full picture rather than a single sample or inspiration image.
Create a short decision sheet for each preferred concept. Include the main materials, color palette, intended construction changes, landscape updates, budget range, and questions for your contractor. Pairing visual 3D renders with a simple written brief makes renovation conversations more focused and productive.
For homeowners working from older plans, tools such as Floor Plan to 3D & Home Redesign can provide a practical bridge between black-and-white layouts, home redesign ideas, and shareable visual previews. The goal is not to finalize every detail on a screen; it is to make smarter, more informed exterior decisions before the work begins.
