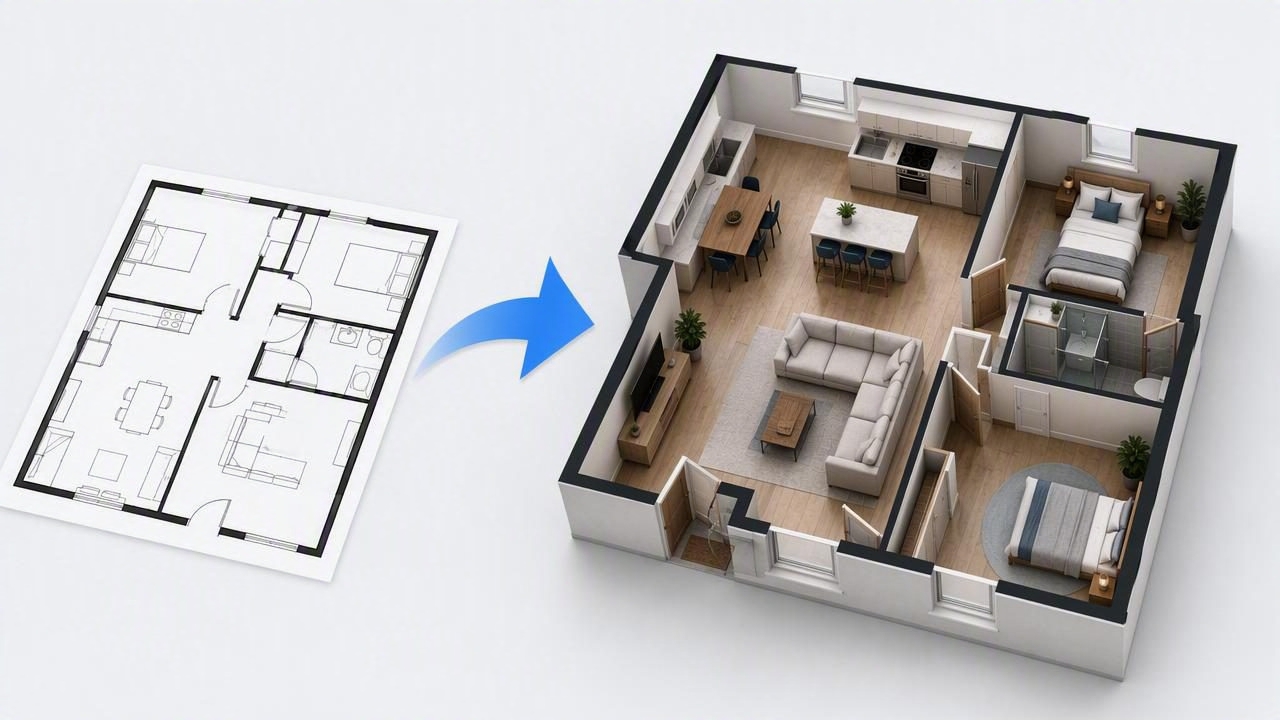
A black-and-white floor plan can communicate a surprising amount of information: room boundaries, doors, windows, dimensions, labels, and circulation paths. However, it can still be difficult to imagine how that flat drawing will feel as a real space. Learning how to turn a black and white floor plan into 3D helps homeowners, property professionals, and interior designers see the layout more clearly before making renovation, furnishing, or staging decisions.
A 3D floor plan conversion does not replace architectural drawings, measurements, permits, or construction advice. It is a visual planning tool. Used carefully, it can make a two-dimensional plan easier to interpret, reveal potential layout concerns early, and provide a stronger starting point for discussing interior design ideas.
Why Convert a Black-and-White Floor Plan to 3D?
Traditional floor plans are efficient technical documents, but they require spatial interpretation. A person looking at a rectangle labeled “Bedroom” must mentally estimate where furniture could go, how wide a walking route may feel, and what the relationship is between that room and the rest of the home.
A 3D render gives those details visual context. Instead of reading symbols alone, you can see walls, openings, room volumes, and a perspective view of the plan. This is particularly helpful when a floor plan is scanned from a printed document, included in a real estate listing, or supplied as an older blueprint.
- Homeowners can compare renovation concepts before committing to finishes or furniture.
- Buyers and renters can better understand an empty property’s potential.
- Interior designers can present an early layout concept in a format clients can interpret quickly.
- Real estate professionals can use visual previews to explain room relationships and possible staging directions.
- Renovation teams can use the visualization as a conversation aid alongside verified plans and site measurements.
What a Good Source Floor Plan Should Include
The quality of a 3D conversion begins with the quality of the source image. A simple hand sketch can be useful for brainstorming, but a clean plan with visible labels and boundaries generally produces a more understandable visual result.
| Source Detail | Why It Matters for a 3D Preview |
|---|---|
| Clear exterior and interior walls | Defines the overall footprint and separates individual rooms. |
| Door swings or opening markers | Helps identify access points and likely furniture-clearance zones. |
| Window locations | Supports a more useful sense of light, wall space, and room orientation. |
| Room labels | Reduces ambiguity between spaces such as a study, bedroom, pantry, or bathroom. |
| Dimensions or scale notes | Provides a reference for reviewing proportions, though it is not a substitute for measured modeling. |
| High contrast and minimal shadows | Makes lines, symbols, and text easier to identify. |
Before starting, crop out unrelated pages, handwritten notes that cover walls, and large borders. If you are photographing a paper plan, take the image directly from above in bright, even light. Avoid angled photos, glare, folded corners, and low-resolution screenshots.
A Practical Workflow for Floor Plan Conversion
The most reliable approach is to treat the 3D image as a draft visual concept that must be checked against the original. The following workflow keeps the process focused on useful decisions rather than decorative details too early.
1. Start With the Most Complete Plan Available
Choose the version that best represents the current layout. If a property has been remodeled since the plan was created, mark known changes before generating a visual. For example, a removed wall, relocated kitchen, or enclosed porch can materially change the interpretation of the space.
If you have multiple levels, work one floor at a time unless your tool specifically supports a clear multi-level input. Separate source images are often easier to review than a crowded plan containing every floor of a building.
2. Identify the Fixed Layout Elements
Before converting anything, make a short list of elements that should remain fixed in the visual preview:
- Exterior walls and room boundaries
- Main entrances and interior door locations
- Windows and major openings
- Stairs, hallways, and circulation routes
- Bathrooms, kitchens, and other service areas
This list is important because floor plan conversion is not only about making an image look attractive. It is about preserving the layout information that makes the image useful. A beautiful render with a missing doorway or an incorrectly placed staircase can lead to poor planning conversations.
3. Create the Initial 3D Layout
Upload or import the black-and-white plan into a suitable floor plan conversion workflow. The initial output should focus on the structure: room locations, walls, openings, and approximate proportions. Resist the urge to judge the result based only on furniture, colors, or lighting at this stage.
Think of this first 3D version as a visual translation. Its job is to help you read the plan more naturally, not to deliver construction-ready documentation.
4. Compare the 3D Preview With the Original Plan
Place the original plan and the generated image side by side. Review them room by room, beginning at the exterior entrance and moving through the home in a logical path. This process catches errors more effectively than scanning the finished image at random.
- Confirm the number of rooms and their general positions.
- Check whether hallways connect the same spaces shown on the source plan.
- Verify that doors appear on the intended walls.
- Look for windows, patios, balconies, staircases, and utility zones.
- Compare room labels and any visible dimensions with the original document.
- Flag anything unclear rather than assuming the 3D interpretation is correct.
Concrete Example: Visualizing a Two-Bedroom Apartment
Imagine a black-and-white apartment plan with a living room at the front, an open kitchen along one side, two bedrooms at the rear, and one bathroom beside a central hallway. The plan includes room labels, several dimensions, door arcs, and three exterior windows.
After the plan is converted into 3D, the first useful check is not whether the sofa looks appealing. Instead, compare the essential layout:
- Does the entry lead into the living area rather than directly into a bedroom?
- Is the kitchen still adjacent to the dining or living zone?
- Does the hallway provide access to both bedrooms and the bathroom?
- Are the rear windows aligned with the bedroom exterior walls?
- Is there enough apparent wall area to consider a bed, desk, or storage concept?
Once the basic arrangement looks consistent, you can test an interior design direction. For instance, a compact dining table may work better near the kitchen, while a slim sofa may preserve a clear route from the entry to the hall. The render does not prove exact furniture clearance, but it can show when an idea appears likely to overcrowd the primary circulation route. You would then confirm actual dimensions on site before buying anything.
How to Use 3D Renders for Better Renovation Previews
Once a layout has been checked, 3D renders can support more focused decisions. Rather than changing everything at once, test one question per concept. This makes it easier to compare alternatives and explain your preference to a partner, client, or contractor.
| Planning Question | Useful 3D Comparison |
|---|---|
| Will the living room feel crowded? | Compare a large sectional with a smaller sofa and two chairs. |
| Where should a home office go? | Test a desk placement in a bedroom corner versus an alcove near the living room. |
| Should a wall be opened up? | Review a conceptual open-plan view alongside the existing room division. |
| Which style suits the space? | Keep the layout fixed while comparing warm wood, contemporary neutral, or transitional finishes. |
| Can an empty room be staged? | Use furnishings to communicate the intended function without changing structural assumptions. |
For exterior refresh projects, the same principle applies. Keep rooflines, doors, windows, and major structural features consistent while exploring paint palettes, landscaping direction, or entryway updates. A visual concept can clarify style preferences, but building rules, product availability, and local approvals still need independent verification.
Common Mistakes to Avoid
Assuming Every Line Is Interpreted Perfectly
Scanned plans can contain faded lines, overlapping text, symbols, and handwritten changes. If an area is unclear, review the source document or obtain a cleaner copy. Never rely on an uncertain visual interpretation for structural work.
Confusing a Render With a Measured Model
A 3D image may preserve the general arrangement and visible proportions of a floor plan, but it is not automatically a CAD or BIM file. It should not be used as engineering documentation, a permit drawing, or a guarantee of construction dimensions.
Adding Furniture Before Checking Movement Paths
Furniture should support how a room is used. Check entrances, door swings, hallways, and access to storage first. Decorative choices become more productive after the functional path through the home is understood.
Using Only One View
An overhead 3D floor plan is useful for spatial relationships, while perspective views are helpful for evaluating visual balance. Review both when possible, especially for narrow rooms, open-plan areas, and spaces with unusual angles.
Important Limitations to Keep in Mind
A 3D floor plan preview is best used to communicate and compare ideas. It is not a substitute for field measurement, professional design documentation, or construction approval.
Before ordering custom cabinetry, starting demolition, moving plumbing, or signing off on a contractor’s scope, verify every critical detail with qualified professionals and current site measurements. Ceiling heights, wall thicknesses, structural supports, utility locations, and local building requirements may not be visible in a black-and-white plan.
It is also wise to distinguish between a visual proportion and an exact dimension. A room may appear large enough for a particular dining table in a render, yet the real clearance could be insufficient once chairs are pulled out. Use the preview to narrow your options, then use reliable measurements to make the final choice.
Choosing an App-Based Conversion Workflow
If you want a fast way to make a visual concept from a plan without learning complex 3D software, an app-based workflow can be practical. Floor Plan to 3D & Home Redesign offers guidance for converting floor plans into 3D-style visuals and using them as a starting point for room planning and renovation previews. Check each generated layout against your source plan, and review subscription details before relying on full functionality.
Final Takeaway
To turn a black and white floor plan into 3D effectively, begin with a clear source image, preserve fixed layout information, and compare the generated preview carefully with the original. Once the room structure is credible, use 3D renders to explore furniture arrangements, interior design styles, empty-room staging, and renovation ideas.
The strongest results come from treating 3D conversion as an informed visual planning step: helpful for understanding possibilities, but always followed by real-world measurement and professional review when decisions affect cost, safety, or construction.
