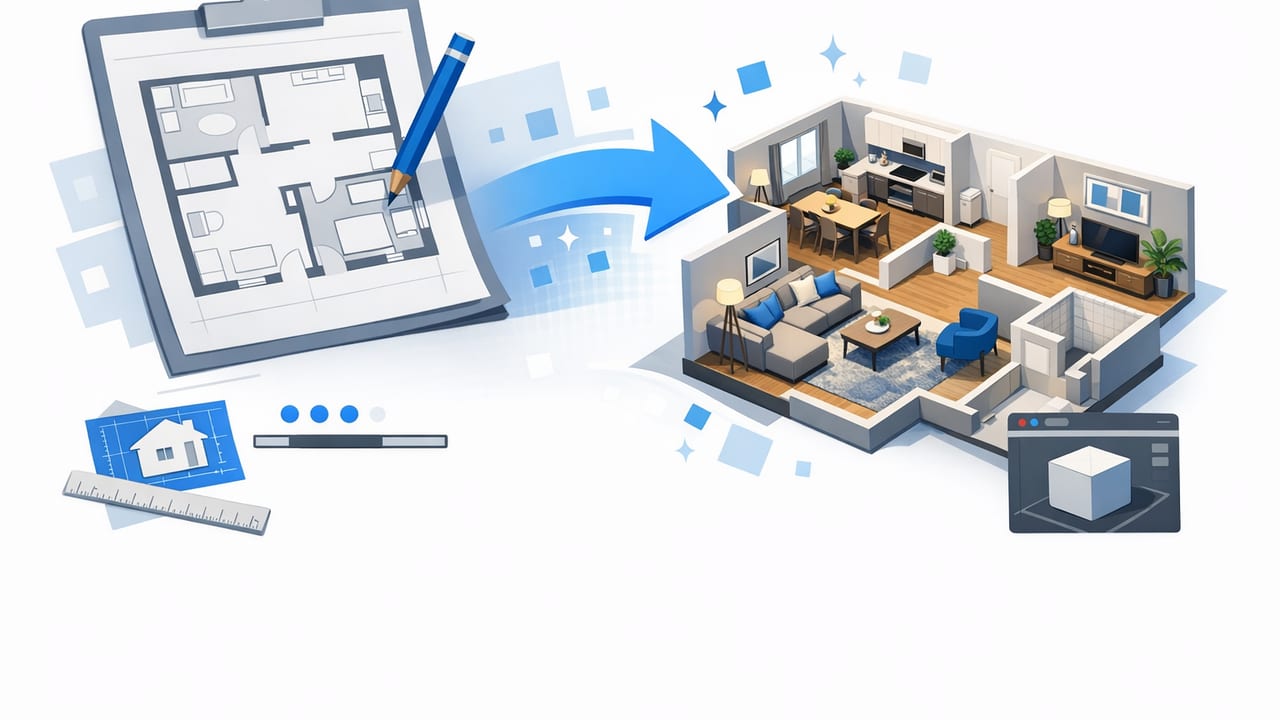
A furnished 3d view based on floor plan is one of the fastest ways to understand how a space will actually feel—before moving a single wall or buying any furniture. Unlike a bare 3D shell, a furnished view answers the questions that matter in real life: Will a sectional block the walkway? Can the dining table extend without colliding with a door swing? Is there enough clearance around the bed for nightstands and drawers?
This guide walks through a practical, repeatable workflow to convert a 2D plan into a furnished 3D view that’s dimensionally reliable, visually readable, and ready for presentations or listings. It’s written for homeowners, agents, students, and designers who want professional-looking results without overcomplicating the process.
What “furnished 3D” really means (and what it doesn’t)
A furnished model is not the same as a photorealistic architectural visualization. Think of it as accurate spatial planning + clear materials + believable furniture. Your goal is decision-making clarity.
- Must-have: correct room sizes, wall thicknesses (if relevant), door/window placement, and furniture at real dimensions.
- Nice-to-have: consistent materials, simple lighting, shadows, and a camera angle that reads well.
- Optional: decor, plants, artwork, and advanced rendering effects.
Start with a clean, legible floor plan input
Your output quality depends heavily on the input plan. Whether you’re working from a PDF, a photo, or a scan, aim for these basics:
Input checklist
- High contrast (walls clearly darker than background).
- Minimal perspective distortion (photograph from directly above if possible).
- At least one known measurement (overall width, a labeled dimension, or a standard door width).
- Doors and windows clearly visible (including swing arcs if present).
Tip: If your plan photo is skewed, straighten it before converting. Small perspective errors can turn into noticeable furniture fit problems later.
Step-by-step workflow: from 2D plan to furnished 3D
The workflow below assumes you’re using a floor-plan-to-3D method (AI-assisted or manual modeling). The steps are tool-agnostic so you can adapt them to your preferred software.
- Calibrate scale using a known dimension.
- Confirm walls and room boundaries.
- Place openings (doors, windows) and verify swings/clearances.
- Set ceiling height and any level changes (if applicable).
- Block in furniture with correct real-world sizes.
- Refine materials (flooring, wall color) for readability.
- Light the scene for clarity (not drama).
- Run accuracy checks and export.
Scale and accuracy: the part most people skip
If you want a furnished 3d view based on floor plan to be trusted, accuracy is non-negotiable. Even if you’re not building from it, a viewer will instinctively notice when furniture feels “off.”
Minimum accuracy checks
- Overall footprint: verify the longest width/length matches the plan.
- Door widths: common interior doors are often around 30–36 inches (76–91 cm), but use what your plan indicates.
- Circulation paths: keep primary walkways roughly 36 inches (90 cm) or more where possible.
- Furniture clearances: allow drawer and door swing space (especially kitchens and bedrooms).
Quick conversion helper (if your plan uses mixed units)
When you need to reconcile inches, feet, and meters, a tiny reference like this helps keep the model consistent:
// Common unit conversions
// inches to meters:
meters = inches * 0.0254

// feet to meters:
meters = feet * 0.3048

// meters to inches:
inches = meters / 0.0254
Furniture blocking: get the layout right before making it pretty
The fastest way to a believable furnished view is to start with simple blocks (rectangles/cuboids) at correct dimensions. Don’t choose a specific sofa model on day one—choose the sofa size class.
Go-to furniture dimensions (use as a starting point)
| Item | Typical Size Range | Planning Note |
|---|---|---|
| Sofa (3-seater) | 78–96 in (198–244 cm) wide | Keep 14–18 in (36–46 cm) to a coffee table |
| Dining table (6) | 60–84 in (152–213 cm) long | Allow ~36 in (90 cm) behind chairs |
| Queen bed | 60 x 80 in (152 x 203 cm) | Plan ~24–30 in (61–76 cm) clearance on sides |
| Kitchen base cabinet run | 24 in (61 cm) deep | Typical aisle 36–48 in (90–122 cm) |
| Desk | 48–72 in (122–183 cm) wide | Chair pullback space matters more than width |
Layout rules that make a furnished model feel “right”
- Anchor zones: define a primary use area per room (conversation zone, dining zone, sleep zone).
- Respect door swings: avoid placing furniture in the arc unless you’re changing the door type.
- Align intentionally: align key pieces (sofa, bed) to walls or windows to reduce visual clutter.
- Keep circulation continuous: avoid dead-end pinch points between furniture and walls.
Materials and color: prioritize readability over realism
In a planning-focused render, materials are visual labels. Use them to separate surfaces and communicate intent.
- Walls: neutral, matte, slightly warm or cool; avoid pure white blowout.
- Floors: a subtle wood or tile texture helps viewers understand orientation and scale.
- Furniture: keep a limited palette (2–4 main tones) so the plan reads clearly.
- Glass: don’t overdo reflections—clarity beats realism in most presentations.
Lighting and camera angles that sell the space (without “over-rendering”)
You can make a furnished model feel professional with simple lighting:
Lighting basics
- One daylight source (sun/sky or an HDRI-like environment) for soft, believable shadows.
- Ambient fill to avoid harsh black corners.
- Room lights only when needed to reveal deep interiors (hallways, windowless baths).
Recommended camera set
- Top-down 3D (axonometric): best for understanding layout and furniture fit.
- Corner wide shot per main room: shows depth; keep verticals straight.
- One hero view: the space’s main selling point (open living/dining, kitchen, primary bedroom).
Rule of thumb: If the camera makes the room look larger but furniture looks distorted, widen less and step back more.
Quality control: a fast pre-export checklist
Before you export images for a client, listing, or remodel plan, run a final QC pass. It prevents the most common “this feels wrong” feedback.
- Walls: no gaps, misaligned corners, or inconsistent thickness.
- Openings: windows not floating; doors not intersecting furniture.
- Furniture scale: beds, sofas, tables match real sizes (not just what looks good).
- Clearances: chairs can pull out; bathrooms have workable spacing.
- Consistency: flooring direction consistent; materials not randomly changing room to room.
Export settings that work for proposals and listings
For most uses, you want exports that are crisp, lightweight, and consistent.
Practical export recommendations
- Resolution: 2000–3500 px on the long edge for web and PDF proposals.
- Format: PNG for clean lines; JPEG for smaller files with photo-like renders.
- Background: neutral (white or very light gray) for easy placement in documents.
- Batch naming: use consistent filenames for faster review and revisions.
# Example naming convention
project_room_view_revision.ext
lakehouse_living_axo_r01.png
lakehouse_kitchen_corner_r01.png
lakehouse_bedroom_hero_r02.jpg
Common pitfalls (and how to avoid them)
- Over-furnishing: too many items makes a room feel smaller; stage like a listing, not a storage unit.
- Ignoring thickness: if your plan implies thick exterior walls, model them—window reveals and room sizes change.
- Mismatched doors/windows: a single misplaced opening breaks trust quickly.
- Unrealistic furniture sizes: a tiny sofa can “solve” fit issues but creates false confidence.
- Lighting extremes: heavy contrast may look artistic but hides layout details.
Choosing a method: manual modeling vs AI-assisted conversion
There’s no single best approach; it depends on your input quality, timeline, and how often you iterate.
| Approach | Pros | Cons | Best For |
|---|---|---|---|
| Manual modeling | Maximum control, precise details | Slow; requires skill | Complex remodels, custom millwork |
| Template-based planners | Easy, quick furniture libraries | May drift from real plan dimensions | Early ideation and mood exploration |
| AI-assisted floor plan to 3D | Fast layout creation; good for iterations | Needs QC; some plans require cleanup | Listings, proposals, rapid space planning |
Putting it all together: a repeatable mini-workflow
If you want a reliable routine for creating a furnished 3d view based on floor plan, use this sequence:
- Import/trace the plan and calibrate scale.
- Build the envelope (walls, ceiling height, openings).
- Block furniture using standard dimensions and clearance rules.
- Refine with a limited palette of materials and simple lighting.
- QC (door swings, walkways, overall dimensions).
- Export axonometric + 1–2 room views + a hero view.
Final note: keep it truthful, not just pretty
The most effective furnished views don’t just look nice—they reduce uncertainty. A viewer should be able to trust that what they’re seeing will fit and function in the real space. If you optimize for accuracy first, your visuals will naturally become more persuasive.
If you prefer doing this on iPhone with an AI-assisted workflow, an app like Floor Plan to 3D can help convert black-and-white 2D plans into a 3D starting point you can furnish, review, and export.
