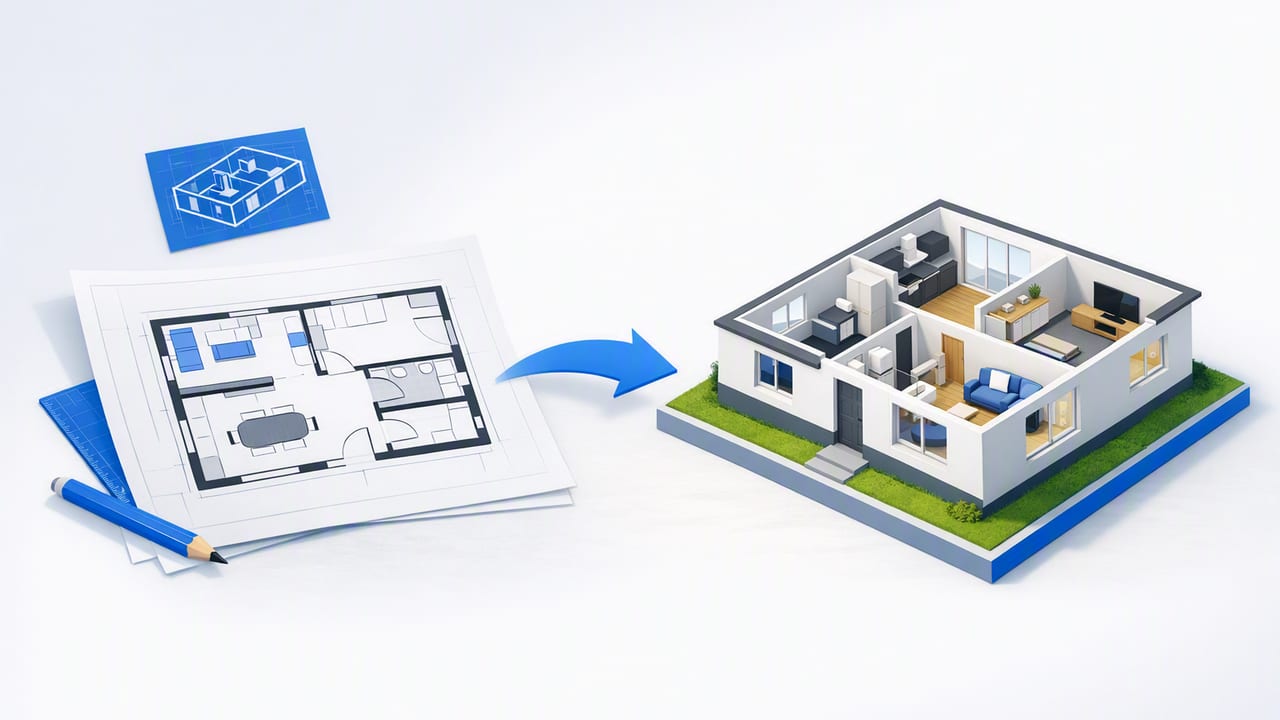
When people search for how to create 3d model from floor plan, they often want the same outcome: a clean, believable 3D view that matches the original layout closely enough to support real decisions (renovation planning, room planning, proposals, or presentations). The problem is that “2D to 3D” can be either fast or accurate—unless you follow a workflow that protects scale, proportions, and key architectural details from the start.
This guide breaks down an accuracy-first process you can use whether you’re working with a scanned blueprint, a PDF floor plan, or a photo of a black-and-white drawing. You’ll learn what data matters, where most conversions go wrong, and how to generate 3D renders that are useful—not just pretty.
What you need before you convert a floor plan to 3D
3D modeling from a floor plan is fundamentally a data translation task. The more clearly your 2D plan communicates scale and intent, the less guessing you’ll do in 3D.
Minimum inputs
- A readable floor plan (PDF, scan, or photo) with clear wall lines and room boundaries.
- At least one known measurement (a dimension string, a labeled wall length, or a scale bar).
- Door and window locations (even approximate, but consistent).
Nice-to-have inputs that improve realism
- Ceiling height (and any dropped ceilings or vaulted sections).
- Window sill/head heights for accurate exterior proportions and daylight behavior.
- Wall thickness (interior vs exterior can differ significantly).
- Photos of key rooms to validate finishes and openings.
Rule of thumb: If your 3D model will support budgeting or construction decisions, prioritize measurable accuracy over decorative detail.
Step-by-step: create a 3D model from a floor plan
The steps below assume a common conversion approach: import the 2D plan as an underlay, calibrate scale, trace/construct the architectural shell, then add openings, heights, and materials before rendering.
1) Clean the floor plan image (so the software reads it correctly)
If you’re using a scan or photo, spend a few minutes on cleanup. It prevents warped geometry and misreads later.
- Crop to the plan boundary and remove margins/legend blocks if they confuse tracing.
- Deskew so horizontal walls are truly horizontal (avoid trapezoid distortion from camera angle).
- Increase contrast for black-and-white line clarity.
- Remove smudges or stray marks that could be mistaken for walls.
2) Calibrate scale using one reliable dimension
Scale calibration is the make-or-break step. If you skip it or use an unreliable measurement, every downstream decision becomes guesswork.
- Pick a dimension that is clearly labeled (e.g., a long exterior wall).
- Set your model’s unit system (feet/inches or metric) before drawing.
- Match the underlay to that known length (most tools offer a “measure then scale” feature).
Tip: After scaling, verify with a second known dimension elsewhere on the plan. If it’s off, your plan image may be stretched or skewed—fix that before modeling.
3) Trace walls with consistent rules (don’t “eyeball” thickness)
Walls aren’t just boundaries; they control room sizes, circulation widths, and furniture fit. Choose a wall strategy and stay consistent.
- Exterior walls: set thickness first (common ranges vary by construction type).
- Interior partitions: use a separate thickness rule.
- Centerline vs face-of-wall: pick one reference method when tracing.
4) Add doors and windows with real-world placement logic
Openings are where conversions often drift. A door moved by even a few inches can break furniture layouts or clearance checks.
- Place doors based on hinge/handing symbols when available.
- Use standard door widths only if the plan doesn’t specify.
- For windows, confirm alignment on exterior elevations if you have them; if not, keep spacing proportional and verify with photos.
5) Enter vertical data: ceiling heights, floor thickness, and roof hints
A floor plan is primarily horizontal information. To produce a trustworthy 3D model, you must define vertical assumptions.
- Ceiling height: apply a default, then override room-by-room as needed.
- Floor build-up: especially important in multi-story stacks.
- Stairs: verify total rise/run if dimensions exist; otherwise use code-typical riser/tread values and adjust.
6) Create rooms/zones (for planning, materials, and AI room planner suggestions)
Defining rooms as named zones helps with material takeoffs, lighting, and redesign iterations. Even if your tool calls them “spaces,” “areas,” or “rooms,” the idea is the same: assign boundaries and labels.
7) Apply materials sparingly—then refine
Start with broad material categories (flooring type, wall paint, countertop material) to get the overall design read. Detailed finishes come later once the layout is validated.
8) Light the scene for truthful scale (not just mood)
Lighting can hide proportion issues. Use lighting to reveal them.
- Enable natural light if windows are set correctly.
- Use neutral white artificial lights for clarity in early previews.
- Avoid extreme wide-angle camera views that distort room sizes.
9) Export with the right deliverable in mind
A renovation preview needs different outputs than a listing or a design board. Decide first, then export.
- For decision-making: orthographic views, dimension overlays, clear room labels.
- For presentation: high-resolution 3D renders, consistent camera heights, and a small set of “hero” angles.
Accuracy checklist: the conversion points that most often fail
Use this quick checklist to catch problems early—before you invest time in décor and styling.
- Scale verified twice: two distant dimensions match within tolerance.
- Wall thickness consistent: interior vs exterior rules applied correctly.
- Door swings make sense: doors don’t collide with fixtures or furniture.
- Window head heights plausible: daylight looks believable and exterior proportions feel right.
- Circulation works: hall widths and clearances are realistic for the home type.
Table: what to prioritize depending on your goal
| Goal | Must-be-accurate | Can-be-approximate |
|---|---|---|
| Renovation planning | Scale, wall positions, openings, ceiling heights, stairs | Decor, small fixtures, textures |
| Interior redesign previews | Room boundaries, windows, main furniture sizes | Minor wall thickness variations, hardware |
| Exterior refresh concepts | Window/door placement, roof massing assumptions, facade proportions | Exact material brands, landscaping species |
| Empty-room staging | Room dimensions, camera height, realistic furniture scale | Precise outlet placement, trim profiles |
Common mistakes when you create a 3D model from a floor plan
Mistake 1: Trusting a distorted photo
Phone photos often introduce perspective warp. If walls “almost” line up, your model will drift. Fix distortion (deskew) or use a scan whenever possible.
Mistake 2: Ignoring plan conventions
Some plans show wall centerlines; others show finished faces. Some include cabinetry outlines that look like walls at a glance. Learn the plan’s visual language before tracing.
Mistake 3: Over-detailing before validation
It’s tempting to jump into materials and furniture. Validate geometry first: room sizes, door clearances, and window alignment. Then style.
Mistake 4: Using unrealistic camera settings
Very wide field-of-view settings make spaces look larger than they are. If the 3D is meant to support decisions, keep camera height and lens settings closer to how humans perceive rooms.
A practical “room data” structure (optional but helpful)
If you collaborate with others—or you’re moving between an AI room planner and a 3D renderer—standardizing room names and key attributes helps prevent mismatches.
{
  "rooms": [
    {
      "name": "Kitchen",
      "area_sqft": 165,
      "ceiling_height_ft": 9,
      "flooring": "wood",
      "notes": "Keep island clearance 42in; align pendants over island"
    },
    {
      "name": "Primary Bedroom",
      "area_sqft": 190,
      "ceiling_height_ft": 9,
      "flooring": "carpet",
      "notes": "King bed + 2 nightstands; blackout shades"
    }
  ]
}
This isn’t required, but it’s a simple way to keep redesign iterations consistent, especially when you generate multiple concepts.
FAQ
Do I need dimensions on the floor plan to convert it to 3D?
You can build a 3D model with only one known measurement (to set scale), but the more dimensions you have, the fewer assumptions you’ll need. If no dimensions exist, you’ll need a real-world reference (like a known door width) and you should treat outputs as conceptual.
How accurate can a floor plan to 3D conversion be?
With a clean, properly scaled plan and consistent rules for walls/openings, you can reach decision-grade accuracy for many redesign and renovation preview tasks. The limiting factors are usually missing vertical data (ceiling heights, window heads) and distortions in the source image.
What’s the fastest way to validate my 3D model?
Check three things: (1) overall exterior footprint dimensions, (2) two or three key room sizes, and (3) door/window spacing on major elevations. If those match, the model is usually reliable enough to start design iterations.
Closing thoughts
To create 3d model from floor plan successfully, treat the floor plan like a dataset: calibrate scale, follow consistent tracing rules, define vertical assumptions, and validate early before you style. That approach produces 3D renders you can actually use for room planning, renovation previews, and clearer communication with contractors or stakeholders.
If you prefer doing this on an iPhone with an AI-guided workflow, an app like Floor Plan to 3D & Home Redesign can help turn a black-and-white plan into clean 3D renders while keeping key layout details intact.
