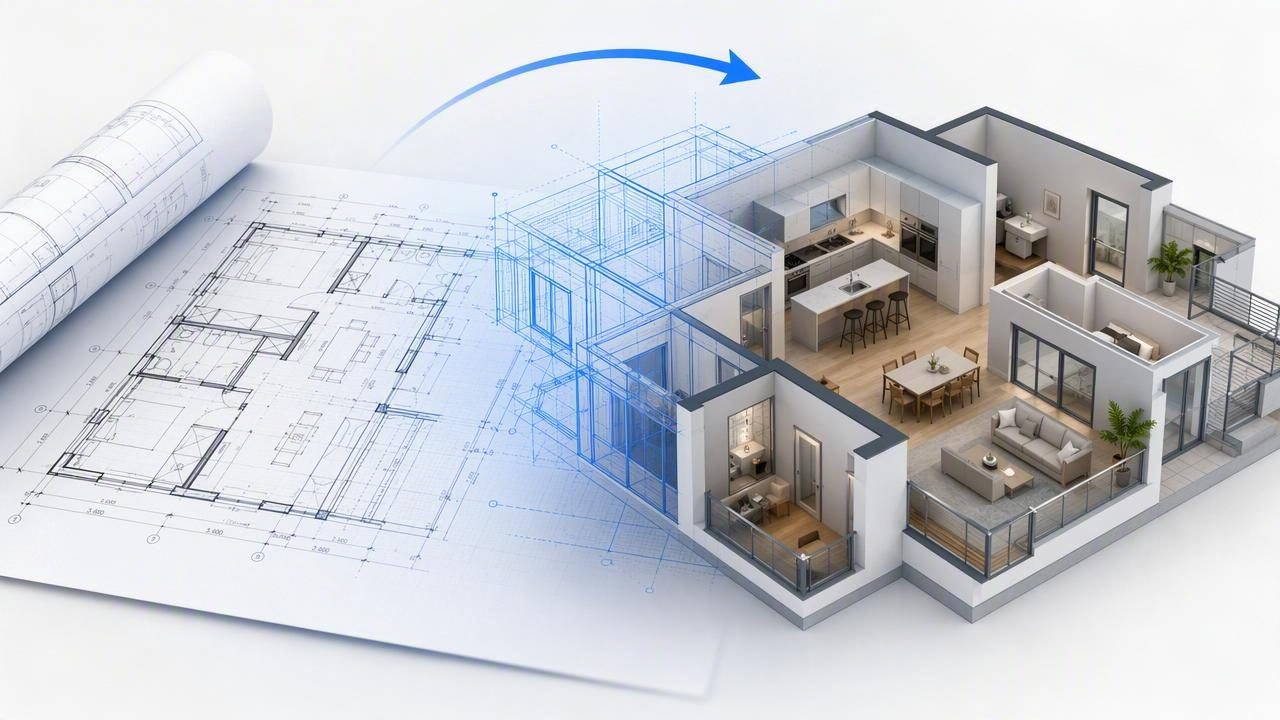
Learning how to create a 3D model from a blueprint can make an abstract drawing far easier to understand. A black-and-white plan may communicate room boundaries, wall locations, dimensions, doors, and windows, but it does not always help a homeowner, client, or contractor visualize how the space will feel once furnished and finished.
A 3D floor plan conversion turns those flat details into a visual concept. It can help you explore room flow, identify awkward furniture clearances, compare renovation ideas, and explain a design direction before work begins. The key is to treat the result as a planning and communication tool—not as a replacement for verified construction documents.
This guide explains a practical, room-by-room process for converting a blueprint into a useful 3D model, including what to prepare, what to check in the render, and where visual planning has limits.
Why Convert a Blueprint Into a 3D Model?
Blueprints are designed to convey technical information efficiently. They are excellent for showing layout relationships, but interpreting them takes practice. A 3D render gives the same plan a more immediate, human-scale perspective.
For example, a homeowner considering a kitchen renovation may understand that a plan includes an island, pantry, and dining area. A 3D concept can reveal whether the island appears too dominant, whether the dining zone feels crowded, or whether sightlines from the entry create the desired first impression.
Creating a 3D model from a blueprint is especially useful when you need to:
- Preview room proportions and circulation paths.
- Compare possible furniture arrangements before purchasing items.
- Communicate a design idea to family members, clients, or tradespeople.
- Explore interior finishes, color directions, and staging concepts.
- Present an exterior refresh alongside a planned interior update.
- Spot questions that should be clarified with a qualified designer, architect, or contractor.
The goal is not to produce a legally authoritative model. The goal is to make a plan easier to review and discuss.
What You Need Before Starting a Floor Plan Conversion
The source blueprint has a major effect on the usefulness of the 3D output. Start with the clearest version available, whether it is a scanned paper plan, a PDF export, or a clean photograph of a printed drawing.
Use a readable source image
Choose an image where wall lines are sharp and labels are legible. Avoid photos with heavy shadows, folded corners, glare, cropped dimensions, or handwriting over important symbols. If your plan has several pages, identify the specific level you want to convert first, such as the ground floor or upper floor.
Keep key reference details visible
When possible, retain the details that help establish the layout:
- Room names and approximate dimensions.
- Exterior and interior wall locations.
- Door swings and window placements.
- Stairs, hallways, closets, and utility areas.
- Fixed fixtures, including kitchen counters, toilets, showers, and sinks.
- Notes about ceiling changes, decks, garages, or exterior openings.
If the original plan is incomplete, write down what is missing before you begin. That way, you can avoid assuming that a blank area is an open room, storage space, or structural wall.
A Practical Workflow to Create a 3D Model From a Blueprint
A reliable workflow starts with layout accuracy and adds visual details afterward. It is tempting to begin with paint colors or furniture, but the room shell should be reviewed first.
1. Identify the scope of the model
Decide what you want the render to answer. Are you reviewing a full-home layout, a proposed kitchen extension, a bedroom redesign, or an empty living room? A focused question produces a more useful concept.
For instance, the scope might be: “Show how an open-plan kitchen, dining, and living area could function after removing a non-structural partition.” This is more actionable than simply requesting a stylish 3D image.
2. Convert the plan into a base layout
Use your chosen floor plan conversion method to generate the initial 3D view. At this stage, focus on the plan geometry represented in the image: the overall room arrangement, openings, major divisions, and the relationship between connected spaces.
Do not assume every output is correct automatically. A blueprint may contain symbols, partial labels, or line weights that can be interpreted incorrectly. Review the base model against the source drawing before moving to design choices.
3. Check the building envelope and circulation
Look at the perimeter walls first, then work inward. Confirm that the exterior shape resembles the blueprint and that major rooms connect in the expected order. Next, trace a realistic route through the home: entry to living room, kitchen to dining space, bedroom to bathroom, and hallway to storage.
Ask practical questions:
- Does each door appear in the correct wall?
- Are windows located on the correct side of the room?
- Does the hall connect to the intended rooms?
- Is the staircase in the right location and direction?
- Are closets, bathrooms, and utility spaces separated appropriately?
These checks matter more than decorative decisions because a visually appealing render with an incorrect layout can lead to misleading conversations.
4. Add room purpose and furniture zones
Once the layout is credible, define how each room will be used. A 3D concept should show zones rather than simply filling every open area with furniture. In a living room, for example, the seating group may need to support conversation, TV viewing, a fireplace focal point, or access to a patio door.
In an open-plan room, use furniture placement to clarify boundaries. A sofa can define the lounge zone, a rug can visually anchor it, and a dining table can establish separation from the kitchen without requiring new walls.
5. Explore finishes only after the layout review
Materials, lighting, cabinetry, and color palettes are valuable for communicating style. However, they should come after you have confirmed the model’s room arrangement. Test a limited number of coherent directions rather than mixing unrelated trends in one image.
For a calm contemporary interior, you might compare warm oak cabinetry, off-white walls, matte black hardware, and neutral upholstery. For an exterior refresh, compare siding color, trim contrast, front-door color, landscaping structure, and porch lighting as one coordinated package.
Concrete Example: Converting a Two-Bedroom Blueprint
Imagine a two-bedroom apartment blueprint with a narrow entry hall, an open living-dining room, a galley kitchen, one bathroom, and a small balcony. The plan lists room dimensions and shows a sliding door to the balcony, but the owner cannot tell whether a sectional sofa will make the main room feel too cramped.
First, create the base 3D layout and compare the following items with the blueprint: the entry location, kitchen wall, bathroom door, bedroom doors, balcony opening, and room labels. Next, place a compact sofa along the longest uninterrupted wall, leave a walking route from the hall to the balcony door, and use a small round dining table near the kitchen.
The resulting visual may reveal that a large chaise sectional blocks the natural path to the balcony. A smaller sofa with an accent chair could preserve movement and make the room appear more balanced. That conclusion is useful even if the final furniture dimensions still need to be measured on site.
How to Verify a 3D Render Against the Blueprint
A good review process prevents a render from becoming a polished but inaccurate illustration. Use the original drawing beside the generated view and work through a simple checklist.
| Blueprint Detail | What to Check in the 3D View | Why It Matters |
|---|---|---|
| Room labels | Each space has the intended function. | Prevents rooms from being interpreted incorrectly. |
| Wall positions | Major partitions and exterior edges match. | Defines room size and circulation. |
| Doors and windows | Openings appear on the intended walls. | Affects access, daylight, and furniture placement. |
| Dimensions | Relative proportions seem consistent with the plan. | Helps identify obvious scale issues. |
| Fixed fixtures | Kitchen and bathroom elements remain in expected zones. | Supports realistic renovation discussions. |
If something looks wrong, return to the source image rather than trying to justify the output. A missing window or shifted doorway can completely change the design solution for a room.
Important Limits of Blueprint-to-3D Visuals
3D renders are powerful communication aids, but they are not measured CAD or BIM models. They should not be used as engineering approvals, permit documents, structural calculations, or guaranteed construction dimensions.
Blueprint scans can also omit information that affects a build, including wall composition, beam locations, electrical routing, plumbing constraints, ceiling heights, site conditions, and local code requirements. Even when dimensions are visible, confirm critical measurements in the field and consult appropriate licensed professionals before construction.
Use the render to ask better questions—not to replace professional verification.
For example, a 3D kitchen preview can help you compare cabinet styles and island placement. It cannot confirm that a wall is safe to remove, that appliances have required clearances, or that a proposed change meets local regulations.
Tips for Better Renovation Previews
- Start with one floor: Reviewing a single level reduces confusion and makes errors easier to spot.
- Use consistent reference points: Compare doors, windows, and major walls before evaluating decor.
- Test alternatives with a purpose: Compare two furniture plans or two finish palettes that solve the same problem.
- Preserve an uncluttered layout: Too many decorative objects can hide circulation and proportion issues.
- Share visuals with context: Include the original blueprint and note which parts are concepts requiring verification.
Turn a Flat Plan Into a Clearer Design Conversation
When you create a 3D model from a blueprint, the best outcome is clarity. You can see the relationship between rooms, test a furnishing idea, and communicate a renovation direction before committing to expensive decisions. Always compare the visual back to the original plan and confirm important details with qualified professionals.
For homeowners and design professionals who want an accessible visual starting point, Floor Plan to 3D & Home Redesign’s guide to floor plan conversion explains how a plan can be turned into a 3D concept for layout review and presentation. Review available subscription functionality before relying on an app for a project workflow.
