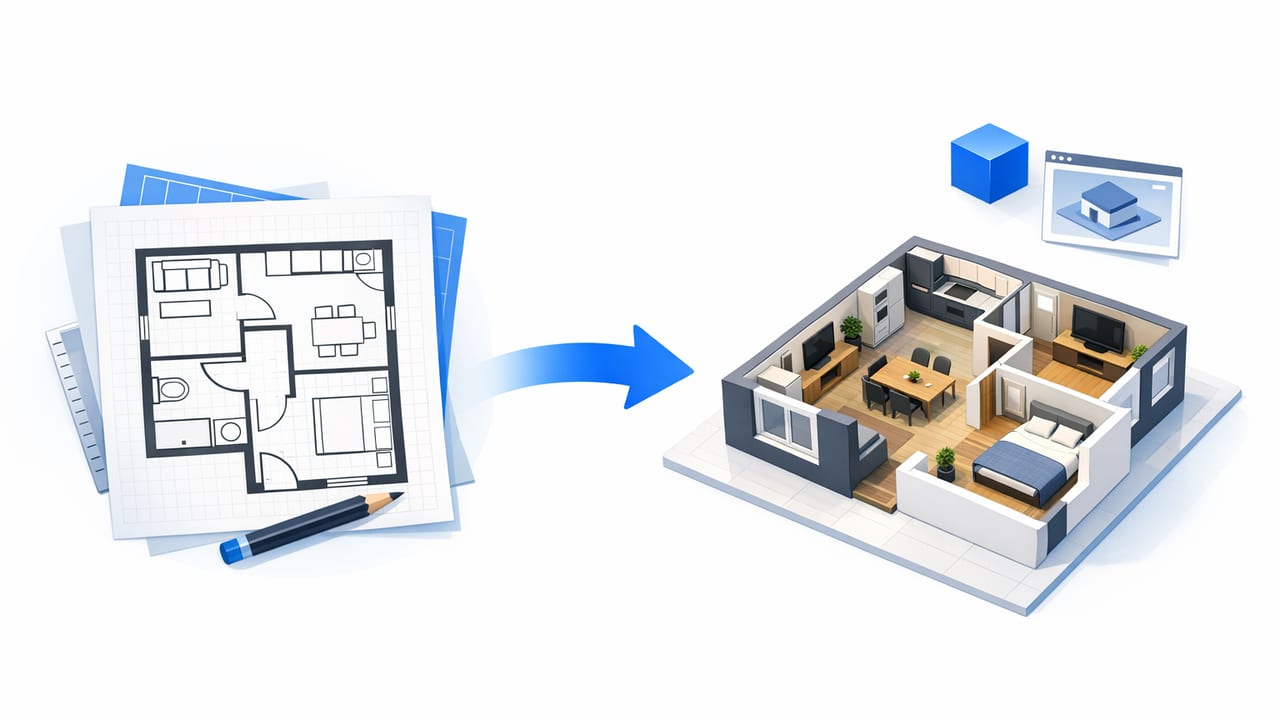
When you convert floor plan to 3d, you’re not just making a nicer picture—you’re creating a decision tool. A good 3D model helps you test renovation ideas, verify furniture fit, and communicate layout changes clearly to contractors, clients, or family members. A bad 3D model, on the other hand, can hide mistakes until they become expensive (think: a doorway that swings into a cabinet, or a “spacious” living room that’s actually too tight for a sectional).
This guide focuses on an accuracy-first workflow: how to prepare your floor plan, what to check during conversion, and how to use the 3D output for smarter interior design and renovation previews.
What “convert floor plan to 3D” really means
At minimum, converting a plan to 3D involves:
- Interpreting 2D geometry (walls, openings, room boundaries)
- Preserving scale (dimensions and proportions)
- Assigning vertical information (wall height, ceiling type, stairs)
- Adding context (materials, lighting, furniture for planning)
The biggest difference between a “pretty” render and a useful one is whether the model matches reality. That means keeping the plan’s labels and dimensions consistent, and making assumptions explicit (e.g., ceiling height set to 2.6 m or 8'6").
Choose your starting input: blueprint, scan, or digital plan
Your input quality determines how smooth the conversion will be. Here are the common sources and how to prepare them.
1) PDF floor plans (best for accuracy)
If your plan is a vector PDF (lines and text, not a photo), it typically produces the cleanest conversion because walls and dimensions are crisp.
- Export at high resolution if the tool requires a raster image (e.g., 300 DPI).
- Prefer a page where the dimension strings are visible.
2) Phone photos or scans (common, but needs cleanup)
Photos introduce perspective distortion. Before you convert floor plan to 3d, do these quick fixes:
- Capture from directly above, in bright, even light.
- Crop to the plan boundary; remove desk edges and shadows.
- If possible, use a scan mode that auto-flattens perspective.
3) Real estate listing plans (use with caution)
Marketing plans sometimes “approximate” room sizes. If you’re planning a remodel, validate at least one key dimension (e.g., overall width) with a tape measure or existing survey.
An accuracy-first 6-step workflow to convert a floor plan to 3D
Step 1: Identify a known measurement for scale
Before generating 3D, pick a single trustworthy reference:
- Overall exterior width/length
- A clearly labeled wall segment
- Standard door width (only as a last resort)
Why it matters: one wrong scale setting can make every furniture and clearance decision wrong.
Step 2: Confirm wall thickness assumptions
Many conversion tools infer wall thickness. If your plan doesn’t specify it, choose a sensible default:
- Interior partitions: often 100–150 mm (4–6 in)
- Exterior walls: often thicker due to structure/insulation
If you’re redesigning a tight bathroom or kitchen, wall thickness can materially change cabinet runs and clearances.
Step 3: Validate doors, windows, and openings
Auto-detection can misread symbols—especially sliding doors, pocket doors, or double windows. In 3D, verify:
- Door swing direction and hinge side
- Window placement relative to corners
- Openings that affect furniture placement (e.g., wide cased openings)
Step 4: Set vertical parameters early (height, ceilings, stairs)
Even a perfect 2D plan needs 3D assumptions:
- Wall height (common default, then adjust)
- Ceiling type (flat, vaulted, soffits)
- Stair rise/run if applicable
Tip: If you’re creating renovation previews, save multiple versions (e.g., “Existing” vs “Proposed”) with different ceiling or opening configurations.
Step 5: Use an AI room planner for layout options—then reality-check
AI room planner suggestions are most helpful after you have a scaled shell. Use AI to explore:
- Alternate furniture layouts
- Storage ideas (built-ins, wardrobes, pantry walls)
- Traffic-flow improvements (wider paths, fewer pinch points)
Then verify with basic clearance rules (examples):
- Keep major walkways comfortable (often ~900 mm / 36 in as a baseline).
- Ensure door swings don’t collide with furniture or each other.
- For dining, confirm chair pull-back space behind seats.
Step 6: Render with purpose (materials and lighting that communicate)
For renovation decisions, you don’t need cinematic realism—you need clarity. Choose:
- Simple, consistent materials to compare options
- Daylight lighting for accurate color perception
- Multiple camera angles that show constraints (tight corners, doorways)
Quality checklist: how to know your 3D model matches the plan
| Check | What to look for | Why it matters |
|---|---|---|
| Overall footprint | Exterior dimensions match the plan | Prevents compounding scale errors |
| Room labels | Kitchen/bed/bath areas align with plan text | Avoids swapped spaces after auto-detection |
| Openings | Door swings, window widths, sliding tracks | Critical for furniture, cabinetry, and circulation |
| Wall thickness | Interior vs exterior thickness feels plausible | Affects net usable area and cabinet runs |
| Proportions | Rooms “feel” correct compared to listed sizes | Catches subtle distortion from photos/scans |
| Vertical assumptions | Wall height/ceilings set and consistent | Prevents misleading volume and lighting |
Common mistakes when converting floor plans to 3D (and how to avoid them)
Mistake 1: Trusting auto-detection without a scale anchor
Even great tools can’t guess scale reliably if the image is distorted or dimensions are missing. Always set or confirm one known measurement before committing to design decisions.
Mistake 2: Ignoring “small” details that drive usability
A few inches can change everything in kitchens, bathrooms, and hallways. Pay attention to:
- Door casing and swing clearances
- Appliance depth and opening arcs
- Radiators, columns, or structural chases
Mistake 3: Mixing design inspiration with dimensional reality
It’s tempting to apply a look (arched doorway, oversized island, deep sofa) before confirming it fits. Use a two-layer approach:
- Layer 1: correct layout and circulation
- Layer 2: finishes, decor, and style
Manual vs app-based vs outsourced: which conversion method is right?
| Method | Best for | Trade-offs |
|---|---|---|
| Manual CAD/3D software | Full control, complex architecture | Steep learning curve; time-intensive |
| Floor plan conversion apps | Fast renovation previews, easy sharing | May require verification and edits |
| Outsourced modeling service | High polish for listings/proposals | Cost and turnaround time; revisions can add friction |
If your goal is to explore multiple remodel options quickly, app-based conversion paired with an AI room planner often provides the best speed-to-clarity—especially for early-stage decisions.
A simple “scale verification” snippet (optional but useful)
If you’re working with image-based plans and want a repeatable way to sanity-check scale, you can use a quick pixel-to-length calculation once you know one reference length. This is not a full measurement tool—just a consistency check.
// Given: a known wall length (e.g., 4000 mm) and its pixel length in the image
const knownLengthMm = 4000;
const knownLengthPx = 860;

// mm per pixel
const mmPerPx = knownLengthMm / knownLengthPx;

// Estimate another segment measured in pixels
const otherSegmentPx = 430;
const otherSegmentMm = otherSegmentPx * mmPerPx;

console.log({ mmPerPx, otherSegmentMm });
If the estimated segment doesn’t match the plan’s printed dimension (within a reasonable tolerance), your scan likely has distortion or your pixel measurements are off—fix that before you convert floor plan to 3d and start designing.
Using 3D renders to make renovation decisions faster
Once your 3D model is accurate, your renders become a practical decision system. A few high-impact uses:
- Compare layout options: open vs partially open kitchen, island orientations, entry storage placements.
- Test “before/after”: keep an “Existing” version and duplicate it into “Option A/B/C.”
- Communicate scope: show what changes (walls removed, new windows) and what stays.
- Plan exteriors: preview siding color, trim contrast, and entry updates with consistent camera angles.
The best 3D render is the one that prevents a misunderstanding.
FAQ: converting floor plans to 3D
Do I need dimensions on the plan to get an accurate 3D model?
Dimensions are strongly recommended. If none exist, you can still build a model, but you should confirm at least one real measurement on-site (overall width, a key wall, etc.).
What should I prioritize: realism or accuracy?
Accuracy first. You can always improve materials and lighting later. A realistic render of an incorrect layout is worse than a simple render of a correct one.
Can I use 3D conversion for empty-room staging?
Yes. Accurate room proportions make virtual staging believable and help avoid furniture that looks great but wouldn’t fit in real life.
Final takeaway: accuracy unlocks creativity
When you convert floor plan to 3d with a reliable scale, verified openings, and clear assumptions about height and structure, you get more than visuals—you get confidence. That confidence is what lets you explore bolder interior design ideas, compare renovation previews side by side, and share plans that others can understand immediately.
If you’re looking for a lightweight way to turn a black-and-white plan into clean 3D renders while keeping key layout details intact, an iOS tool like Floor Plan to 3D & Home Redesign can be a practical option to test concepts quickly without heavy 3D software.
