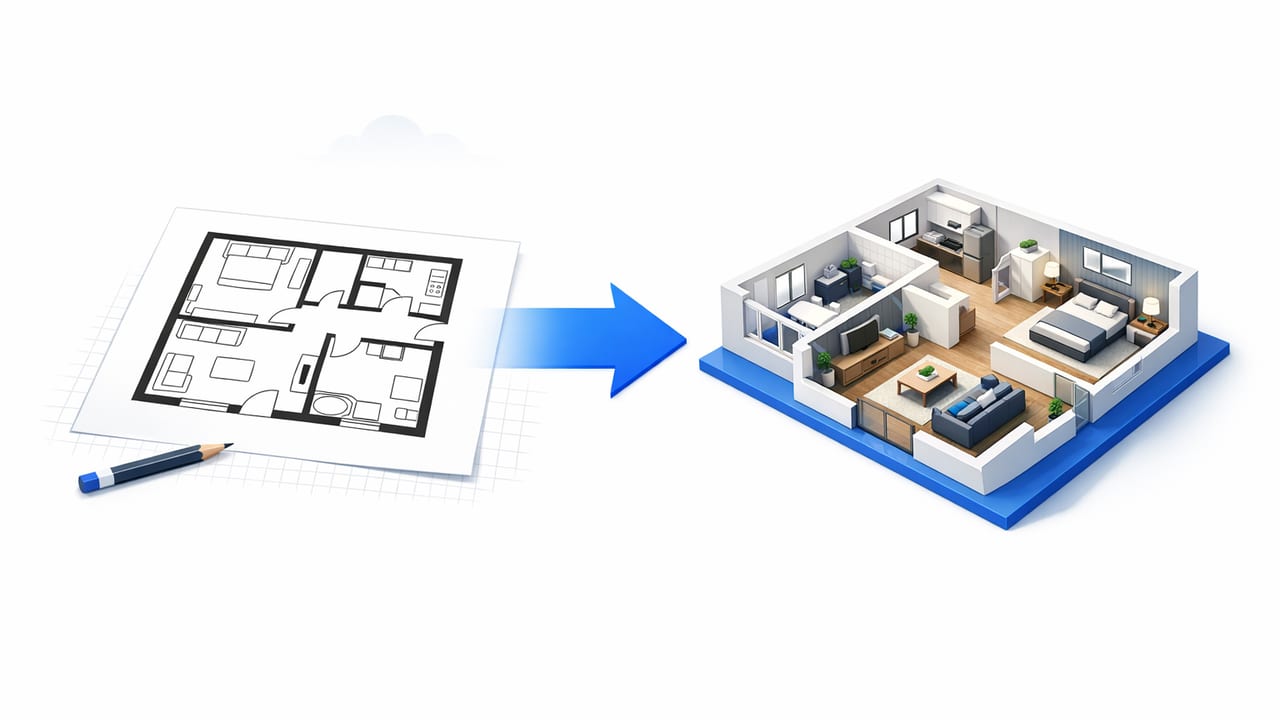
Black-and-white floor plans are everywhere: PDF listings, scanned blueprints, permit drawings, and old paper sketches pulled from a folder. They’re quick to share, but not quick to visualize. If you want to test renovations, furniture layouts, or staging concepts, you’ll eventually need depth, height, and materials—meaning you’ll want to convert black and white floor plan to 3d without losing the original proportions and key notes.
This guide walks through a practical, accuracy-first workflow. You’ll learn how to prep your plan, convert it into a clean 3D model, validate dimensions, and use an AI room planner style process to explore redesign options—without “guessing” your way into costly mistakes.
Why black-and-white plans are harder than they look
A floor plan seems simple: lines for walls, arcs for doors, symbols for fixtures. But conversion tools (and humans) can misread common details, especially on older or low-quality scans. Typical issues include:
- Broken or faint wall lines that become gaps in the 3D model.
- Thick line weights that cause walls to be detected too wide.
- Skewed photos (taken at an angle) that distort proportions.
- Overlapping annotations (dimensions, notes, hatching) that confuse wall/door detection.
- Mixed scales when a plan includes enlarged detail callouts on the same sheet.
The good news: you can prevent most of these problems with a short prep routine and a simple verification checklist.
Before you convert: prep your plan for high-accuracy results
Whether you’re using a conversion app, a desktop tool, or a hybrid workflow, input quality determines output quality. Use the following steps to maximize clean wall detection and preserve dimensions.
1) Start with the best source (PDF > scan > photo)
- Best: Original vector PDF (lines are crisp; scaling is reliable).
- Good: Flatbed scan at 300–600 DPI.
- Okay: Phone photo, but only if you correct perspective and lighting.
2) Clean up contrast and straighten the page
If you’re working from an image, edit it quickly:
- Increase contrast so walls are clearly darker than background.
- Remove shadows and glare (especially near corners).
- Deskew/straighten so horizontal and vertical lines are true.
- Crop to the plan area; remove title blocks if they clutter the drawing.
3) Identify the “ground truth” measurement
Every 3D conversion needs at least one reliable reference dimension. Pick one that’s clear and unlikely to be rounded:
- Overall exterior width/length
- A labeled room dimension (e.g., 12'–6")
- A standard opening size only if explicitly labeled (don’t assume)
Rule of thumb: If you can’t confidently anchor scale, you can still build a 3D concept model—but you shouldn’t treat it as renovation-accurate.
A step-by-step workflow to convert a black-and-white floor plan to 3D
Below is an accuracy-first process that works whether you’re using an AI-powered converter, a 3D floor plan app, or manual modeling with automation.
Step 1: Import and set scale
Import your plan and immediately set a scale using your “ground truth” measurement. If the tool allows, lock the scale so subsequent edits don’t drift.
Quality check: Measure at least two other known spans (e.g., another room width, hallway length) to confirm the scale is consistent across the page.
Step 2: Detect and confirm walls
Most converters detect walls as continuous line segments. After automatic detection (or after you trace), do a quick pass for:
- Wall continuity: no gaps at corners or T-junctions
- Consistent thickness: interior vs. exterior walls differ as expected
- Alignment: parallel walls stay parallel (no subtle warping)
If your plan uses heavy line weights, you may need to choose “centerline” tracing or reduce wall thickness during interpretation.
Step 3: Add doors, windows, and openings (don’t guess)
Doors and windows drive how a space feels in 3D—light, flow, furniture placement. Use the plan symbols, but avoid assumptions:
- If a window size isn’t labeled, place it proportionally, then flag it as “to verify.”
- Confirm door swings match real circulation; flipped swings can break layouts.
- For cased openings, define the opening width clearly to avoid “phantom walls.”
Step 4: Set room heights and levels
A 2D plan rarely communicates ceiling height, soffits, or split levels clearly. To keep your 3D model believable:
- Start with a default ceiling height (then adjust if notes specify).
- Mark level changes (steps down, sunken living rooms) if shown.
- Don’t over-detail at first—get massing right, then refine.
Step 5: Assign basic materials for readability
You don’t need photorealism to make better decisions. Apply simple materials to clarify surfaces:
- Wall paint (light neutral)
- Floor type per room (wood/tile/carpet)
- Countertop + cabinetry blocks in kitchens
This creates a clean 3D render that communicates space and function—perfect for early renovation previews and stakeholder alignment.
Step 6: Generate 3D views and iterate room by room
Switch to 3D and do a “walkthrough audit.” Your goal is to catch issues that are hard to see in 2D:
- Are any walls accidentally doubled or missing?
- Do doors collide with fixtures or furniture zones?
- Do window placements make sense with exterior walls?
- Do room proportions feel consistent with labeled dimensions?
Accuracy checklist (use this before sharing a 3D render)
If you’re exporting images for a proposal, a client presentation, or internal review, run this quick checklist:
- Scale anchored: at least 1–3 key dimensions verified
- Wall graph clean: no gaps, overlaps, or micro-walls
- Openings logical: doors/windows aligned to walls; swings reasonable
- Labels preserved: room names match plan (Kitchen, Bedroom 2, etc.)
- Proportions consistent: hallways not too narrow; bathrooms not oversized
- Export readable: camera height, wide-angle distortion controlled
Methods compared: manual modeling vs. AI conversion
There’s no single “best” method—only the best fit for your timeline and accuracy needs. Here’s a practical comparison.
| Method | Best for | Pros | Watch-outs |
|---|---|---|---|
| Manual CAD/3D modeling | Construction-level control | Maximum precision; custom details | Slow; steep learning curve |
| Hybrid (auto-detect + manual cleanup) | Renovation planning and proposals | Fast setup; accuracy where it matters | Still requires verification and edits |
| AI floor plan conversion | Quick 3D previews and iterations | Very fast; great for exploring options | Needs good input images; can misread clutter |
Using an AI room planner workflow after conversion
Once you have a faithful 3D shell, you can use an AI room planner approach to explore layouts and redesign directions—without committing to a single idea too early.
Start with constraints, not aesthetics
- Keep plumbing walls fixed for bathrooms/kitchens (unless you’re budgeting reroutes).
- Preserve required clearances (hallways, door clearances, appliance spacing).
- Respect window/door placements before moving furniture.
Then test 2–3 layout options per room
For each key room (kitchen, primary bedroom, living room), produce variations:
- Baseline: current layout in 3D (your control)
- Optimized circulation: improved walk paths and functional zones
- Value add: a bolder option (island, built-ins, opening a wall)
Finish with “decision renders”
Export a small set of high-clarity images that help decisions happen:
- One top-down 3D view per floor
- Two eye-level views per key room
- One comparison pair (Option A vs. Option B)
Common conversion problems (and how to fix them)
Problem: Walls are jagged or broken
Cause: low resolution, faint lines, or noisy scans.
Fix: re-scan at higher DPI; boost contrast; manually bridge gaps before 3D generation.
Problem: The model is scaled wrong
Cause: missing reference dimension or incorrect unit interpretation.
Fix: re-apply scale using a clear overall dimension; verify at least two additional spans.
Problem: Doors/windows appear on the wrong wall
Cause: symbol confusion (especially with mirrored plans) or heavy annotations.
Fix: isolate the plan layer (crop out notes); manually confirm each opening against the 2D drawing.
Problem: Room labels disappear in 3D
Cause: some workflows treat labels as “noise.”
Fix: preserve a labeled 2D sheet for reference and reapply room names in the 3D project for clarity.
A lightweight naming + measurement system (helps teams collaborate)
If you’re sharing files with contractors, designers, or clients, consistency prevents confusion. Here’s a simple format you can copy:
ProjectName_Floor-Level_Room_View_Option
Example:
OakSt_Level1_Kitchen_View2_OptionB
And keep a short measurement log (even in Notes):
- Overall building width/length
- Kitchen run lengths + island clearance
- Bathroom wet-wall locations
FAQ: Converting black-and-white floor plans to 3D
Do I need perfect dimensions to create a useful 3D model?
No. For early concepting, you can work with approximate dimensions—as long as you label what’s unverified. For renovation decisions (cabinet orders, framing changes), you should confirm critical measurements onsite.
What’s the fastest way to get clean renovation previews?
Use a hybrid approach: auto-detect or trace the main walls, verify scale with one reliable dimension, then iterate in 3D with simple materials. This produces decision-ready renders quickly without over-modeling.
Can a 3D model replace construction drawings?
Typically, no. A 3D model is excellent for visualization and alignment, but permitting and construction usually require drawings that follow local standards and include structural/spec details.
Bring it together: a repeatable process that stays accurate
To reliably convert black and white floor plan to 3d, focus on three things: clean input, anchored scale, and verification in 3D. Once the shell is correct, you can safely explore interior design options, AI-guided room planning layouts, exterior refresh ideas, or empty-room staging concepts—without drifting away from the original plan.
If you prefer an iPhone/iPad workflow, an app like Floor Plan to 3D & Home Redesign can help streamline the conversion and produce exportable 3D images for presentations.
