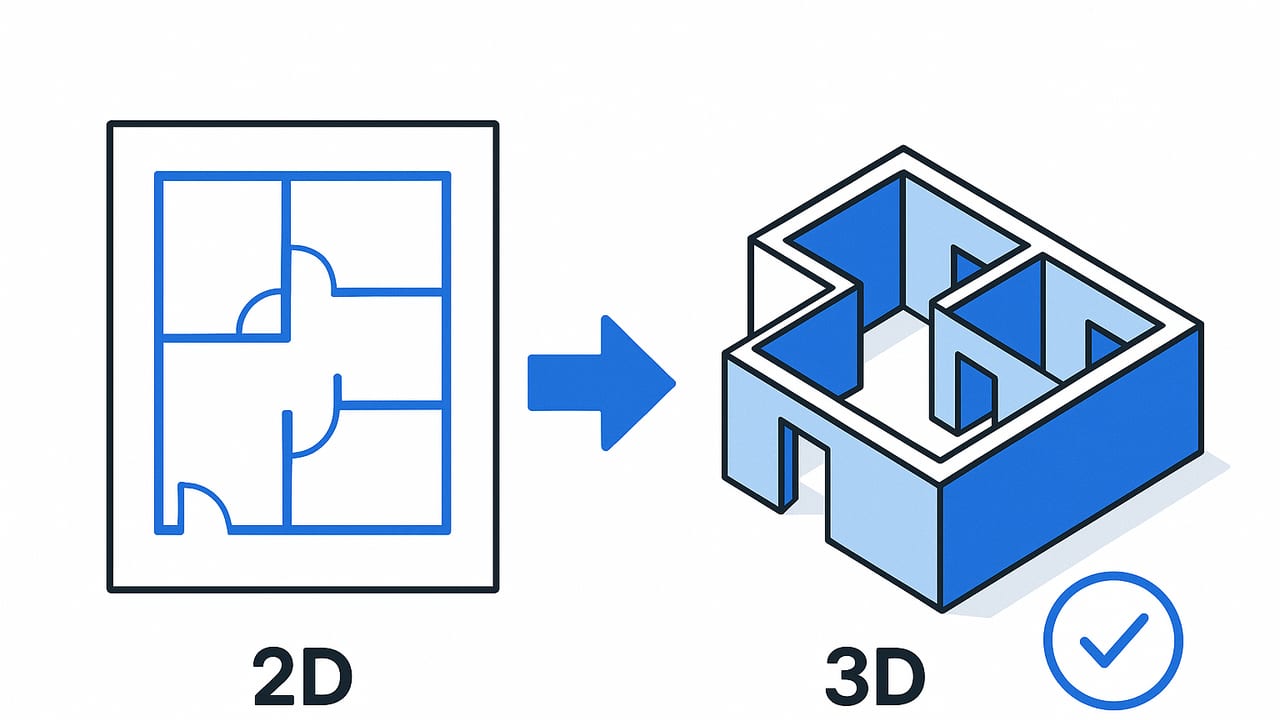
Turning a flat drawing into a believable space is one of the most satisfying moments in design. When you convert 2d floor plan to 3d, you gain the context you need to make layout decisions, test furniture arrangements, validate clearances, and communicate intent to clients and stakeholders. This guide walks through methods, scaling math, modeling essentials, quality checks, and export settings so your 3D results look great and stay true to the plan.
Choosing the Right Method to Convert 2D Floor Plan to 3D
There are several approaches, each with trade-offs in speed, accuracy, cost, and required skill level. Pick the workflow that fits your project scope and timeline.
| Method | Speed | Accuracy | Skill | Best For |
|---|---|---|---|---|
| Manual modeling in a 3D tool (trace/import plan) | Medium | High (depends on discipline) | Intermediate–Advanced | Custom details, complex geometry |
| CAD/BIM import (DWG, DXF, IFC) to 3D | Fast–Medium | Very High (if source is accurate) | Intermediate | Professional projects with existing CAD |
| AI-assisted plan conversion apps | Fast | High (verify with QA) | Beginner–Intermediate | Quick concepting and client visuals |
| Photogrammetry of the drawing | Slow | Low–Medium | Advanced | Special cases, not commonly used |
For most home and room planning tasks, AI-assisted converters or BIM imports are fastest. Manual modeling remains the most flexible for custom details and nuanced accuracy, especially when you must respect wall thicknesses, level changes, and exact door/window placements.
Pre-Conversion Prep: Clean Input, Clean Output
Before you trace or feed a plan into a converter, improve the source image. Garbage in means guesswork out. Follow these quick steps:
- Deskew and de-rotate: Plans photographed at an angle distort dimensions. Use a perspective correction tool to square edges.
- Crop to the plan: Remove borders, title blocks, and fold shadows unless you need them for scale.
- Boost contrast: Convert to high-contrast black-and-white to make walls and symbols pop. Keep lineweight legible.
- Erase noise: White-out scribbles, stamps, and artifacts that could confuse an AI parser.
- Identify a reference: Highlight at least one reliable dimension (e.g., a 12' wall) for scale calibration.
- Collect metadata: Ceiling heights, wall thicknesses, door swing directions, window sill/head heights, and stair risers/treads.
Scale That Survives QA
Accurate scale is the backbone of a trustworthy 3D model. Even a few percent error compounds into furniture collisions and misleading circulation widths.
- Pick a primary reference: Use the longest labeled dimension you trust. Longer baselines reduce percentage error.
- Measure in pixels or units: In an image editor or your 3D tool, measure the reference line’s pixel length.
- Compute scaling factor: Factor = Real length / Measured length.
- Apply uniformly: Scale the entire floor plan import by this factor in X and Y.
- Verify with a secondary dimension: Check a perpendicular dimension to catch aspect ratio distortion.
# Example: compute scale for an image-traced plan
# Real reference: 12' 0" (144 inches)
# Measured on image: 378 px
real_inches = 144.0
pixels = 378.0
scale_inches_per_px = real_inches / pixels  # 0.38095 in/px
# If your 3D app uses meters: 1 inch = 0.0254 m
scale_meters_per_px = scale_inches_per_px * 0.0254  # 0.009677 m/px
Common tolerances if you lack a full survey:
- Overall plan dimensions: ±1% (residential), ±0.5% (fit-out)
- Door width: ±0.5 in (±13 mm)
- Counter depth: ±0.25 in (±6 mm)
If your second check is off beyond tolerance, re-do deskewing or pick a different reference. Don’t proceed until scale is trustworthy.
Modeling Essentials: From Lines to Volumes
Whether you trace or let an AI convert 2d floor plan to 3d automatically, you’ll still want to validate and refine these core elements:
- Walls: Capture true thickness (e.g., 4.5 in for interior, 6–8+ in exterior). Set accurate heights per level. For sloped ceilings, use profiles or roof planes.
- Openings: Doors and windows need correct rough openings, head heights, and swing/slide directions. Place casings if you care about photo-real edge lines.
- Floor and ceiling: Add slabs with realistic thickness. Note dropped ceilings for HVAC or lighting.
- Stairs: Follow code-ish geometry (rise 7–7.75 in, run 10–11 in typical). Model landings and guardrails if visible.
- Columns and beams: Structure can dictate furniture placement; include where relevant.
- Fixtures: Sinks, toilets, appliances, radiators, and built-ins anchor spatial planning.
Materials, Lighting, and Cameras That Sell the Space
After geometry, visual fidelity comes from physically plausible materials and lighting.
Materials
- PBR maps: Use base color, roughness, normal, and ambient occlusion for realism.
- Scale: Match texture scale to reality (e.g., 6 in subway tiles). Mis-scaled textures break immersion.
- Directionality: Align wood grain, tile patterns, and carpet seams with the plan’s intent.
Lighting
- Daylight: Use a sun/sky system. Set location and time for believable shadows; midday is crisp, late afternoon is warm.
- Interiors: Mix ambient fill with key lights (downlights, pendants, sconces). Avoid pure white; aim for 4000–5000K neutral.
- Portals and exposure: If rendering, use window portals and control exposure/white balance to prevent blown highlights.
Cameras
- Ortho vs. perspective: Orthographic is great for axonometric floorplan views; perspective sells realism.
- FOV: For interiors, 50–65° avoids extreme distortion while showing context.
- Eye height: Set around 5 ft 6 in (1.68 m) for human-scale views.
QA: Turn Lines Into Verified Space
Quality assurance is more than a quick glance. Bake these checks into your workflow.
- Dimension overlay: Compare critical spans (kitchen runs, hallway widths, bed clearances) between plan and 3D.
- Adjacency and flow: Verify door swings don’t clash with fixtures and that circulation paths remain clear.
- Vertical checks: Confirm ceiling heights, window heads, and stair headroom (≥ 6 ft 8 in/2.03 m typical).
- Collision tests: Run clash detection between furniture and architecture where your tool supports it.
- Section cuts: Slice through the model to catch hidden offsets, misaligned floors, or duplicated walls.
Tip: Create a simple "QA scene" with dimension guides, a standard 30 in x 30 in (762 mm) clearance block, and a 36 in (914 mm) path-of-travel proxy. Drop it into new models to keep checks consistent.
Exports and Sharing: Crisp, Clear, and On-Brand
Once you convert 2d floor plan to 3d and finish QA, package your results for presentations and proposals.
- Stills: 2560×1440 or 4K for presentations; save to PNG for lossless linework.
- Print: Target 300 DPI at final print size. Add scale bars and north arrows where appropriate.
- 360 panoramas: 8K equirectangular for VR-friendly tours.
- 3D models: Export glTF/GLB for web, OBJ/FBX for DCC tools, IFC for BIM exchange. Include units and origin notes.
- Style: Consider a line+shaded "architectural diagram" style for early concepts; go photoreal only when the design is mature.
Common Pitfalls (and How to Fix Them)
- Scale drift: If a far corner is off, your source image may be skewed. Recorrect perspective and rescale; validate with two perpendicular checks.
- Misaligned walls: Snap to guides or use constraints. Turn on angle locks (0°, 90°) for orthogonal segments.
- Flipped normals: If surfaces render black, flip normals or recalculate face orientation.
- Z-fighting: Overlapping coplanar faces flicker. Nudge one surface by 1–2 mm or remove duplicates.
- Noisy renders: Increase samples, enable denoising, or add light portals. Clamp indirect lighting if fireflies appear.
- Wrong door swings: Cross-check the plan’s arc symbols; adjust hinge side and inswing/outswing.
Mini Workflow Example
Here’s a fast, practical run-through.
- Import the plan: Load a cleaned JPEG into your 3D tool as an underlay. Ensure it sits at Z = 0.
- Set scale: A labeled living room wall is 12' 0". You measure 378 px on the image; scale factor is 144 in / 378 px ≈ 0.38095 in/px. Apply uniform scaling.
- Trace walls: Draw centerlines or inner faces, then extrude to 9 ft. Offset thicknesses: 4.5 in interior, 7.5 in exterior.
- Place openings: Insert 36 in entry door (80 in head), 72 in window (sill 30 in, head 80 in). Match swings to plan arcs.
- Add slabs and ceilings: 6 in floor slab, 0.5 in finish; flat ceiling at 9 ft with recessed lighting.
- Furnish key pieces: 84 in sofa, 60 in dining table, 36 in walkway minimums. Use real product dimensions where possible.
- Materials: Oak floor (6 in plank), eggshell paint walls, matte white ceiling. Verify texture scales.
- Lighting: Sun at 35° altitude, 160° azimuth for soft late-afternoon shadows. Neutral 4500K interior lights.
- Camera setup: Eye height 5'6", FOV 60°, two angles per room (corner and straight-on).
- QA pass: Overlay dimensions for kitchen run (120 in), hall (36 in clear). Fix any misalignments. Re-render at 2560×1440.
FAQ: Converting 2D Plans to 3D
Do I need CAD files?
No. A high-contrast image works with most converters. CAD/DWG/IFC is ideal for precision, but not mandatory.
How accurate can it be?
With careful scaling and QA, expect ±1% overall in residential contexts. For construction documentation, rely on surveyed/BIM sources.
What about multi-level projects?
Convert each level separately, align origins, and maintain consistent story heights. Use stair openings to coordinate floor slabs.
Can I handle curved walls and angled rooms?
Yes. Use arcs/splines for curves and maintain true radii. Validate with multiple chord measurements to avoid approximations.
How do I present options quickly?
Maintain a base model and use scene states or layers for alternative furniture layouts, finishes, or lighting scenarios.
Wrapping Up
When you convert 2d floor plan to 3d with disciplined prep, rigorous scaling, and consistent QA, the result is a dependable model that informs decisions and persuades clients. Choose the method that fits your project, treat scale as non-negotiable, and build a repeatable checklist for materials, lighting, and exports. If you prefer a streamlined iOS workflow that transforms black-and-white plans into accurate 3D visuals while preserving dimensions, consider trying Floor Plan to 3D for a quick, reliable starting point.
