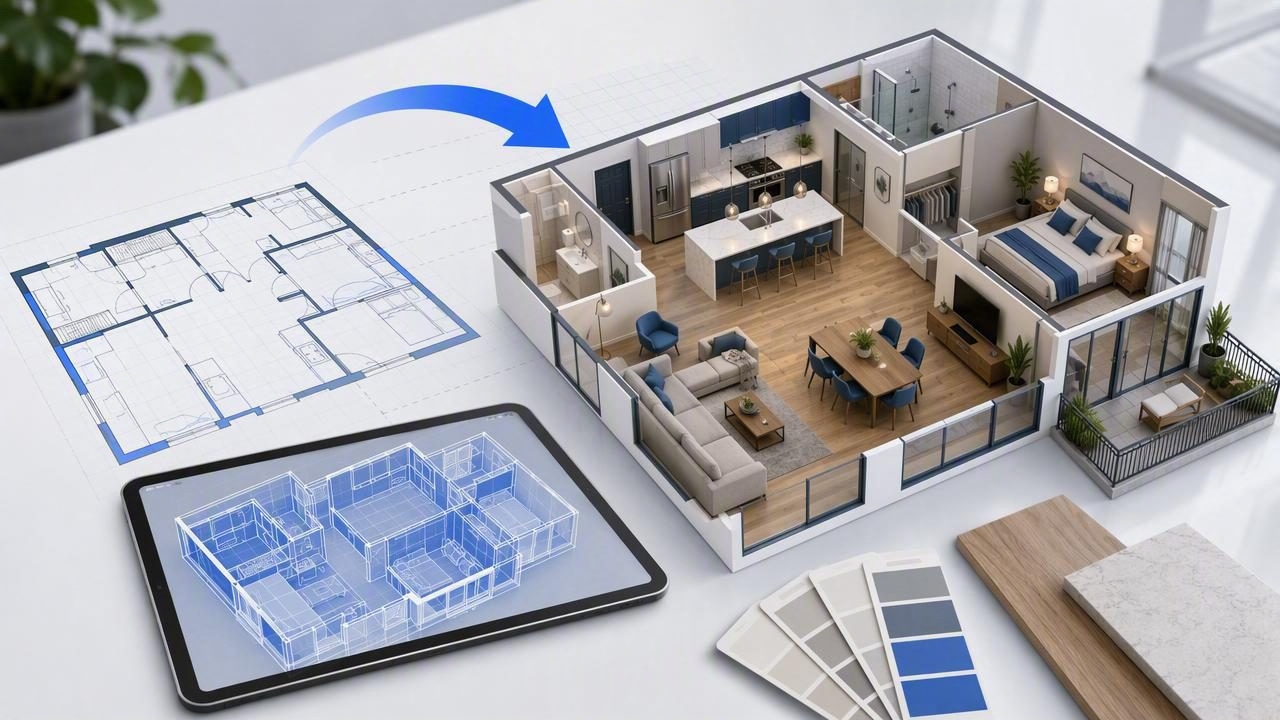
A floor plan can communicate measurements, walls, doors, and room names, but it does not always help people feel how a space will work. Clients may struggle to imagine furniture placement, homeowners may misjudge room scale, and renovation teams can interpret a two-dimensional drawing differently. A 3D blueprint app helps bridge that gap by converting a flat blueprint or floor plan into a more visual, understandable model.
Whether you are planning a kitchen renovation, presenting an interior design concept, staging an empty property, or reviewing an exterior refresh, 3D visualization can make decisions easier before expensive work begins. The best results depend on more than attractive images, however. You need an app that respects the underlying layout while giving you practical ways to test ideas.
This guide explains what a 3D blueprint app does, which features matter most, how to evaluate accuracy, and how to use 3D renders as part of a smarter renovation planning workflow.
What Is a 3D Blueprint App?
A 3D blueprint app is a tool that transforms a two-dimensional floor plan, blueprint, or drawing into a three-dimensional visual representation. Depending on the platform, users may upload an image, scan a document, import a plan, or build rooms manually. The app then identifies or recreates walls, openings, room divisions, and dimensions to produce a 3D view.
Unlike traditional drafting software, many modern tools are designed for fast visualization. They can help users create renovation previews, experiment with furnishings, compare finishes, and generate images for presentations without learning complex professional modeling software.
A useful conversion should preserve the important information in the source drawing, including:
- Overall room proportions and layout
- Wall locations and room boundaries
- Doors, windows, and circulation paths
- Room labels and key dimensions where available
- Relationships between connected spaces
In short, the 3D model should not simply be visually appealing. It should be a reliable visual aid for discussing how the actual space may function.
Why Convert Blueprints Into 3D Before Renovating?
Renovation decisions often involve uncertainty. A homeowner might ask whether an island will make a kitchen feel cramped. A designer may need to show why a sectional sofa blocks a walkway. A contractor may want a clearer explanation of the intended room arrangement. Flat plans are essential technical documents, but 3D renders make the same information more accessible to people who do not read drawings every day.
Using a 3D blueprint app early in the planning process can support better conversations around:
- Space planning: Test furniture sizes, clearances, and movement routes.
- Design direction: Compare interior design styles, colors, flooring, and lighting ideas.
- Renovation scope: Clarify which rooms, walls, and surfaces are part of the project.
- Stakeholder alignment: Give clients, family members, or project partners a shared visual reference.
- Presentation quality: Create polished images for proposals, listings, mood boards, or approval meetings.
A 3D preview is not a replacement for architectural drawings, building permits, structural engineering, or site measurements. It is a planning and communication tool that can reveal questions earlier, when changes are typically less costly.
Essential Features to Look for in a 3D Blueprint App
Not every floor plan conversion tool serves the same purpose. Some focus on realistic rendering, while others prioritize quick room planning. When comparing options, consider the features below.
1. Layout Preservation
The first requirement is layout fidelity. An app should retain the original structure as closely as possible rather than inventing a generic room arrangement. Look for workflows that let you review walls, openings, dimensions, and room boundaries after conversion.
If a floor plan includes labels such as “Bedroom,” “Bath,” or “Living Room,” preserving those labels can also reduce confusion when reviewing a larger home. For renovation work, even small errors in a doorway position or wall length can affect furniture decisions.
2. Easy Editing Controls
Automatic floor plan conversion saves time, but no automated process is perfect. Choose an app that allows straightforward adjustments. You should be able to correct wall placement, resize rooms, move doors, modify windows, or update labels without rebuilding the project from scratch.
This editing layer is particularly important when working with older blueprints, low-resolution scans, hand-marked plans, or drawings that contain symbols an app may not interpret correctly.
3. Furniture and Room Planning Tools
An AI room planner can make a 3D layout more useful by suggesting furniture arrangements or design directions based on a room’s purpose. The most helpful tools do not treat furniture as decoration alone. They account for circulation, focal points, usable floor area, and basic function.
For example, in a living room, compare a sofa layout facing the television with one centered around a fireplace. In a bedroom, verify that bedside tables and wardrobe doors have enough clearance. In a dining room, check whether chairs can be pulled back comfortably.
4. Interior and Exterior Visualization
Many projects extend beyond a single room. If your plans include curb appeal improvements, additions, or outdoor living areas, look for an app that supports an exterior refresh as well as interior design exploration. Seeing siding colors, landscaping concepts, patio layouts, or entry updates alongside indoor changes can create a more cohesive renovation vision.
5. High-Resolution Export Options
A screen preview may be enough for personal planning, but professional use often requires sharper output. High-resolution 3D renders are useful for client proposals, contractor discussions, real estate marketing, and design presentations. Before choosing an app, check whether it can export images at a resolution suitable for your intended use.
Accuracy vs. Realism: Why You Need Both
A common mistake is choosing a tool based only on photorealistic images. Beautiful materials, dramatic lighting, and stylish furniture can make a rendering persuasive, but they cannot compensate for an inaccurate layout. Conversely, a technically correct model with no design context may fail to help a client understand the possibilities.
| Priority | Why It Matters | Questions to Ask |
|---|---|---|
| Layout accuracy | Supports practical planning and clearer communication. | Are walls, doors, labels, and proportions retained? |
| Editing flexibility | Lets users correct conversion errors and test options. | Can I adjust rooms and openings quickly? |
| Visual realism | Helps viewers understand finishes, style, and atmosphere. | Can I change materials, lighting, and furnishings? |
| Export quality | Makes renders useful beyond the app itself. | Can I save presentation-ready images? |
The strongest workflow starts with an accurate base plan, then layers on furniture, finishes, and visual styling. Treat realistic rendering as a way to communicate a validated layout, not as proof that every construction detail has been resolved.
A Practical Floor Plan Conversion Workflow
Following a consistent process can improve the quality of your 3D renders and reduce revisions. Here is a simple workflow for turning a blueprint into actionable renovation previews.
- Start with the clearest source file. Use a high-quality scan or image with visible walls, labels, and dimensions. Remove shadows, folds, or unnecessary markup when possible.
- Check the conversion immediately. Compare the 3D view to the original blueprint. Review exterior walls, internal partitions, room names, windows, and doors.
- Confirm the scale. Use known dimensions to verify that the model is proportionate. Incorrect scale can make furniture tests misleading.
- Define the goal for each room. Identify whether you are testing storage, seating, work areas, entertaining space, accessibility, or a new style direction.
- Create a few meaningful alternatives. Compare two or three layouts rather than endlessly generating options. Give each version a clear purpose.
- Review clearances. Look for blocked doors, narrow pathways, awkward corners, and furniture that competes with windows or appliances.
- Export and annotate key views. Save the angles that best communicate the decision. Add notes where clarification is needed for contractors or clients.
“The most valuable render is not always the most dramatic one. It is the one that helps a person make a confident, informed decision.”
Common Mistakes When Using 3D Renders
3D visualization is powerful, but it should be used carefully. Avoid these common planning mistakes:
- Ignoring existing conditions: A blueprint may not show ceiling beams, radiators, electrical panels, or unusual site constraints.
- Using assumed measurements: Verify critical dimensions on site before ordering cabinetry, furniture, flooring, or fixtures.
- Overfilling rooms: A layout can look attractive in a render while feeling crowded in reality. Prioritize walking space and daily use.
- Confusing concept visuals with construction documents: Always consult qualified professionals for structural, code, mechanical, and permit requirements.
- Showing only one option: Comparing alternatives often reveals the trade-offs between storage, seating, budget, and openness.
Who Benefits Most From a 3D Blueprint App?
These tools can be useful for many people, not only professional designers. Homeowners can test a home redesign before committing to purchases. Interior designers can explain concepts with less back-and-forth. Real estate professionals can create more engaging property visuals. Remodelers can clarify a proposed layout with clients. Landlords and property managers can plan updates between tenancies.
The value is especially clear when a project involves people with different levels of design experience. A 3D render gives everyone something concrete to review, making comments more specific than “I think it might feel too small.”
Final Checklist Before Sharing Your 3D Plan
- Does the 3D model match the source floor plan?
- Have critical dimensions been checked against the real space?
- Are doors, windows, and major circulation routes unobstructed?
- Does each furnished room support its intended function?
- Have you compared at least one alternative design option?
- Are the exported 3D renders clear enough for their intended audience?
A well-chosen 3D blueprint app can turn a technical drawing into a practical decision-making tool. By prioritizing layout accuracy, editable conversion, useful room-planning features, and clear exports, you can create renovation previews that are easier to understand and more productive to discuss. For users seeking a mobile workflow for floor plan conversion and home redesign concepts, Floor Plan to 3D & Home Redesign is one option designed to help visualize plans without heavy 3D software.
