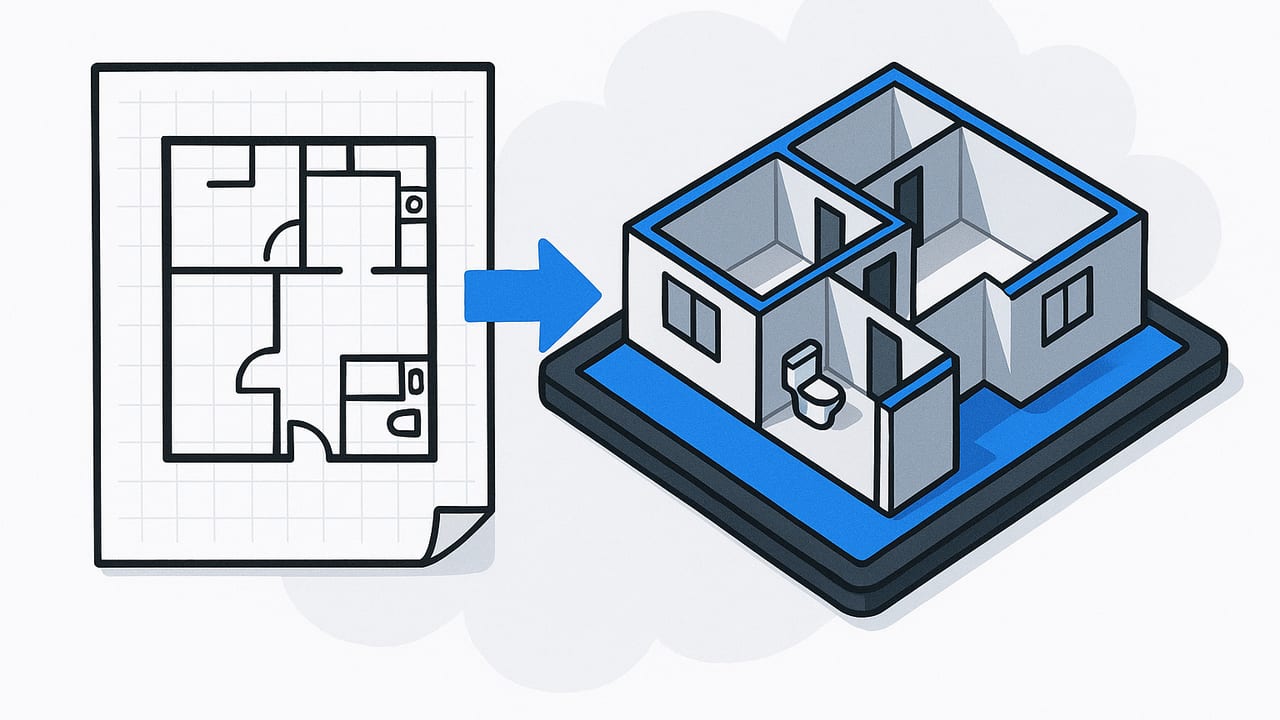
A 3d floor plan bridges the gap between technical drawings and the way people actually experience a space. It transforms walls, doors, and dimensions into an intuitive, spatial story: how rooms connect, how light falls, and how furniture fits. Whether you’re an architect preparing a client presentation, a real estate agent trying to sell an idea, or a homeowner planning a remodel, understanding how to create and refine a 3d floor plan will save time, reduce miscommunication, and elevate your results.
What is a 3d floor plan, exactly?
At its core, a 3d floor plan is a three-dimensional representation of a space viewed from above, often with walls cut at a certain height so you can see room layouts and furnishings. Unlike a walkthrough render, it prioritizes clarity of layout over eye-level realism. Unlike a full BIM model, it focuses on visual communication rather than comprehensive construction metadata.
- Key elements: Walls, doors, windows, stairs, fixed features (kitchen/bath), furniture, materials, and lighting.
- Purpose: Communicate scale and flow quickly, help decisions on layout and finishes, and validate that the design matches constraints.
- Output: A high-resolution image, a short animation, or a lightweight interactive file suitable for web or mobile.
When to use a 3d floor plan
- Pre-design and concept verification: Test adjacencies, furniture fit, and circulation before investing in detailed drawings.
- Client buy-in: Replace abstract lines with an immediately understandable spatial overview.
- Marketing: Real estate listings and proposals benefit from visuals that clarify scale and livability.
- Remodel planning: Compare options side-by-side (island vs. peninsula, bathtub vs. shower-only) with material and lighting variations.
The inputs you need for accuracy
Great 3d floor plans are only as accurate as the data you feed them. Gather the following before you start:
- Dimensioned 2D plan: PDF, image, or scan of a measured floor plan. If you have only a sketch, add at least two known dimensions.
- Wall thicknesses and types: Interior vs. exterior thickness, and any special partitions.
- Ceiling height(s): Note if different rooms have different heights or soffits.
- Openings: Door and window widths, heights, and sill heights.
- Fixed utilities: Kitchen and bath layouts, radiators, columns, and built-ins.
If information is missing, adopt a conservative assumption and document it. Also consider a quick on-site verification for critical areas such as kitchens and bathrooms, where tolerances are tight.
How to create a 3d floor plan: Step-by-step workflow
- Capture your plan: Import a PDF or take a well-lit, square-on photo of a printed plan. If photographing, avoid skew; keep the camera parallel to the page.
- Set scale precisely: Use a known dimension on the drawing. The scale conversion anchors everything that follows.
- Trace or recognize geometry: Walls, doors, windows, stairs. Some tools use AI to detect walls and openings; review and correct any misreads.
- Extrude walls and slabs: Set ceiling height and wall thickness to generate the 3D shell.
- Insert openings and fixtures: Add doors (swing direction), windows (type and sill height), kitchen/bath fixtures, and built-ins.
- Place furniture: Use standard sizes to reflect realistic fit. Maintain clearances (e.g., 36 inches/900 mm for main pathways).
- Apply materials and lighting: Choose flooring, paint, and key finishes. Add a neutral daylight setup and gentle interior lighting for legibility.
- Review and export: Do a final pass for proportions and alignment, then export to your target format (image, PDF, or 3D).
Pro tip: lock scale early
Measure twice, scale once. A perfectly set scale at the start prevents cascading errors in furniture fit, door swings, and clearances.
Keep it true-to-size: scaling and verification
Most errors in a 3d floor plan stem from an inaccurate scale. After setting scale, verify with at least two cross-check measurements in different parts of the plan. Acceptable visual workflows often target ±1–2% tolerance for planning and marketing visuals.
- Cross-check distances: Hallway width, a bedroom dimension, and the longest wall span.
- Check opening locations: Window centers relative to corners; door swings clear adjacent walls.
- Watch cumulative drift: On long runs, slight errors compound—split long spans into multiple checks.
Quick scale calculation from a photo
If you’re working from a photographed plan, use a known dimension in pixels to compute a scale factor. Then apply it consistently.
// Known: distance between two points in the plan is 4200 mm
// Measured in the image: 1050 pixels between the same points
// Scale factor (mm per pixel)
const realWorld = 4200; // mm
const pixels = 1050; // px
const mmPerPixel = realWorld / pixels; // 4 mm/px

// Convert any pixel measurement to mm
function pxToMm(px) { return px * mmPerPixel; }
Lighting and materials that sell the space
Even a technically correct 3d floor plan can feel flat without thoughtful lighting and materials. Aim for clarity and balance.
- Daylight first: Simulate soft daylight from the top-left or top-right to give gentle shadows for depth.
- Neutral palette: Favor mid-tone woods and soft whites; extreme contrast can distract from layout.
- Highlight key areas: Subtle accent lighting over islands or dining tables improves readability.
- Avoid mirror glare: Reflective materials can create hotspots in top-down views—reduce reflectivity where possible.
Exporting your 3d floor plan: formats and use cases
Choose outputs based on your audience and workflow. For web listings and quick approvals, images are foolproof. For collaboration and downstream modeling, opt for 3D formats.
| Format | Best for | Notes |
|---|---|---|
| PNG | Web, presentations | Lossless, supports transparency; use 3000–5000 px on longest edge. |
| JPEG | Listings, email | Smaller files; set quality to 85–92% to balance clarity and size. |
| Print and markups | Vector overlays and comments; good for proposals. | |
| OBJ/FBX | Interchange with DCC tools | Broad compatibility; textures may need relinking. |
| glTF/GLB | Web and AR viewers | Compact, PBR-friendly; ideal for interactive delivery. |
Tools and approaches: picking the right path
There’s no one-size-fits-all tool for creating a 3d floor plan. Consider your timeline, budget, and the fidelity you need.
| Approach | Strengths | Limitations | Ideal for |
|---|---|---|---|
| Mobile app (AI-assisted) | Fast from photo/scan; low learning curve; on-the-go edits | Less granular than full CAD/BIM; template-based furniture | Agents, homeowners, quick concept validation |
| Desktop CAD/BIM | High precision; construction-ready modeling; robust libraries | Steeper learning curve; time-intensive | Architects, designers needing detailed control |
| Online conversion service | Hands-off; predictable turnaround | Per-plan fees; iteration cycles slower | Busy teams, one-off marketing packages |
Common pitfalls (and how to avoid them)
- Wrong scale: Always calibrate from a known dimension and verify with cross-checks.
- Misplaced openings: Doors that clip adjacent walls or windows too close to corners break realism. Double-check offsets.
- Furniture that doesn’t fit: Use standard sizes; leave realistic circulation clearances.
- Overly glossy materials: Dial down reflectivity to avoid visual noise in top views.
- Heavy geometry: High-poly furniture bogs down exports; choose optimized assets.
Performance and file size: optimize for speed and clarity
A responsive 3d floor plan loads faster and keeps viewers engaged. Prioritize readability over hyper-detailed models.
- Polygon budget: Use low-to-mid poly assets; reserve detail for focal pieces.
- Texture discipline: Cap textures at 1–2K for most items; avoid redundant high-res maps.
- Instance repeats: Reuse the same chair/plant model rather than unique variants to reduce size.
- Light baking: Where supported, bake ambient occlusion to enhance form without heavy lighting rigs.
Communicating design intent
A 3d floor plan is a conversation starter. Pair it with just enough annotation to guide decision-making without clutter.
- Label zones: Kitchen, dining, living, storage, and circulation paths.
- Callouts for changes: Highlight new walls, removed partitions, or widened openings.
- Option sets: Export A/B versions to compare layouts quickly.
Quality checklist before you export
- Scale locked: Two or more verified dimensions match real-world values.
- Openings verified: Doors swing clear; windows centered and at correct heights.
- Furniture fit: No overlaps; clearances respected.
- Materials balanced: No overpowering textures; consistent style across rooms.
- Lighting even: Soft shadows for depth; no blown highlights.
- Export size appropriate: Right resolution/format for email, web, or print.
FAQ: quick answers for better 3D results
How accurate should a 3d floor plan be?
For planning and marketing, ±1–2% is typical. For construction, align with measured as-built data and use CAD/BIM workflows.
Can I start from a hand-drawn sketch?
Yes—ensure at least two known dimensions and a clear photo. You can refine with measurements over time.
What if I don’t have furniture dimensions?
Use standard sizes: queen bed ~60×80 in (152×203 cm), sofa ~84×36 in (213×91 cm), dining chair clearance ~24 in (61 cm) per seat edge.
Bringing it all together
Creating a compelling 3d floor plan is a blend of precision and storytelling. Start with reliable dimensions, anchor the scale, and build up with clean geometry, realistic furniture sizing, and balanced materials and light. Export in formats that match your audience, and keep performance in mind for fast sharing. With a disciplined workflow, you’ll turn sketches and scans into clear, persuasive visuals that move projects forward.
For those who prefer a streamlined, mobile-first path from black-and-white 2D to detailed 3D, the iOS app Floor Plan to 3D can convert a photographed or scanned layout into a scaled model using AI, preserving proportions and enabling easy exports for proposals.
