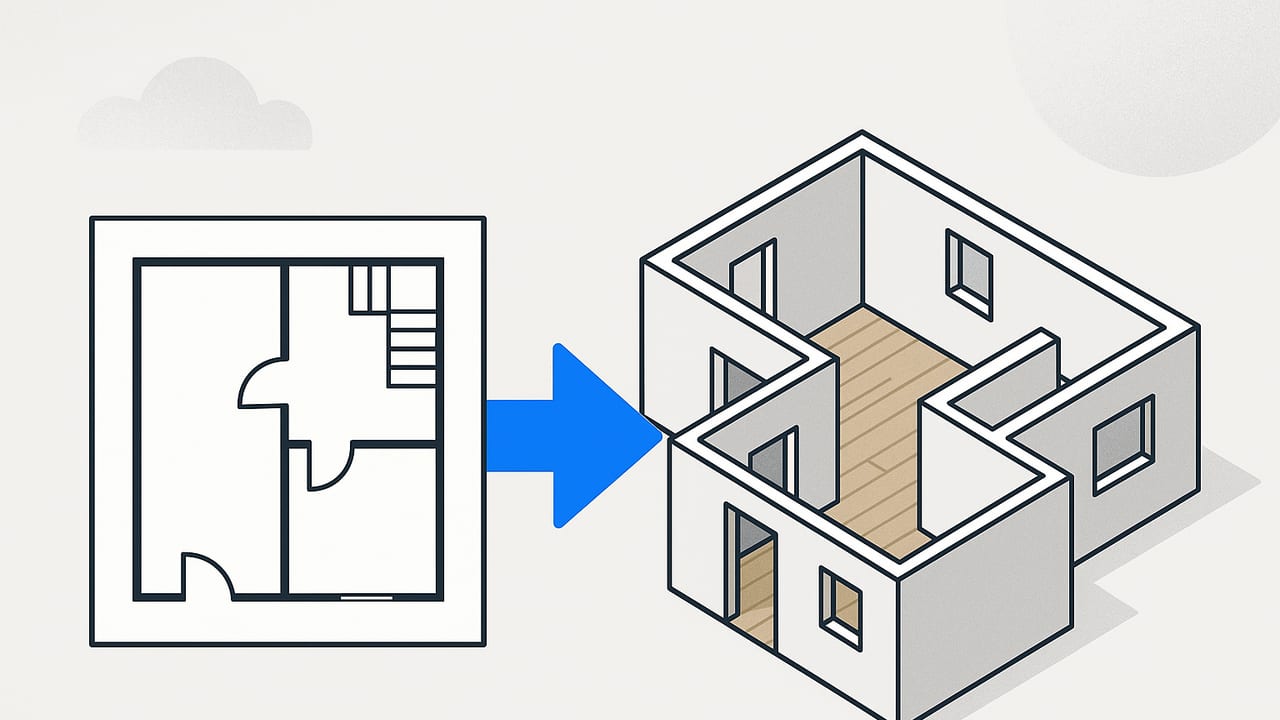
Turning a black-and-white plan into a convincing 3D space is one of the fastest ways to validate a layout, communicate design intent, and win stakeholder trust. Yet the path from 2D to 3D is often plagued by scale drift, missing semantics, sloppy lighting, and inconsistent exports. This guide distills a field-tested workflow for converting 2D floor plans into accurate, navigable, and persuasive 3D scenes. Whether you model manually, rely on AI, or hybridize workflows, the goal is the same: fidelity to the plan and clarity in the visuals.
Why 2D to 3D Matters
- Clarity for clients: Volumes, sightlines, and adjacencies become instantly understandable.
- Faster decisions: Iterate on kitchens, baths, and circulation in hours, not days.
- Fewer errors: Catch clearance and code issues before they hit the field.
- Better presentations: High-resolution 3D renders and diagrams elevate proposals.
Choose the Right Method for Your Project
Different 2d to 3d paths trade off speed, accuracy, and flexibility. Pick the method that aligns with your constraints.
| Method | Time to first model | Typical accuracy | Best for | Notes |
|---|---|---|---|---|
| Manual CAD/BIM modeling | Half day to multi-day | High (if dimensions verified) | Construction docs, complex geometry | Full control; steeper learning curve |
| AI floor plan conversion | Minutes | Medium-high (plan-driven) | Concepts, quick client reviews | Depends on input clarity and scale cues |
| Photogrammetry | Hours | Medium (texture heavy) | As-builts, site capture | Less ideal for pure floor-plan-to-model |
| LiDAR/SLAM scanning | Hours | High (within device tolerance) | Existing conditions verification | Best when paired with plan-derived intent |
Prepare Inputs That Convert Cleanly
Garbage in, garbage out. The single greatest booster for 2d to 3d accuracy is a clean, legible plan.
- Use high-contrast art: Black lines on white background. Avoid compression artifacts.
- Include a scale reference: A known wall length, a graphic scale bar, or dimension strings.
- Separate layers if possible: Walls, doors, windows, fixtures. Even in a single image, clarity helps AI and humans alike.
- Flatten skew: Photograph plans head-on. If photographing, stand directly above, center the lens, and avoid perspective tilt.
Scaling Fundamentals: Lock Real-World Units Early
Scaling is the hinge that determines whether 3D results are believable. Lock scale as soon as possible and validate at multiple checkpoints.
- Identify a known dimension (e.g., a 12' wall or 3650 mm corridor).
- Measure the same in pixels (in your modeling app or image editor) and compute a scale factor.
- Apply the factor to the entire model space, not just the first object.
- Cross-check with two or more secondary dimensions to ensure no skew.
If you prefer a quick scriptable check, use a simple scaling snippet like this:
# Python pseudo-code for scale calibration from a raster plan
pixel_distance = 842.0   # pixels measured between two points
real_distance_m = 3.200   # meters from the dimension on the plan
pixels_per_meter = pixel_distance / real_distance_m

# Convert any pixel measurement to meters
some_wall_pixels = 1265.0
some_wall_m = some_wall_pixels / pixels_per_meter

# Tolerance check (e.g., within 1% of expected length)
expected_m = 4.000
error_pct = abs(some_wall_m - expected_m) / expected_m * 100
if error_pct <= 1.0:
    print('Scale OK')
else:
    print('Scale drift detected')
Pro rule: Always validate scale on at least three non-collinear edges. This catches both uniform scale errors and perspective skew from the source image.
Wall Logic and Semantics: Don’t Just Trace Lines
A 2d to 3d transformation isn’t just geometry; it’s semantics. Treat each plan element as a typed object with behavior.
- Walls: Give thickness (e.g., 90–150 mm or 3.5–6 inches) and height based on project type. Interior vs exterior matters for materials and insulation layers.
- Doors and swings: Capture width, swing direction, and clearance. Pocket, barn, or bifold types change usable space.
- Windows: Set sill height, head height, and frame depth. These control daylight, privacy, and elevation renders.
- Stairs: Riser height and tread depth must sum to a safe run. Model railing and headroom.
- Plumbing and fixed MEP: Maintain clearances around toilets, tubs, HVAC returns, and panels.
In most 3D tools, assign object categories and metadata as you go. Semantics power downstream operations like schedules, visibility filters, and rule-based QA.
Materials, Lighting, and Color That Sell the Space
Even a perfectly scaled model can look flat. To communicate convincingly, focus on materials and light.
Materials
- Use real-world texture scales. A 200 mm tile should map to 200 mm in the model.
- Prefer physically based materials (PBR). Set albedo, roughness, and normal maps for believable shading.
- Limit palette early. Start with a neutral base and add accents purposefully.
Lighting
- Daylight first: Simulate true sun based on orientation. Then add fill lights sparingly.
- Interior fixtures: Use IES profiles for realistic distribution on downlights and sconces.
- Avoid overexposure: Clamp highlights and lift shadows gently. Real spaces retain contrast.
Cameras and Storytelling: Show the Decisions
Create views that answer questions, not just look pretty.
- Axon cutaway: Explains adjacency and circulation at a glance.
- Eye-level shots: Demonstrate countertop runs, island clearances, and sightlines.
- Detail crops: Focus on joinery, tile layouts, and material transitions.
- Plan/section overlays: Overlay 3D linework on the 2D plan to show fidelity.
QA Checklist for Reliable 3D
Quality assurance ensures your 2D to 3D output is trustworthy. Use this quick pass before you publish:
- Scale: Verify at 3+ points. Tolerance target: ±1% residential, ±0.5% commercial.
- Clearances: Kitchen work aisles 1000–1200 mm; toilets 380 mm min from centerline to side; doors 32–36 inches typical.
- Heights: Doors 80 inches typical; countertops 36 inches; vanity mirrors at eye level.
- Openings: All doors swing clear of obstructions; windows centered per plan notes.
- Layers: Walls, openings, fixtures on correct categories for visibility control.
- Lighting: No blown highlights; daylight exposure balanced; color temperature consistent.
- Exports: Resolution, aspect ratio, and filename convention standardized.
Export Pipeline: Crisp Renders and Reusable Assets
Consistency builds credibility. Adopt a lightweight pipeline for repeatable outputs.
- Scene states: Save camera, layer visibility, and lighting as reusable presets.
- Render resolution: For print at 300 DPI, compute width and height based on inches. Example: 11x17 inches at 300 DPI produces 3300x5100 px.
- File formats: PNG for lossless transparent overlays; JPG for web; TIFF for print workflows.
- Naming convention: ProjectCode_View_Type_WidthxHeight_v01.ext. Example: HN12_Kitchen_Axon_3300x2200_v03.png
- Version notes: Embed minimal metadata in the filename or a companion text file for auditability.
Common Pitfalls and Fast Fixes
- Misread wall thickness: Cross-check exterior walls against typical assemblies; update one definition and propagate.
- Door swing collisions: Turn on a clearance overlay layer; adjust swing or change to a pocket door.
- Window heights inconsistent: Align heads or sills via a level reference; small misalignments read as errors quickly.
- Scale drift from skewed photos: Correct perspective in an image editor before importing; then recalibrate scale.
- Textures tiling visibly: Increase texture size or use higher-resolution maps; randomize UV offset for repeats.
Mini Case Study: Apartment Kitchen Revision
Scenario: A 52 m² one-bedroom apartment needs a kitchen update without moving plumbing. The client has a raster plan with a 4.000 m exterior wall dimension.
- Scale lock: Measured wall in the plan image is 1050 px. Pixels-per-meter = 1050 / 4 = 262.5 px/m. Subsequent checks on a 2.400 m bedroom wall and a 900 mm door match within 0.7%.
- Semantics: Walls set to 100 mm interior, 200 mm exterior. Doors 800 mm clear. Window sill 900 mm, head 2100 mm.
- Layout testing: Three variants for island width (600, 700, 800 mm) and aisle clearance (1000, 1100, 1200 mm). QA flags stool clearance at 1000 mm; choose 1100 mm for comfort.
- Materials: Matte white fronts, oak veneer panels, and 20 mm quartz countertop. PBR maps keep highlights controlled.
- Lighting: True-north sun for daytime impression, plus 3000K downlights with IES profiles for evening view.
- Deliverables: One axon, two eye-level shots, and a dimensioned plan overlay. Exported at 3300x2200 px for print and 1920x1080 px for web.
Result: Client approved the 1100 mm aisle variant within the first meeting due to clear 3D visuals, saving a week of back-and-forth.
When to Use AI, When to Model Manually
AI-driven 2d to 3d tools excel at speed and draft fidelity. Use them when time-to-first-visual is paramount or when exploring multiple concepts quickly. Switch to manual or hybrid modeling when:
- Custom details dominate (built-ins, custom stairs, non-orthogonal walls).
- Regulatory drawings require strict tolerances and annotations.
- You need BIM-level metadata for quantities and schedules.
Hybrid approach: Start with an AI conversion for baseline walls, openings, and rooms. Then refine in your modeling software, replacing approximations with precise components and adding semantic metadata.
Quick Reference: Dimensional Benchmarks
- Residential door width: 32–36 in (813–914 mm)
- Kitchen counter depth: 24 in (610 mm); island optimal width: 36–48 in (914–1219 mm)
- Work aisle: 42–48 in (1067–1219 mm)
- Toilet centerline clearance: 15 in min to side obstruction (381 mm); 30 in total (762 mm)
- Stair riser: 7–7.75 in (178–197 mm); tread: 10–11 in (254–279 mm)
Optimization Tips for Faster, Cleaner Work
- Component libraries: Build a curated set of doors, windows, fixtures with default sizes and materials.
- Scene hygiene: Name layers consistently and purge unused assets to keep file sizes lean.
- Parametric constraints: Lock critical dimensions; use constraints to prevent accidental drift during edits.
- Batch exports: Queue views and render overnight at high resolution; keep low-res proxies for iterative reviews.
SEO Note: Key Phrases to Guide Your Search
If you're researching tools and methods, useful phrases include: 2d to 3d floor plan conversion, AI floor plan to 3D, scale calibration from images, 3D room planner accuracy, and high-resolution render export.
Putting It All Together
Great 2d to 3d work is a choreography of three elements: trustworthy scale, semantic modeling, and visual storytelling. Start with a clean plan and locked units, classify objects with intent, and light the scene to reveal decisions. Validate with a short QA loop, then export with predictable resolution and naming so your team can iterate confidently. The result is not just a pretty picture, but a reliable artifact that speeds approval and reduces costly surprises.
Looking for a quick mobile workflow to go from a black-and-white plan to a faithful 3D scene you can export at high resolution? An iOS app like Floor Plan to 3D can ingest a photo or scan of your layout, preserve dimensions, and generate a navigable model you can refine and render for proposals.
