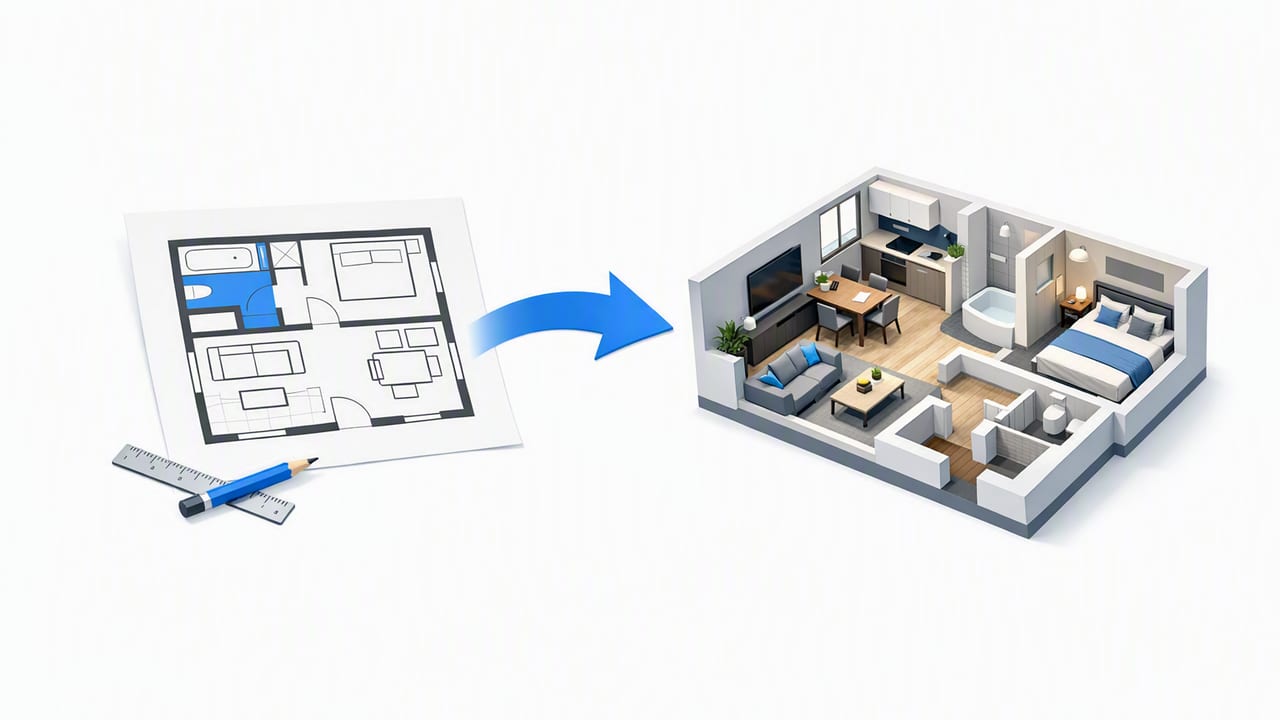
Turning a 2D plan into a 3D view is one of the fastest ways to reduce renovation uncertainty. A clean floorplan to 3d conversion helps you see proportions, identify layout issues early, and test redesign ideas (furniture, finishes, even exterior refresh concepts) before spending on labor or materials. The challenge is accuracy: if the source plan is messy or the conversion workflow is sloppy, your 3D preview can look convincing while being wrong.
This guide breaks down an accurate, repeatable approach—from preparing your black-and-white floor plan or blueprint, to validating dimensions, to using AI room planning for layout ideas, to exporting high-resolution 3D renders for presentations.
Why a floorplan to 3D conversion changes redesign decisions
2D drawings are efficient for construction, but they’re not always intuitive for homeowners, buyers, or stakeholders. A 3D render makes these decisions easier:
- Space planning: See whether circulation paths feel tight or comfortable.
- Proportion checks: Identify rooms that look fine on paper but feel narrow in perspective.
- Faster iteration: Try multiple furniture layouts, kitchen configurations, or staging concepts in minutes.
- Clear communication: Present design options to contractors, family members, or clients with fewer misunderstandings.
A good 3D preview doesn’t just look realistic—it stays faithful to the underlying plan’s measurements and constraints.
Start with the right input: what makes a plan “conversion-ready”
Most conversion issues begin before any 3D tool is opened. You’ll get cleaner results if your plan image is readable and consistent.
Preferred source formats
- High-resolution image (PNG/JPG) exported from a PDF, ideally 150–300+ DPI.
- PDF with crisp linework (avoid photographed printouts when possible).
- Blueprint scan with strong contrast and minimal shadows.
Common plan problems (and fixes)
- Low contrast linework: Increase contrast or use a simple “levels” adjustment so walls stand out.
- Skewed photos: Correct perspective (keystone) so the plan is square.
- Cluttered annotations: If notes overlap walls, consider a cleaned version for conversion while keeping the original for reference.
- Inconsistent scale: Confirm the plan includes at least one reliable measurement (e.g., a labeled room width) to calibrate scale.
The accuracy-first workflow: from 2D lines to reliable 3D
If you want your floorplan to 3d output to be useful for renovation planning (not just inspiration), follow this sequence.
1) Calibrate scale using a known dimension
Pick one dimension you trust—often the overall exterior width, a clearly labeled room length, or a doorway standard. Use it as the “anchor measurement.” Every other check in your model should trace back to this calibration.
2) Confirm wall thickness and structural assumptions
Many 2D plans simplify wall thickness or vary it between interior and exterior walls. In 3D, those differences affect room sizes and how windows/doors fit. Decide early:
- Are exterior walls thicker than interior walls?
- Do partitions include chases or built-ins?
- Are there columns or load-bearing segments hidden behind cabinetry?
If you’re unsure, model it conservatively and flag it for on-site verification.
3) Place doors and windows with swing and sill logic
Doors and windows are where 3D reveals practical issues. When placing openings:
- Verify door swings don’t collide with furniture zones.
- Check window placement against likely sill heights (kitchen counters, bathroom privacy).
- Align openings with the plan’s centerlines, not just “eyeballing” them.
4) Add ceiling height (or estimate it transparently)
Ceiling height changes the feel of a space dramatically. If your plan doesn’t specify it, choose a reasonable default and label it in your notes. You can also create two variants (e.g., 8 ft vs 9 ft) to see how the perceived volume changes.
5) Validate the model with a quick dimension audit
Before you start styling, do a fast verification pass. The goal is to catch drift early—especially if your conversion tool auto-traces walls.
// Dimension audit checklist (pseudo-workflow)
// 1) Check overall footprint
assert(model.exteriorWidth ~= plan.exteriorWidth)
assert(model.exteriorDepth ~= plan.exteriorDepth)

// 2) Check 3 key rooms
for room in [Kitchen, PrimaryBedroom, LivingRoom]:
  assert(model.room(room).width ~= plan.room(room).width)
  assert(model.room(room).depth ~= plan.room(room).depth)

// 3) Check openings
for door in model.doors:
  assert(door.width in [28, 30, 32, 36] +/- tolerance)
Tip: If your model passes these checks, most downstream design decisions (furniture fit, circulation, layout options) become far more reliable.
Using an AI room planner after you trust the geometry
Once the shell is accurate, AI room planning becomes valuable. Think of AI as a high-speed ideation partner: it can propose layout options you might not consider, but you still need to judge them against real constraints (door swings, window access, walkways).
What AI is great at
- Layout permutations: Multiple furniture arrangements that respect basic clearances.
- Style exploration: Fast variations in finishes, color palettes, and decor direction.
- Staging concepts: Making empty rooms feel “livable” for presentations.
Where you should stay cautious
- Code compliance: Egress, stair requirements, and accessibility are not optional.
- Plumbing/HVAC reality: Moving wet walls and ducts has cost implications that AI may not reflect.
- Structural constraints: Removing a wall in a concept render doesn’t mean it’s feasible.
Interior vs exterior previews: what to model for each
Not every project needs a full-detail model. Decide what level of detail supports your decision.
| Goal | Model Detail Needed | Best Output |
|---|---|---|
| Choose a furniture layout | Accurate room dimensions, doors/windows, basic furniture | Top-down + 2–3 interior angles |
| Kitchen/bath concept | Cabinet runs, appliance sizes, clearances, lighting zones | Eye-level interior renders |
| Exterior refresh | Facade proportions, window rhythm, roofline, materials | Front/side elevation-style renders |
| Client or contractor presentation | Validated scale + consistent finishes + labeled options | High-resolution export set |
Renovation previews that reduce costly rework
The practical value of a floorplan to 3d pipeline is avoiding surprises. Here are the most common “expensive misunderstandings” that 3D catches early:
- Pinch points: Hallways or kitchen aisles that look fine in 2D but feel tight in perspective.
- Oversized furniture: A sectional that blocks access to a patio slider, or a bed that clashes with door swings.
- Kitchen work triangle issues: Fridge-door clearance, island spacing, and landing zones around cooktops.
- Lighting placement: Recessed lights over cabinet doors or fans centered incorrectly in the room.
A simple clearance framework (quick reference)
- Main walkways: keep comfortable continuous paths (avoid narrowing near door swings).
- Dining: allow pull-back space behind chairs.
- Kitchens: ensure appliance doors can open without blocking the primary path.
Exact clearance targets vary by region and needs, but the point is consistent: modeling circulation is as important as modeling walls.
How to present options clearly (without overwhelming people)
If you’re sharing redesign ideas, clarity beats volume. Instead of dumping ten renders, structure decisions as “Option A vs Option B.”
- Lock the layout first: Choose wall changes and major furniture zones before choosing finishes.
- Compare two finish directions: For example, “warm natural” vs “cool modern.”
- Use consistent camera angles: Same viewpoint makes differences obvious.
- Add labels: Call out what changed (flooring, cabinet style, exterior paint).
Export checklist for presentation-ready 3D renders
- Use high resolution for proposals (so text labels stay readable).
- Include at least one top-down 3D view plus 2–4 interior angles per key room.
- Keep lighting consistent across option sets for fair comparison.
- Save a version with dimensions/labels and a version without (clean marketing look).
Troubleshooting: when your 3D doesn’t match the plan
Even with good tools, mismatches happen. These are the usual culprits:
Symptoms and fixes
- Rooms are slightly “off” everywhere: scale calibration issue. Re-anchor using a different known dimension (prefer overall footprint).
- One wing aligns, another doesn’t: the plan image may be stretched or skewed. Correct perspective and re-import.
- Doors/windows drift from where they should be: walls were traced from noisy linework. Clean the plan image (contrast, remove artifacts) and re-run conversion.
- Dimensions don’t add up: wall thickness assumptions differ from the plan. Adjust thickness and re-check room sizes.
FAQ: floorplan to 3D conversions
Do I need a perfect plan to get useful 3D renders?
No, but you need at least one trustworthy dimension for scale and a legible wall outline. If the plan is rough, treat the result as conceptual and verify on-site before committing.
Is 3D only for interiors?
Not at all. Exterior refresh previews (paint, cladding, window trim, entry updates) are often easier to decide in 3D because you can compare options side-by-side with consistent viewpoints.
What’s the fastest way to improve realism without losing accuracy?
Keep geometry simple and accurate, then focus on lighting, material consistency, and a small set of believable props. Over-decorating can distract from layout decisions.
Putting it all together: a reliable workflow you can repeat
A dependable floorplan to 3d process is less about fancy effects and more about discipline:
- Prepare the plan (clean, square, readable).
- Calibrate scale from a trusted dimension.
- Model openings and heights thoughtfully.
- Audit key measurements before styling.
- Use AI room planning to explore options once the shell is right.
- Export consistent render sets for decision-making and presentations.
If you want to experiment with this workflow on iPhone or iPad, an app like Floor Plan to 3D & Home Redesign can help convert black-and-white plans into clean 3D previews and generate redesign ideas—just remember: accuracy starts with your source plan and your validation steps.
