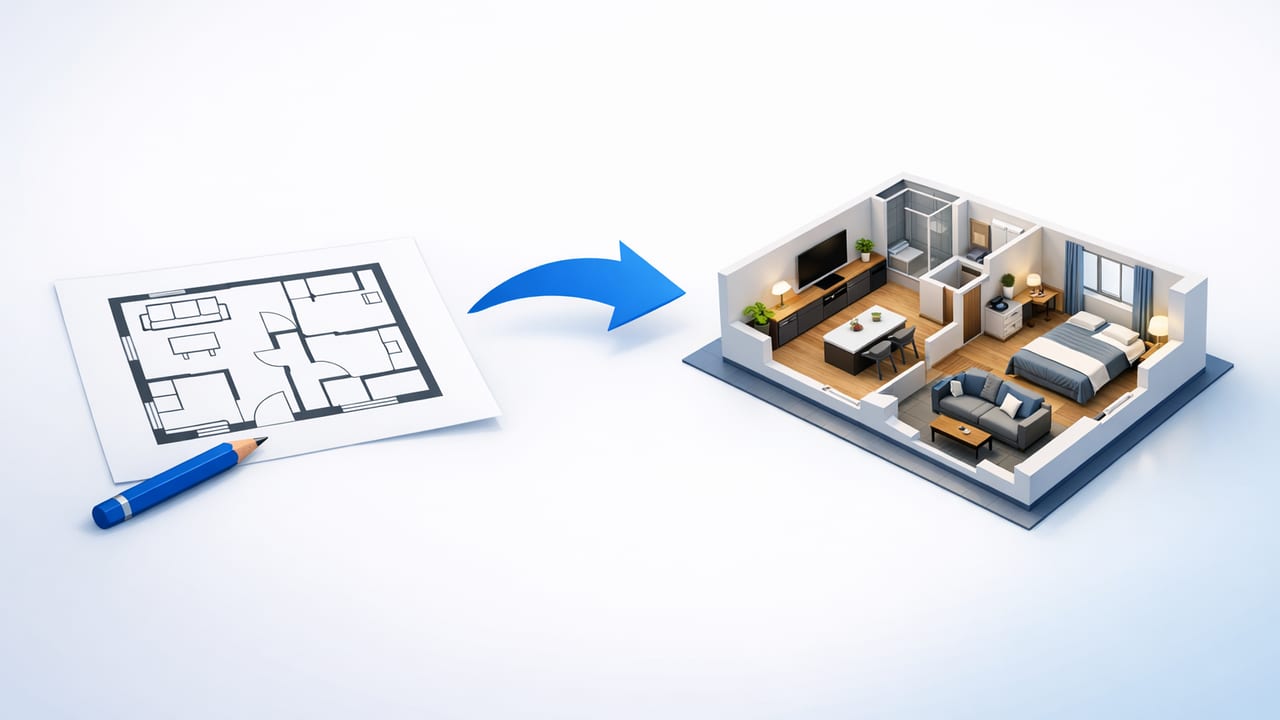
Converting a floor plan to 3D is no longer just a “nice to have” for designers—it’s a practical way to reduce renovation risk. In 2D, it’s easy to miss how a kitchen island blocks a walkway, how a door swing collides with a vanity, or how a new window changes furniture placement. In 3D, those issues become obvious early—when changes are still cheap.
This guide walks through a room-by-room workflow to turn a 2D plan into accurate 3D renders, validate real-life clearances, and explore redesign options (including AI room planner concepts) without getting locked into heavy modeling software.
Why convert a floor plan to 3D before making decisions?
A 2D plan communicates geometry; a 3D model communicates experience. The biggest payoff comes from catching problems that cost money on-site:
- Clearance conflicts: door swings, tight aisles, appliance openings, stair headroom.
- Proportion mistakes: “It fits on paper” but feels cramped in perspective.
- Scope clarity: seeing adjacent spaces helps you avoid redesigning one room in a vacuum.
- Faster approvals: clients, partners, or contractors can react to images, not abstractions.
Rule of thumb: If a change affects circulation, storage, or daylight, test it in 3D—your future self will thank you.
What you need for an accurate floor plan to 3D conversion
You can start from many sources, but accuracy depends on how you set up the input.
Best input types
- Clean PDF floor plan (ideal): crisp lines, readable labels, visible dimensions.
- Scanned blueprint: workable if you correct skew and confirm scale.
- Photo of a printed plan: usable, but take it square-on in bright light to reduce distortion.
Critical details to confirm
- At least one known measurement (e.g., a labeled wall length) to verify scale.
- Wall thickness assumptions if not shown (interior vs exterior walls differ).
- Door/window positions and which way doors swing.
Room-by-room workflow: from 2D plan to reliable 3D
The fastest way to stay accurate is to convert the structure first, then add openings, then test layouts per room.
Step 1: Clean and normalize the plan
Before you convert a floor plan to 3D, make the plan easier to interpret:
- Crop to the floor you’re modeling (avoid title blocks and notes if they confuse detection).
- Straighten the image so walls are horizontal/vertical where appropriate.
- Increase contrast so walls read as solid lines and dimensions remain legible.
Step 2: Lock scale early (and verify it twice)
Scale errors are the #1 reason a 3D preview becomes misleading. Use a known dimension (like “12'-0\"” on a main wall) and verify it against another dimension elsewhere.
- Check 1: overall building width vs. a major labeled dimension.
- Check 2: a smaller dimension (like a bathroom width) to confirm consistency.
Step 3: Build the shell before the rooms
Model exterior walls and major interior partitions first. Don’t worry about furniture yet. Your goal is to preserve:
- overall proportions
- room-to-room adjacencies
- hallway widths and transitions
Step 4: Add doors and windows (then simulate real use)
Openings dictate how a space functions. After placing doors and windows:
- Confirm door swing direction in tight areas (bathrooms, closets, laundry).
- Check window heights if you plan built-ins, sinks, or headboards.
- Validate egress paths and circulation through pinch points.
Step 5: Furnish room-by-room using clearance rules
Now switch to practical layout testing. Work one room at a time so you can compare options.
Key clearance checks (quick reference)
Use these as starting points; local codes, accessibility needs, and appliance specs can require more.
- Main walkways: keep clear and intuitive; avoid “dead-end” circulation.
- Kitchen work zones: ensure appliance doors can open without blocking the primary path.
- Dining: allow pull-back space behind chairs so people can stand up comfortably.
- Bathrooms: check door swings and shower/glass clearances.
- Bedrooms: verify both-side bed access if intended, plus dresser openings.
Using an AI room planner without losing control of accuracy
An AI room planner can be excellent for ideation—furniture arrangements, style directions, and quick “what if” redesigns. The trick is to treat AI output as draft concepts and validate them against your measured 3D model.
A practical AI + 3D loop
- Start from the accurate 3D shell (scaled walls + correct openings).
- Generate 2–4 layout concepts per room (e.g., living room: conversational vs. media-focused).
- Test each concept for clearance conflicts and awkward circulation.
- Refine with constraints: keep the best idea, then re-run variations with specific requirements (storage wall, desk nook, bigger island).
Comparison: three ways to go from floor plan to 3D
| Method | Best for | Pros | Watch-outs |
|---|---|---|---|
| Manual CAD/3D modeling | Construction-level detail | Maximum control, detail | Time-intensive; steep learning curve |
| Floor plan to 3D conversion apps | Renovation previews, fast options | Speed, easier iteration, shareable renders | Must verify scale and openings carefully |
| Outsourced 3D rendering service | Polished marketing visuals | High-end output with minimal effort | Longer turnaround; changes add cost |
Room-by-room examples: what to test in 3D
Kitchen: the “looks fine” trap
In 2D, an island might fit. In 3D, you may notice the refrigerator door blocks the main aisle or the island feels oversized. Test:
- appliance door arcs and drawer pull-outs
- landing space near oven, fridge, and sink
- sightlines to dining and living areas
Bathroom: door swings and real human movement
Bathrooms are small, so tiny errors matter. In 3D, check whether you can enter, close the door, and access fixtures without awkward turns. Test:
- in-swing vs out-swing doors
- shower glass clearance and towel placement
- vanity depth vs circulation
Living room: circulation vs seating capacity
3D helps you balance “how many seats” with “how it flows.” Create two variants:
- Conversation-first: seating faces each other, TV secondary
- Media-first: sightlines to TV prioritized, pathways protected
Exterior refresh: curb appeal choices you can preview
Even without structural changes, 3D previews can help you choose combinations of:
- siding color and trim contrast
- entry door style and lighting placement
- landscape massing (shrubs/trees) relative to windows
Exporting 3D renders that stakeholders can act on
A good render is one that makes feedback specific. Export a small set of views consistently:
- One “orientation” view showing the whole floor (so viewers understand adjacency).
- Two eye-level views per key room (entry angle + opposite corner).
- One top-down 3D view for quick layout comparison.
Use a simple file naming system
This avoids losing track when you iterate quickly across options.
Project_Room_View_Option_Version.png
MapleSt_Kitchen_EyeLevel_IslandA_v03.png
MapleSt_Living_TopDown_LayoutB_v02.png
Accuracy checklist before you trust the model
- Scale verified with two independent dimensions
- Wall thickness matches your assumptions (especially exterior)
- Openings placed correctly (doors/windows, swing direction)
- Stairs and level changes accounted for (if applicable)
- Furniture sizes match real product dimensions (not generic placeholders)
- Circulation tested through daily paths (entry → kitchen → living, bedroom → bath, etc.)
Common mistakes when converting a floor plan to 3D (and how to avoid them)
1) Trusting the scan more than the measurements
Scans and photos can stretch. Always calibrate to a known dimension and confirm with a second measurement.
2) Ignoring doors until the end
Doors define usability. Place them early so your layouts don’t collapse later.
3) Treating AI concepts as “final”
Use AI for ideas, then validate with clearances and real furniture sizes in 3D.
4) Over-detailing too soon
Start with structure and function; add materials and styling once the layout is correct. Pretty visuals can hide functional problems.
FAQ
How long does a floor plan to 3D conversion take?
For a typical home, a first-pass 3D model can be quick if the input plan is clean and scaled. Iterations usually take longer than initial conversion—because you’ll explore options.
Do I need construction-grade precision?
For renovation previews, you mainly need layout-accurate geometry: correct room sizes, openings, and circulation. For building, coordinate with professionals and verified site measurements.
What should I do if the plan has missing dimensions?
Use at least one confirmed dimension (from a listing, a survey, or a site measure). If that’s not available, treat the 3D result as conceptual and avoid decisions that depend on exact fit.
Putting it all together
A reliable floor plan to 3D workflow is less about flashy rendering and more about decision quality: calibrate scale, model the shell, place openings, then test real-life movement room-by-room. Combine that with AI room planner ideation and you can explore more options—while staying grounded in measurable constraints.
If you’re looking for an iOS tool that supports this kind of fast plan-to-render workflow (including AI-guided redesign ideas and exportable high-resolution images), Floor Plan to 3D & Home Redesign is one option to consider.
