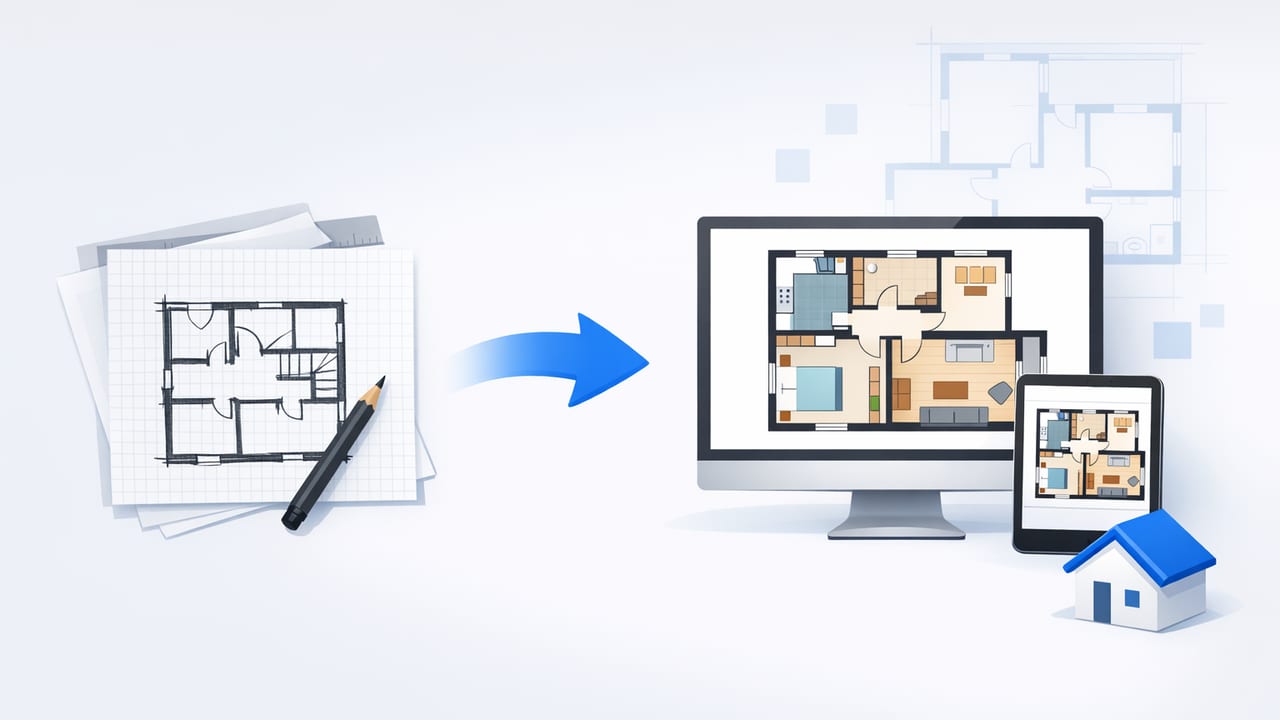
A floor plan converter turns a 2D floor plan (paper scan, PDF blueprint, or black-and-white line drawing) into a structured digital model you can work with—often a clean 2D redraw plus a 3D view you can rotate, measure, and present. Used well, it’s one of the fastest ways to move from “I think this renovation works” to “I’m confident this layout works,” without rebuilding your home in heavy CAD software.
This guide focuses on accuracy-first conversion: how to prepare your plan, what to check in the output, and which features matter most for renovation previews, interior design, exterior refresh ideas, and empty-room staging.
What a floor plan converter actually does (and what it doesn’t)
At a practical level, most converters do three things:
- Interpret geometry: detect walls, rooms, openings, and boundaries from the plan image.
- Reconstruct structure: rebuild the plan as editable vectors or a simple 3D shell (walls + floors + sometimes doors/windows).
- Enable visualization: generate 3D renders you can use to test furniture placement, circulation, and renovation concepts.
What converters usually don’t do automatically (or only do partially):
- Guarantee perfect scale without at least one reliable measurement reference.
- Infer hidden structural constraints (load-bearing walls, beams, HVAC, plumbing runs).
- Resolve ambiguous symbols when the plan is low-resolution, skewed, or heavily annotated.
Rule of thumb: A floor plan converter can be extremely accurate, but it’s only as trustworthy as the plan image and the scale validation you provide.
Before you convert: a 7-point plan prep checklist
Small improvements to your input file can dramatically improve detection quality and reduce cleanup time.
- Use the cleanest source: prefer original PDF exports; otherwise scan at 300–600 DPI.
- Fix perspective: photos of paper plans should be squared (no trapezoid distortion).
- Maximize contrast: black lines on white background; avoid gray shadows.
- Remove clutter: crop out title blocks, legends, and neighboring floors when possible.
- Keep dimension strings visible: at least one clear dimension is essential for scale checks.
- Separate floors: convert one level at a time to avoid cross-detection.
- Preserve labels: room names help AI room planners auto-suggest layouts and furniture zones.
Quick image cleanup (optional)
If you’re comfortable with basic tools, you can standardize a scan before importing. For example, ImageMagick can increase contrast and remove faint backgrounds:
magick input.jpg -colorspace Gray -contrast-stretch 1%x1% -deskew 40% cleaned.pngThe conversion workflow: from 2D plan to reliable 3D
A good workflow is less about “press convert” and more about validation. Here’s a repeatable process that works for most renovations and redesigns.
Step 1: Import and confirm scale
Immediately after conversion, verify scale using a dimension you trust (e.g., a labeled wall length or overall building width). If your converter allows setting a reference measurement, do it early—before you start placing furniture or making design decisions.
Step 2: Validate the envelope (walls and thickness)
Walls drive everything: room size, door clearances, cabinetry fits, and circulation. Check:
- Exterior boundary matches the plan (no missing bump-outs).
- Wall thickness is consistent and realistic (interior vs exterior often differ).
- Angles are correct (especially in older homes with non-90° corners).
Step 3: Validate openings (doors and windows)
Door swings and window placement affect real-world usability. Confirm:
- Door widths (e.g., 30–36 inches common for interior, wider for accessibility).
- Window locations relative to corners (important for furniture and kitchen layouts).
- Sliding doors and pocket doors aren’t misread as windows or wall gaps.
Step 4: Check room boundaries and labels
Room detection can fail when plans have open concept areas or partial walls. Ensure rooms are split logically (kitchen vs dining vs living), and rename rooms to match how you’ll design them. Accurate labels also improve AI room planner suggestions.
Step 5: Add height assumptions (for 3D realism)
3D renders depend on vertical dimensions. If ceiling heights aren’t on the plan, use a default (e.g., 8 ft) and adjust for vaulted areas later. This matters for:
- Cabinet and backsplash proportions
- Window head heights and curtain planning
- Lighting placement and perceived room volume
Accuracy checks that prevent expensive mistakes
To keep your 3D preview aligned with reality, run these checks before you commit to a layout or a renovation scope.
1) The “two-measurement” scale test
Don’t trust a single dimension. Verify scale using two measurements in different directions (for example, overall width and one interior wall). If one matches and the other is off, your input image may be stretched or skewed.
2) The circulation test (furniture + walk paths)
Once basic furniture is placed, trace walk paths:
- Primary routes (entry → living → kitchen)
- Clearances (around dining chairs, sofa-to-coffee-table spacing)
- Pinch points near doors and corners
If your 3D layout “feels cramped,” it’s often a scale mismatch or a wall alignment error.
3) The “fixture reality” test (kitchen/bath)
Kitchens and bathrooms reveal errors quickly because standard sizes are unforgiving. Confirm that you can fit typical modules (e.g., 24-inch base cabinets, 30-inch range) without forcing unrealistic gaps.
Choosing a floor plan converter: feature checklist that matters
Many tools can generate a pretty render. Fewer produce an editable model that stays faithful to the plan. Prioritize these capabilities:
- Scale setting and measurement tools (non-negotiable for renovation previews).
- Wall editing: split/merge walls, adjust thickness, correct angles.
- Door/window editing: move, resize, change type, flip swing.
- Room detection + naming: supports AI room planner workflows.
- Export options: high-res images for proposals and client presentations.
- Plan fidelity: preserves labels and proportions rather than “reimagining” the layout.
Comparison table: match features to common use cases
| Use case | Must-have converter features | Nice-to-have |
|---|---|---|
| Renovation scope planning | Scale tools, wall editing, door/window controls | Material swapping, before/after views |
| Interior layout testing | Room detection, furniture library, clearance checks | AI room planner suggestions |
| Exterior refresh concepts | Basic massing accuracy, consistent proportions | Facade style presets, color palettes |
| Empty-room staging | Fast 3D renders, realistic lighting, exportable images | Multiple style variations per room |
Common conversion problems (and how to fix them fast)
Problem: Walls are broken or doubled
Cause: low contrast, thick line weights, or overlapping annotations.
Fix: re-import a cleaned image; manually merge or redraw key walls; crop out heavy notes.
Problem: Rooms are merged (open concept becomes one giant room)
Cause: partial walls/thresholds confuse boundary detection.
Fix: add room separators in the editor; rename zones based on function (Kitchen, Dining, Living).
Problem: Doors/windows detected in the wrong place
Cause: symbol variations (pocket door marks, sliding door graphics).
Fix: delete and re-place openings; verify widths against typical standards.
Problem: Scale feels “close” but furniture doesn’t fit
Cause: image skew or incorrect reference dimension.
Fix: run the two-measurement scale test; re-square the image; reset scale and re-check.
A practical example: turning a scanned plan into a decision-ready 3D preview
Imagine you have a scanned black-and-white plan for a small ranch home. Your goal is to test whether removing a non-load-bearing wall between kitchen and living room will improve flow and allow an island.
- Prep: crop to the main floor, deskew, increase contrast.
- Convert: import and set scale using the labeled overall width.
- Validate: confirm exterior boundary and interior partitions; correct one misread doorway.
- Test layouts: place a 7-foot island, check 36–42 inch clearances around it, and verify the dining table doesn’t block the hallway.
- Render: export two 3D renders (before/after) for a contractor conversation.
The key is that the converter isn’t just producing an image—it’s producing a model you can interrogate for fit, flow, and feasibility.
Exporting 3D renders that communicate clearly
When you’re ready to share results with a partner, designer, or contractor, clarity beats artistry. Use these export habits:
- Match viewpoints across options (same camera angle for before/after comparisons).
- Label assumptions: ceiling height used, any estimated wall thickness, unknown window heights.
- Keep a “truth set”: one render with minimal styling (neutral materials) so stakeholders focus on layout.
- Use high resolution when presenting: crisp edges help others spot issues early.
Final checklist: what “good” looks like
- Scale verified with at least two measurements
- Continuous wall loops and realistic thicknesses
- Openings placed correctly and sized plausibly
- Rooms named by function for better planning and AI guidance
- 3D renders exported with consistent views and clear assumptions
If you want to explore this workflow on an iPhone or iPad, an iOS app such as Floor Plan to 3D & Home Redesign can help you convert a plan, validate the layout, and generate presentation-ready 3D images without heavy desktop software.
