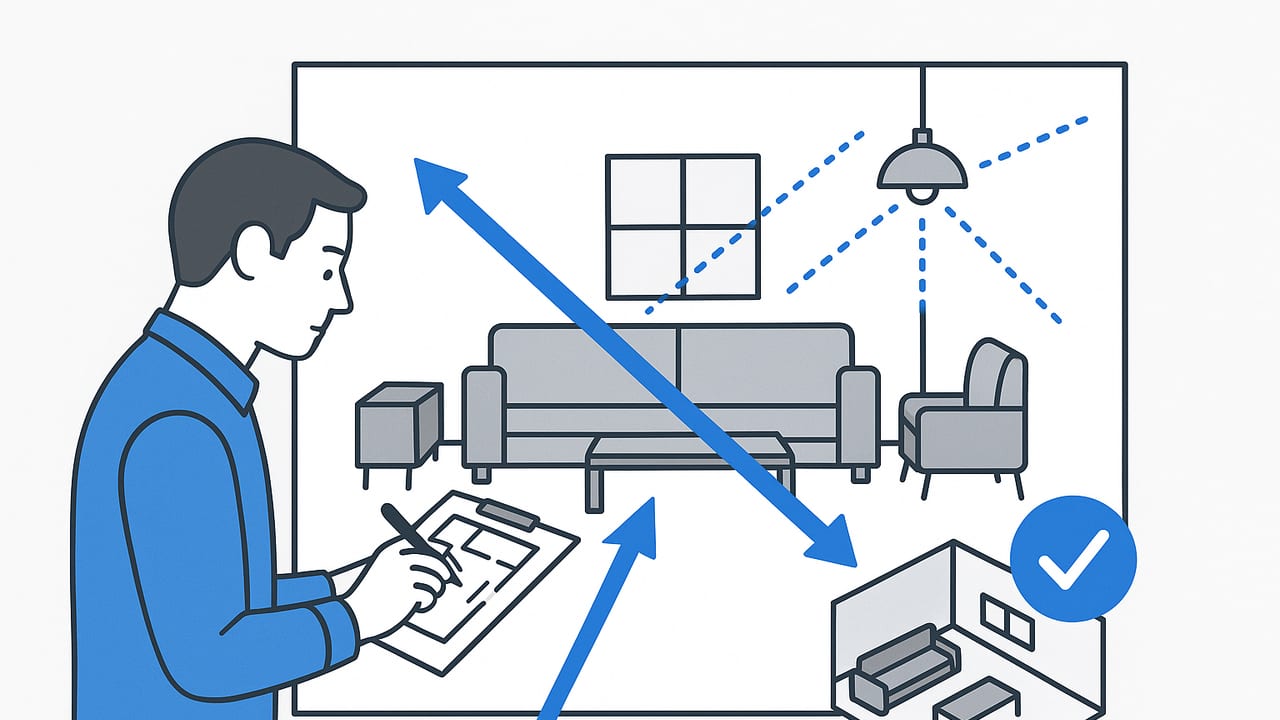
Every layout has places where visibility, light, or movement breaks down. These are room blind spots—areas you cannot see, light doesn’t reach, or traffic conflicts appear until late in the design. Learning to avoid room blind spots early reduces accidents, improves comfort, and keeps your space feeling open and secure. This guide shows you how to identify, map, and eliminate blind spots with practical steps you can apply to any plan—paper, CAD, or 3D.
What Is a Room Blind Spot?
A room blind spot is any location where your view, lighting, or movement is obstructed at the height you need it. It’s not just about cameras or security: in homes and small spaces, blind spots create awkward conversations, unsafe corners, poor task lighting, and clutter buildup where you didn’t expect it.
- Visual blind spots: You can’t see an entry, a child’s play area, the stove, or the TV from key positions (sofa, desk, island, bed).
- Lighting blind spots: Areas with insufficient horizontal or vertical illumination (e.g., a counter in shadow, a dark stair tread).
- Flow blind spots: Corners, door swings, or furniture that hide approaching traffic, causing collisions or bottlenecks.
Common causes include oversized furniture, tall backs or partitions, deep soffits, poorly placed columns, dark finishes that absorb light, and single-point lighting that creates harsh pools of light with darkness between them.
How to Avoid Room Blind Spots Step by Step
1) Define Viewpoints and Activities
Start with where people will be and what they’re doing. The same space must work for multiple eye heights and orientations:
- Eye height (standing): ~1600–1700 mm (63–67 in)
- Eye height (seated): ~1150–1250 mm (45–49 in) for bar seating; ~1050 mm (41 in) for dining; ~950 mm (37 in) for sofa lounging
- Kids’ eye height: ~900–1200 mm (35–47 in)
- Bed eye height (reclined): ~700–900 mm (28–35 in)
Mark these viewpoints on your plan: main seat on the sofa, desk chair, cook at the range, person entering the room, parent supervising play, and anyone moving along key paths.
2) Map Sightlines on the Plan
On your floor plan, draw sightlines from each viewpoint toward targets (entry door, stove, TV, crib, patio door). Add a field-of-view cone to approximate human vision:
- Central task cone: ~60° (high acuity)
- Comfortable awareness cone: ~100–120°
Sketch straight lines from the viewpoint to targets. Identify obstructions above eye level or topping out above 900 mm (35 in) that might block a seated view. Tall sofa backs, high island seating, bookcases, and opaque partitions can block a seated or child’s eye level even if a standing adult sees fine.
Tip: Use dashed lines for partial views and a stop mark where the line hits an obstruction. If your line grazes a corner, assume real-world thickness and round the corner slightly in your drawing—many “almost clear” lines are actually blocked by trim, posts, or hardware.
3) Light the Plan to Remove Dark Corners
Lighting blind spots occur when a room relies on a single ceiling fixture or recessed lights spaced too far apart. Use layered lighting to keep surfaces evenly lit and faces legible:
- Ambient: Recessed or ceiling fixtures spaced so that adjacent beams overlap at work surface height. Typical target: 100–300 lux in living spaces; 300–500 lux in kitchens.
- Task: Under-cabinet lights for counters, reading lamps at seating, vanity lights that fill the face from both sides.
- Accent: Wall washers or track for artwork and corners; a lit corner visually expands the room and kills shadows.
Rules of thumb: Place recessed lights roughly 1 to 1.5 times the ceiling height apart (e.g., 2.4–3.6 m spacing at a 2.4 m ceiling; 8–12 ft at an 8 ft ceiling). Keep the first row of downlights about 600–900 mm (24–36 in) from walls to prevent vertical surface shadows.
4) Tune Furniture Heights and Depths
- Sofa backs: Tall or high-back chaise ends often block low sightlines. If you need supervision views across a space, consider mid-back profiles (700–800 mm / 28–32 in).
- Kitchen islands: Thick waterfall edges and high stools can block seated views. A lowered seating bay or a 2-tier counter can restore sightlines while hiding clutter from the living area.
- Open shelving and half walls: These can give partial views while maintaining separation. Keep the top of any partial divider below seated eye level if views matter.
5) Doors, Swings, and Corners
- Door swing arcs: A fully open door can hide someone behind it. Consider pocket, barn, or outswing doors in tight corridors.
- Corner geometry: A 45° chamfer or a glass corner panel near critical intersections improves mutual visibility.
- Entry sight: From the main seat, can you see who enters? From the kitchen, can you see the play area and the entry simultaneously? If not, adjust openings or furniture until at least one key viewpoint covers both.
6) Use Glass and Mirrors Strategically
- Mirrors: Place perpendicular to windows to bounce ambient light into corners rather than opposite, which can create glare.
- Glass doors/partitions: Consider reeded or frosted for privacy while preserving light and motion awareness.
Balance visibility with privacy. The aim is not surveillance but informed comfort—enough awareness to move safely and interact naturally.
Rapid Checks to Avoid Room Blind Spots
- Seated view band: Keep critical views clear between 750–1250 mm (30–49 in) above floor; avoid tall obstructions in this zone across common paths.
- TV and focal walls: Ensure at least 15° vertical viewing angle from seating; mount center ~950–1100 mm (37–43 in) above floor for typical sofas.
- Island-to-stove visibility: If supervising kids, aim for an unobstructed line from cooktop to living/play seating.
- Stair safety: Light from two directions; avoid treads with a single overhead downlight that casts the nosings into shadow.
- Intersection sight triangle: At corridor T-junctions, keep 300–450 mm (12–18 in) of wall clear near the corner or use glass to create a visibility triangle.
- Recessed spacing: Keep even grid spacing; avoid leaving corners >1.2 m (4 ft) from nearest light unless intentionally moody.
Common Blind Spots and Fixes by Room
| Room | Typical Blind Spot | Primary Cause | Fast Fix |
|---|---|---|---|
| Living Room | Can’t see entry from main seat | Sofa back to entry, tall bookcases | Rotate sofa, use lower console, add side opening |
| Kitchen | Dark counter zones | Only ceiling lights; deep uppers | Add under-cabinet strips; bring first downlight row 600–900 mm from wall |
| Dining | Glare or faces in shadow | Single bright pendant | Diffuse pendant + wall wash; side sconces at ~1500 mm |
| Bedroom | Blocked view of door from bed | Tall dresser or canopy posts | Relocate tall storage; mirror to show entry; lower footboard |
| Home Office | Monitor glare, low face light | Window behind monitor; no task light | Side daylight + angled task lamp; matte screen position |
| Hall/Stairs | Dark treads; hidden oncoming traffic | Single downlight; tight turns | Continuous wall lights; glass or chamfer at turns |
Validate with 3D: Camera Heights, Daylight, and Occlusion
2D sightline sketches are fast, but 3D makes blind spots obvious—especially for seated vs. standing views and time-of-day light changes.
- Camera setup: Use 1050 mm (41 in) eye height for dining/seated checks, 1600–1650 mm (63–65 in) for standing, 850–900 mm (33–35 in) for bed-level checks. Keep a 50–60° field of view to mimic natural perspective.
- Daylight passes: Test morning, noon, and evening to see where corners fall dark. A corner dark at all times likely needs a dedicated fixture or lighter finishes.
- Material realism: Matte vs. glossy finishes significantly affect perceived brightness; matte reduces glare and reveals detail across the surface.
Simple Sightline Occlusion Logic (Pseudo‑Code)
If you’re validating in a scripting-capable tool, a basic ray test flags blind zones. Conceptually:
// viewpoints: list of cameras with position and eye height
// targets: points or areas you want to keep visible
// obstacles: mesh or bounding boxes with top heights
for (camera in viewpoints) {
  for (target in targets) {
    ray = Ray(camera.position, target.position);
    hit = firstIntersection(ray, obstacles);
    if (hit.exists && hit.height >= camera.eyeHeight) {
      markAsBlocked(camera, target);
    } else {
      markAsVisible(camera, target);
    }
  }
}
// Produce a heatmap: % of area visible from each camera
Even without code, you can emulate this by placing a low camera in your 3D scene and walking it through each viewpoint, checking whether obstacles above the relevant eye height cut off views.
Advanced Considerations: Inclusive, Safe, and Social
- Children and seated guests: Ensure supervision views at ~900–1100 mm (35–43 in) eye height. Avoid tall island seating directly blocking the path of view from living to kitchen.
- Aging-in-place: Provide continuous lighting and strong vertical illumination of faces to improve visibility, reduce glare, and prevent missteps. Use night-lighting paths with low-level LEDs.
- Privacy balance: Where a bathroom or bedroom shares a line with social spaces, aim for diagonal or offset entries instead of direct axial views. Use partial-height walls or translucent glazing to preserve light without exposing sightlines.
- Acoustic spill vs. visual oversight: If glass or openness increases noise, trade a full-height wall for a clerestory or internal window—maintain awareness without creating a sound tunnel.
Design for the quiet path: keep the routes clear, the corners readable, and the faces lit. A space feels safer when you can see where you’re going and who you’re with.
Checklist: How to Avoid Room Blind Spots
- Mark all key viewpoints and activities with correct eye heights.
- Draw sightlines and 60–120° cones to important targets.
- Eliminate seated-height obstructions in supervision paths.
- Layer ambient, task, and accent lighting; light the corners.
- Reposition doors or use glazing/chamfers at tight intersections.
- Confirm in 3D with seated and standing cameras across time of day.
- Adjust furniture heights (sofa backs, islands, headboards) to protect visibility.
- Balance visibility with privacy using translucent materials and offsets.
Before-and-After Example
Before: Open-plan living/dining/kitchen with a tall sectional back facing the entry and a single central ceiling light. From the sofa, you can’t see the entry, and the kitchen counter is in shadow under deep wall cabinets.
Findings: Seated eye-height lines intersect the sofa back; entry is hidden. Kitchen work zone reads dark on plan and in renders. Corridor T-junction near the bedrooms has a hard 90° corner.
Fixes:
- Rotate sectional 90° and replace the tall back with a mid-back plus a low console. Now the entry and living are mutually visible.
- Add under-cabinet task lights; shift first row of recessed lights 750 mm (30 in) from the upper cabinets to brighten backsplash and counter.
- Chamfer the corridor corner by 300 mm (12 in) or add a small internal window to reveal approaching traffic.
After: Entry is visible from seating, kitchen tasks are evenly lit, and corridor collisions drop as visibility improves.
Troubleshooting: If Blind Spots Persist
- Obstruction creep: Measure actual furniture heights and thicknesses. Many catalog dimensions exclude pillows and back cushions that rise above frames.
- Lighting glare: Fixing a dark spot by adding a bright downlight can cause glare that makes surroundings feel darker. Consider diffuse or grazing light instead.
- Too many focal points: If every wall has a “moment,” sightlines fight for attention. Prioritize one or two key targets per viewpoint.
By approaching visibility and lighting as a system—viewpoints, lines, layers of light—you’ll avoid room blind spots and build spaces that feel calm, connected, and safe.
Want a quick way to visualize sightlines and lighting before you rearrange furniture? You can turn a black‑and‑white floor plan into a true‑to‑scale 3D scene with an iOS app like Floor Plan to 3D, then walk through at seated and standing eye heights to confirm views and light coverage.
