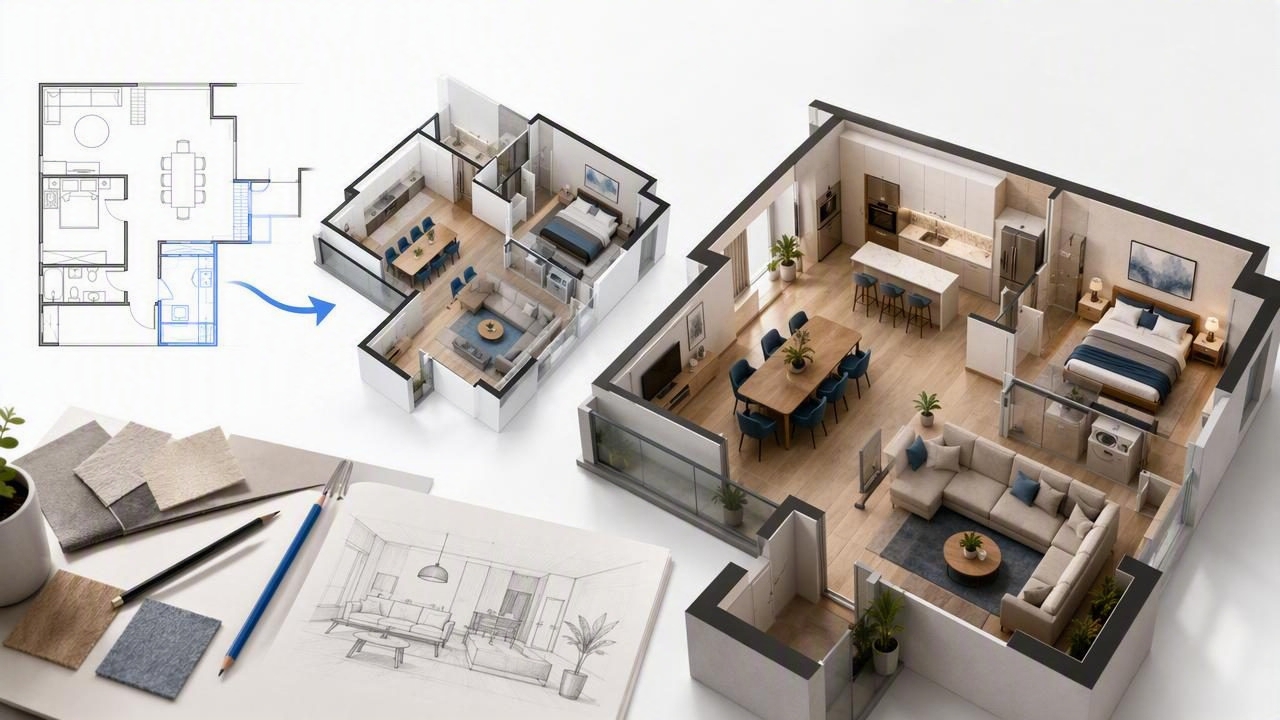
For interior designers, the fastest way to build trust is to show clients how their spaces will actually look and feel. That means turning black-and-white floor plans into immersive 3D visuals—quickly, accurately, and with minimal friction. Choosing the right interior designer tool for floor plan rendering can be the difference between a same-day client approval and a stalled project. This guide breaks down the tool landscape, the features that matter most, and a practical workflow to go from 2D to presentation-ready 3D without compromising scale or design intent.
What an Interior Designer Tool for Floor Plan Rendering Should Do
When we talk about an interior designer tool for floor plan rendering, we mean software or an app that accepts a 2D plan (PDF, image scan, blueprint) and outputs a navigable, dimensionally faithful 3D model with materials, furnishings, and lighting. The best tools minimize repetitive drafting, automate recognition of walls and openings, keep proportions true, and export high-resolution stills or panoramas for proposals. Whether you prefer desktop CAD, web-based planners, or mobile apps, the essentials are the same: reliable scale, speed, and visuals that communicate design clearly.
Common Categories of Tools
| Category | Best For | Learning Curve | 2D → 3D Speed | Scale Fidelity | Typical Outputs |
|---|---|---|---|---|---|
| Desktop CAD/BIM | Complex detail, documentation | High | Moderate | Excellent | CAD files, renders, sheets |
| Web 3D Planners | Quick concept visuals, collaboration | Low–Medium | Fast | Good | Images, 360 tours, links |
| Mobile 2D→3D Converters | Field-to-render speed, portability | Low | Very fast | Good–Excellent (if calibrated) | Hi-res images, panoramas |
| Game-Engine Viz | Real-time, cinematic marketing | High | Slow–Moderate | Excellent | Videos, interactive fly-throughs |
How to Choose the Right Tool: Criteria That Matter
Before committing to a platform, evaluate these features against your practice’s needs. Prioritize accuracy, speed, and client-facing outputs.
- Input Flexibility: Can you import JPEG/PNG scans, PDFs, or photos of printed plans? Tools that detect walls, doors, and windows from black-and-white layouts can jump-start modeling.
- Scale Calibration: Look for a simple “set scale” step using a known dimension (e.g., a 10' wall). The tool should lock the entire plan’s proportions to that reference.
- Automation and AI Recognition: Automatic vectorization of lines into walls, detection of openings, and room boundary recognition save hours and reduce manual errors.
- Dimension Controls: Wall thickness, ceiling height, and door/window sizes should be editable with numeric inputs so you can match construction documents.
- Material and Furniture Libraries: A curated catalog of finishes, fixtures, and furnishings helps you create believable scenes fast. Support for custom textures (e.g., client’s stone slab) is a plus.
- Lighting Tools: Natural and artificial lighting controls (sun angle, temperature, intensity) with exposure and white balance adjustments elevate realism.
- Camera and Composition: Multiple viewpoints, two-point perspective, focal length control, and safe-frame guides help create portfolio-quality images.
- Output Quality and Formats: Expect high-resolution stills (4K+), 360 panoramas, and ideally transparent-background exports for presentations. Batch rendering saves time.
- Collaboration: Comments, markups, version history, and easy share links accelerate approvals. If you present on-site, offline rendering on mobile can be invaluable.
- Performance and Device Fit: Consider whether you need iPhone portability, a web app for team access, or desktop horsepower for complex scenes.
Practical Workflow: From 2D Plan to Client-Ready 3D
Use this field-tested sequence to convert a black-and-white floor plan into accurate, persuasive visuals.
- Prepare the Plan Image: If your plan is on paper, scan at 300–600 dpi. For a phone photo, shoot from directly above with even lighting; crop margins to remove shadows and skew.
- Import and Calibrate: Bring the image into your interior designer tool for floor plan rendering. Set scale using a known dimension (corridor width, room length). Confirm a second dimension to verify proportional accuracy.
- Trace or Auto-Detect Walls: Use AI auto-detection if available, then spot-check angles and thicknesses. Correct any non-orthogonal walls or stair alignments before extruding to 3D.
- Place Openings and Structure: Add doors, windows, columns, and load-bearing walls. Match sill heights and swing directions to the plan; they influence circulation and furniture layout.
- Set Heights and Levels: Define floor-to-ceiling height, window heads, and soffits. Multi-level projects need consistent story heights and stair riser counts to avoid rendering artifacts.
- Zone Rooms: Assign room types (kitchen, living, bath) to enable material presets, lighting defaults, and schedule summaries if your tool supports them.
- Apply Materials: Start with floors and walls. Use real-world scales: a 6" x 36" plank should look like a 6" x 36" plank. Add bump/roughness maps for tile and stone to avoid “flat” surfaces.
- Furnish and Accessorize: Place hero pieces first (sofa, dining table, bed), then secondary items (side tables, lamps), and finish with soft goods and art. Maintain accurate clearances around doors and circulation paths.
- Light and Expose: Set a daytime sun angle for natural light, then layer practicals (pendants, sconces) with warm temperatures. Balance exposure; avoid overblown windows by reducing environment brightness or adding interior fill lights.
- Compose and Render: Choose human-eye focal lengths (28–35 mm equivalent) and two-point perspective for interiors. Render test drafts at low resolution, refine materials and lighting, then output final 4K stills and a 360 panorama for client review.
Pro Tip: Validate scale visually and numerically. After calibration, dimension a known hallway and compare to the plan. A quick 1–2% correction now prevents costly re-renders later.
Render Settings Checklist
render:
  resolution: 3840x2160  # 4K for presentations
  perspective: two_point  # verticals straight
  focal_length: 30mm      # natural interior view
  exposure: auto-locked   # consistent across views
  white_balance: 4000–5000K
  shadows: soft_high      # realistic penumbra
  output_formats:
    - PNG (transparent bg for boards)
    - JPG (smaller size for email)
    - 360 panorama (client exploration)
Accuracy Pitfalls and How to Avoid Them
- Photo Distortion: Shooting a plan at an angle warps geometry. Fix with a top-down scan or use perspective correction before import.
- Mis-Scaled Imports: If a second known dimension is off, recalibrate. Don’t compensate by stretching furniture; fix scale at the source.
- Default Wall Thickness: Many tools assume 4"–6" walls. Check your plan’s specified thickness (often 100–150 mm or more) and update before placing doors/windows.
- Ceiling Height Assumptions: Don’t forget bulkheads and dropped ceilings. Update heights per room for lighting accuracy and to avoid fixtures clipping.
- North Orientation: Incorrect north reduces lighting realism. Set true north to match site plans for consistent shadows in all views.
- Material Scale Drift: Wood, tile, and stone should match real dimensions. If a subway tile looks oversized, adjust texture scale and repeat settings.
Presenting to Clients: What They Need to See
Clients rarely need twenty views of the same room. Deliver a concise set that answers their top questions: space planning, light quality, material combinations, and key focal points. A typical set might include two living room angles (seating and TV wall), one kitchen wide angle, a detail shot of a material junction (backsplash–counter–cabinet), and a 360 panorama of the main space to reduce back-and-forth emails.
ROI: Turning Speed and Accuracy into Approvals
Time is your margin. If a tool converts plans to 3D in minutes instead of hours, you can iterate faster during live client sessions. That reduces decision fatigue and increases approval rates. Consider a simple model: if faster rendering saves two hours per concept round and you run four iterations per project, that’s a full day recaptured—often the difference between profitable fixed-fee work and scope creep. Moreover, accurate scale in 3D mitigates costly surprises on site; clients approve layouts and clearances they truly understand.
Security and File Hygiene
Floor plans often include private information. Prefer tools that process locally on your device or offer transparent data policies. Strip metadata from uploaded files when possible, avoid including unit numbers in shared links, and export only what the client needs. Keep a clean revision log so you can trace changes without exposing unnecessary history.
When to Use Which Tool
- Concept sprint with a client on-site: Mobile 2D→3D converter for speed and quick presentation images.
- Detailed documentation and coordination: Desktop CAD/BIM with precise dimensions and schedules.
- Marketing visuals and walkthroughs: Game-engine or high-end visualizer for cinematic output.
- Remote collaboration and quick feedback: Web planner with shareable links and comments.
Final Thoughts
Your best interior designer tool for floor plan rendering is the one that preserves scale, accelerates iterations, and communicates intent clearly. Start with a reliable 2D-to-3D pipeline, validate dimensions, and focus on lighting and composition for convincing results. If you want a portable option that converts black-and-white plans to accurate 3D on iPhone and exports high-resolution renders, consider trying the iOS app Floor Plan to 3D as part of your toolkit.
