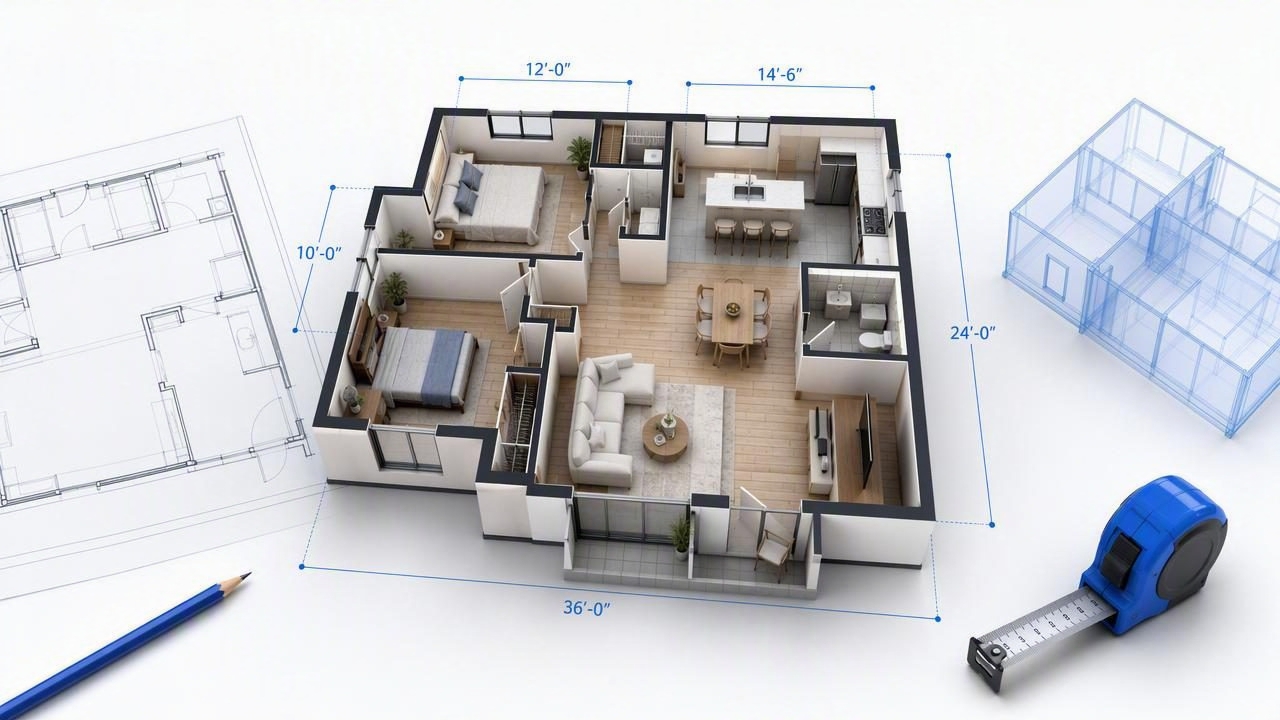
Choosing the best 3D floor plan renderer to preserve room proportions in a render is about more than producing an attractive image. A visually polished render can still be misleading if bedrooms appear wider than they are, hallways become too generous, or furniture makes a compact living room look unrealistically spacious.
For homeowners, real estate professionals, contractors, and interior designers, proportion accuracy is essential. It helps people understand how a renovation may feel, whether furniture can fit comfortably, and how rooms connect throughout a property. The right floor plan conversion workflow turns a flat drawing into useful 3D renders without losing the layout information that makes the plan trustworthy.
This guide explains what proportion preservation means, which rendering features matter most, how to assess output quality, and how to prepare a floor plan for more reliable renovation previews.
Why Room Proportions Matter in 3D Floor Plan Rendering
A floor plan communicates space through measured relationships: wall lengths, room widths, door placements, openings, and circulation paths. When a renderer converts that plan into three dimensions, it needs to retain those relationships rather than treat the drawing as a loose visual reference.
Room proportions affect practical design decisions, including:
- Furniture planning: A sectional sofa, dining table, bed, or kitchen island may appear to fit in a distorted render but fail in the actual room.
- Renovation feasibility: Accurate layouts reveal whether moving a wall, adding storage, or opening a doorway will create enough usable space.
- Client communication: Clear 3D visuals reduce misunderstandings between homeowners, designers, builders, and stakeholders.
- Property marketing: Realistic room scale helps viewers set appropriate expectations before a viewing or presentation.
- Budget decisions: A proportionally correct concept makes it easier to prioritize changes that genuinely improve function.
In short, 3D visualization should support decision-making, not merely create a more dramatic version of the property.
What “Preserving Proportions” Actually Means
Proportion preservation does not necessarily mean a render is a construction-ready architectural model. Instead, it means the resulting 3D layout maintains the important spatial relationships shown in the source plan.
A reliable floor plan renderer should interpret and retain the following elements whenever they are legible in the original image:
- Overall exterior footprint and major wall positions
- Relative width and depth of each room
- Room labels and intended uses
- Dimensions, scale indicators, and measurement notes
- Door swings, windows, openings, and passage locations
- Kitchen, bathroom, staircase, and built-in fixture placement
- Connections between rooms and circulation routes
For example, if a plan shows a narrow galley kitchen beside a larger dining area, the 3D render should not turn the kitchen into a wide open space simply because that presentation looks more appealing. Accuracy begins with respecting the source drawing.
Key Features to Look for in a 3D Floor Plan Renderer
Not all rendering tools handle plans in the same way. Some are designed primarily for decorative visualization, while others focus more carefully on floor plan conversion and layout recognition. Use the following criteria when evaluating options.
1. Dimension and Scale Recognition
The strongest starting point is a renderer that can detect or retain visible dimensions. Measurements provide an objective framework for wall lengths and room sizes. If your plan includes dimensions, avoid tools that ignore them entirely and rebuild the plan from a generic room template.
Even when exact automated scale extraction is unavailable, the tool should make it easy to verify the output against the original drawing. This is especially important with older blueprints, scanned plans, and hand-marked documents.
2. Wall and Opening Detection
Walls establish the geometry of every room. A useful system should distinguish exterior walls from interior partitions and recognize obvious doors, windows, and open transitions. Incorrect wall detection can create the most noticeable proportional errors, such as a room that is too shallow or a corridor that disappears altogether.
Look closely at how the renderer handles:
- Double-line exterior walls
- Angled or curved walls
- Closets and utility spaces
- Open-plan boundaries
- Sliding doors and cased openings
- Stairs and split-level transitions
3. Label and Room-Type Interpretation
Room labels provide useful context. A renderer that identifies “Kitchen,” “Bath,” “Bedroom,” or “Living Room” can make more sensible initial furnishing and material suggestions. However, labels should assist layout interpretation, not override the plan geometry.
For instance, a labeled bedroom may receive a bed and side tables in the render, but the furniture should be scaled to the room rather than forcing the room to appear larger. This distinction separates a practical AI room planner from a purely decorative image generator.
4. Editable Output and Review Controls
Automated floor plan conversion saves time, but no automation should be treated as infallible. Choose a workflow that permits review and adjustment before finalizing high-resolution 3D renders. The ability to inspect room boundaries, revise furniture placement, or correct a misread opening is valuable when accuracy matters.
Editing controls are particularly useful for unusual layouts, low-quality scans, plans with handwritten notes, and properties that have changed since the original blueprint was created.
Comparison: Accuracy Features vs. Visual-Only Features
| Feature | Why It Matters | Priority for Proportion Accuracy |
|---|---|---|
| Dimension recognition | Anchors walls and room sizes to measurable information | High |
| Wall and doorway detection | Maintains the true room outline and circulation flow | High |
| Room-label recognition | Supports appropriate room planning and staging | Medium |
| Furniture libraries | Helps test functionality when items are correctly scaled | Medium |
| Lighting and material styles | Improves presentation quality but does not prove layout accuracy | Low |
| Photorealistic textures | Useful for mood boards and client presentations | Low |
This comparison highlights an important point: photorealism and accuracy are separate qualities. A simple, clean 3D model that preserves proportions can be more valuable than an elaborate image that distorts the space.
How to Prepare a Floor Plan for Better 3D Results
The quality of the original plan strongly influences the quality of the render. Before uploading a plan, take a few minutes to improve clarity and remove avoidable ambiguity.
- Use the clearest available source. A high-resolution PDF, exported blueprint, or evenly lit scan is preferable to a blurry phone photo.
- Keep the full plan visible. Cropping off dimensions, a scale bar, room names, or exterior walls can make proportion interpretation less reliable.
- Flatten and align the image. Correct perspective distortion if the plan was photographed at an angle.
- Remove visual clutter where possible. Notes, stains, shadows, and overlapping pages may interfere with wall recognition.
- Confirm the plan version. Use the most current layout, particularly after additions, extensions, or structural renovation work.
- Flag uncertain areas. If a symbol or dimension is unclear, compare it with site measurements before relying on the render.
A clean plan does not replace professional surveying or architectural documentation, but it gives a renderer a better foundation for an accurate visual interpretation.
A Practical Workflow for Accurate Renovation Previews
A proportion-focused workflow balances speed with verification. Rather than accepting the first generated image, use the 3D output as a visual planning layer that you review against the source document.
Step 1: Start With the Existing Layout
Create a baseline 3D render before experimenting with changes. Compare each major room shape, doorway, and connection to the original floor plan. This makes it easier to spot whether the initial conversion has preserved the building’s footprint.
Step 2: Check High-Impact Spaces First
Prioritize kitchens, bathrooms, narrow hallways, staircases, and small bedrooms. These areas are most sensitive to small dimensional errors because fixtures and furniture occupy a large share of the available floor area.
Step 3: Add Furnishings at Realistic Scale
Use furniture to test usability, not to fill empty space. Leave believable clearance around beds, dining chairs, islands, and doors. A render that includes oversized furniture can make a correctly sized room look too small, while undersized objects can create a false impression of spaciousness.
Step 4: Test One Change at a Time
For home redesign decisions, preview a wall removal, new kitchen layout, exterior refresh, or staging concept separately before combining multiple changes. Incremental comparison helps you understand which design move improves the plan and which one compromises circulation.
Step 5: Export and Share the Right View
Use a top-down 3D floor plan view to discuss layout and proportions. Use eye-level interior views to discuss finishes, atmosphere, and sightlines. Both perspectives are useful, but they answer different questions.
“The most useful render is not the one that makes every room look bigger. It is the one that helps people understand the space they actually have.”
Common Mistakes That Distort Room Scale
Even a capable renderer can produce misleading results if the inputs or review process are weak. Watch for these common issues:
- Using a low-resolution scan: Fine walls, dimensions, and door symbols may be misread.
- Ignoring the plan scale: A clear drawing without a usable scale reference may require manual validation.
- Trusting wide-angle camera views: Interior camera angles can exaggerate depth and make rooms appear larger.
- Over-furnishing: Too many decorative items obscure circulation and usable floor area.
- Assuming wall heights from a 2D plan: Floor plans often do not show ceiling heights, soffits, or structural changes.
- Skipping real-world checks: Verify critical renovation dimensions on site before ordering materials or starting construction.
How to Evaluate a Render Before You Share It
Before sending a 3D floor plan to a client, contractor, or family member, perform a quick consistency check. Ask whether the visual tells the same story as the 2D drawing.
- Do the longest and shortest walls appear in the correct relationship?
- Are room adjacencies consistent with the source plan?
- Do doors open into plausible areas without blocking key circulation?
- Does furniture fit while allowing realistic walking clearance?
- Are kitchens, bathrooms, and storage areas located where the plan places them?
- Does the render retain labels or context needed for viewers to understand the layout?
If the answer to any of these questions is no, treat the render as an early concept rather than a final planning document. A few adjustments or a better source image can often improve the result significantly.
Choose Accuracy Before Aesthetics
The best 3D floor plan renderer is one that helps users see a property more clearly, not one that simply makes it look more impressive. Prioritize tools that preserve walls, room proportions, dimensions, labels, and functional relationships. Then use interior design styles, furnishing options, and lighting to make the concept easier to communicate.
For homeowners and professionals seeking a fast visual starting point, tools such as Floor Plan to 3D & Home Redesign can help transform black-and-white plans into clean 3D renders while supporting room planning and renovation previews. Just remember that every visual concept should be reviewed against the original plan and confirmed with real measurements for construction-critical decisions.
