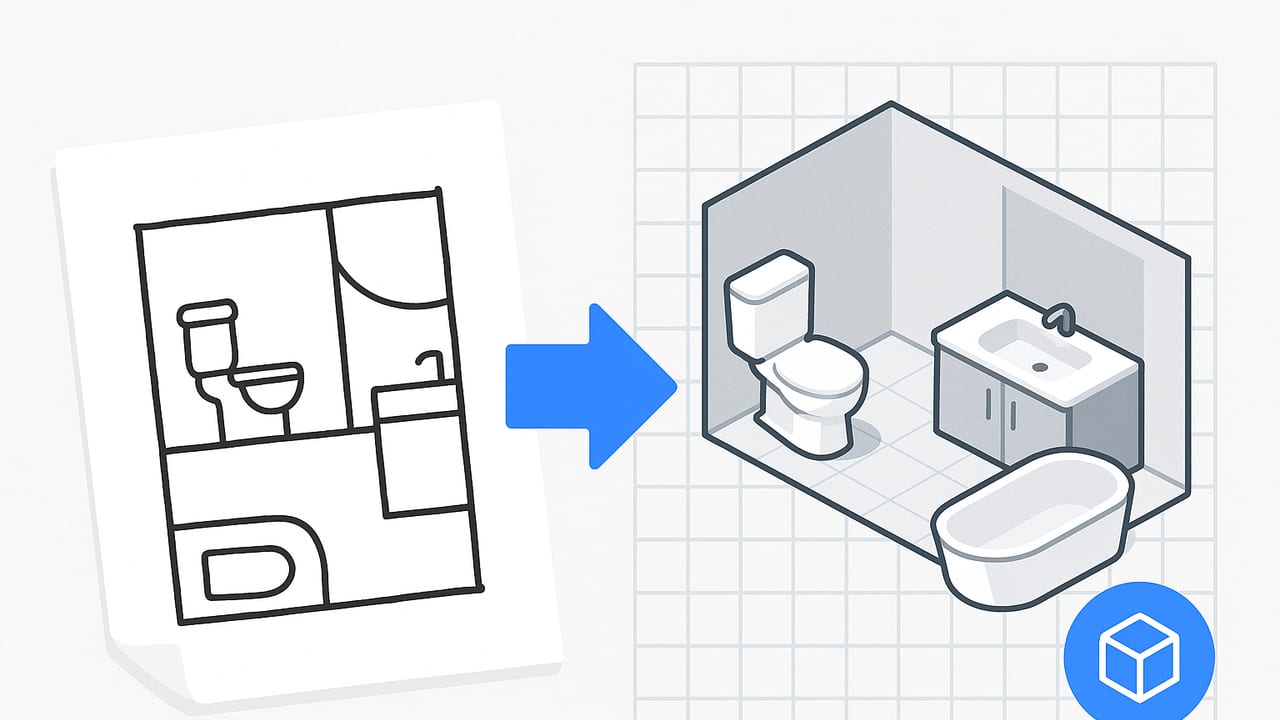
Turning a quick hand sketch into a believable 3D bathroom layout is no longer a heavy CAD project. With the right workflow, you can go from pencil lines to a dimensionally accurate, photorealistic visualization in under an hour. This guide walks you through how to create a bathroom layout 3D from hand sketch with reliable scale, code-conscious clearances, and compelling materials and lighting—without overcomplicating the process.
What You Need Before You Start
- A clean hand sketch with all walls, doors, windows, and fixtures roughly placed.
- Measured dimensions: overall room length/width, wall thickness, door and window sizes, and key fixture sizes (vanity, tub/shower, toilet).
- Measuring tools: a tape measure or laser distance measurer.
- Digitization device: smartphone camera or scanner.
- Reference images for finishes and fixtures you plan to use.
- 3D tool or app that accepts floor plan images or manual tracing and supports real-world units.
Step-by-Step: From Pencil to 3D
1) Clean up your hand sketch
Redraw faint lines, label each wall length, and mark door swings and window openings. Add dimension strings outside the room perimeter so they’re readable after you digitize. If your sketch is messy, trace it on graph paper to help keep straight walls and rough scale.
2) Establish scale and accuracy
- Pick one “master” dimension (e.g., overall width) and verify it on site.
- Confirm diagonals if the room isn’t perfectly rectangular; this helps catch out-of-square rooms.
- Note wall thickness (e.g., 4.5 in/115 mm standard interior stud walls) so your 3D model matches interior clear space.
- Record finish-level sizes if tile build-up affects the final dimensions in tight spaces.
3) Digitize the sketch
- Photograph the sketch in even light with the camera held parallel to the page to avoid distortion.
- Crop away blank margins and keep the black-and-white lines high contrast for best recognition if your tool uses image detection.
- Save as JPEG or PNG at a reasonable resolution (e.g., 2000–3000 px on the long edge).
4) Convert to 3D: Choose your workflow
Option A: Mobile app from photo
Ideal for speed. Import the sketch photo, set scale by matching one known measurement, and let the app generate walls and openings. Then place fixtures and materials, adjust real-world sizes, and render.
Option B: Manual tracing in a 3D tool
Import the sketch as a background image, lock it, and trace walls using a line tool that snaps to units (mm or inches). Add doors and windows with parametric components, then switch to 3D and place fixtures. This is more hands-on but highly controllable.
Option C: Hybrid (vectorize, then 3D)
Vectorize a clean scan of your plan with a 2D drafting tool, keep layers for walls/doors/fixtures, then import into your 3D software. Set units, extrude walls to height, and place objects. Good for complex or curved walls.
Bathroom Clearances and Fixture Sizing Cheat Sheet
Always verify local codes; the following are common guidelines used for planning and 3D visualization. Treat them as a starting point rather than code promises.
| Item | Typical Minimum | Notes |
|---|---|---|
| Toilet side clearance | 15 in (380 mm) from centerline to side wall/obstruction | 30 in (760 mm) minimum total width |
| Toilet front clearance | 24 in (610 mm) | Some codes allow 21 in (533 mm); more is better |
| Vanity depth | 18–22 in (450–560 mm) | Powder rooms may use 16–18 in shallow vanities |
| Vanity front clearance | 30–36 in (760–915 mm) | Comfortable working space |
| Shower size | 32×32 in (813×813 mm) minimum | 36×36 in (915×915 mm) is more comfortable |
| Tub length | 60 in (1524 mm) | Standard alcove tub; widths 30–32 in |
| Door width | 28–32 in (711–813 mm) | Pocket or outswing doors save interior clearance |
| Ceiling height over fixtures | 80 in (2032 mm) | Watch sloped ceilings over tubs/showers |
| Towel bar space | 24–30 in (610–762 mm) | Mount 48–52 in (1220–1320 mm) AFF |
Place Fixtures Strategically
- One-wall plumbing: Sink, toilet, and shower/tub along a single wall. Simplest and often most cost-effective.
- Two-wall plumbing: Vanity and toilet on one wall, shower/tub on adjacent wall. Balances efficiency and layout flexibility.
- Three-wall (alcove) shower/tub: Great for standard 60 in tubs and easy curtain or glass door installs.
Model door swing early to avoid clearance conflicts. If space is tight, consider a pocket or outswing door. Verify window sill heights relative to tub/shower splash zones and plan for tempered glass where required.
Lighting, Materials, and Realism
- Layer lighting: Ambient (ceiling), task (vanity sconces or backlit mirror), and accent (niche lights). In render settings, aim for white balance around 4000–5000 K for neutral bathrooms.
- Tile scale matters: Use real tile sizes (e.g., 2×8 in subway, 12×24 in porcelain) and realistic grout widths (1/16–1/8 in). Incorrect scaling instantly breaks realism.
- Reflectance and gloss: Mix matte and semi-gloss surfaces; fully glossy everything looks plastic. Mirrors should reflect realistically without “black” artifacts—add environment lighting if needed.
- Small bathroom illusions: Large-format tiles with minimal grout, wall-hung vanity and toilet, continuous floor material under the vanity, and a clear glass shower screen make spaces feel larger.
Validate Scale Before You Render
- Check a dimension overlay: Many tools let you display or annotate dimensions directly in 3D or on plan. Confirm a few critical spans—room width, vanity, and shower size.
- Fixture sizing: Replace generic blocks with real product dimensions from manufacturer cut sheets whenever possible.
- Camera realism: Use a lens between 24–35 mm equivalent for interiors. Ultra-wide lenses can mislead clients about true space.
- Eye-level height: Set camera height around 5 ft (1524 mm) for a natural perspective.
Common Mistakes and Quick Fixes
- Modeling to stud, not finish: If you model to stud sizes, your interior clearances will be wrong. Adjust to finish-to-finish dimensions.
- Forgetting wall thickness: Add wall thickness when tracing; otherwise, fixtures may overlap in 3D.
- Incorrect door swing: A left-hand vs. right-hand mix-up can block a vanity or radiator. Verify early.
- Shower curb and slope: Model a 2–4 in (50–100 mm) curb if not curbless, and hint at a 1/4 in per foot (2%) slope to the drain. It reads better in renders.
- Mis-scaled textures: If tiles or wood planks look cartoonishly large or tiny, correct texture scale in the material editor.
Mini-Workflow: 30 Minutes from Sketch to 3D
- 5 minutes: Photograph the sketch, crop, and boost contrast.
- 10 minutes: Import and set scale using a known wall length; trace walls at correct thickness and add door/window openings.
- 10 minutes: Place fixtures (vanity, toilet, shower/tub) with true product sizes; check clearances from the cheat sheet.
- 5 minutes: Apply materials, add a ceiling light and vanity sconces, set camera to 28–35 mm, and render a draft.
Reserve more time for styling: towels, mirror, plants, and accessories increase realism and help clients visualize daily use.
Advanced Tips for Tricky Bathrooms
- Curved or angled walls: Trace a polyline from the sketch and convert to an arc or segmented curve. Validate multiple chords to keep overall length truthful.
- Sloped ceilings and dormers: Model roof planes or use a sloped ceiling tool. Ensure showerhead height meets comfort (typically 78–84 in) within the slope.
- Window-in-shower details: Use a higher sill, specify solid-surface returns, and a tilt-and-turn or fixed tempered unit. In 3D, bevel the returns slightly for realism.
- Accessibility planning: If targeting accessibility, model a 60 in (1524 mm) turning circle, curbless shower with linear drain, and proper grab bar backing locations. Use real mounting heights.
Exporting Plans and Renders
- Still images: Export at 3000–4000 px wide for presentations. Use both plan and perspective renders to tell the story.
- Annotations: Create a dimensioned plan view and a labeled fixture legend. Keep text styles consistent for readability.
- File names: Include room, view, and revision (e.g., Bath-NE-Persp-R2.jpg) to reduce confusion.
- Color management: If your tool supports it, export in sRGB for web and presentations to avoid washed-out colors.
FAQs: Hand Sketch to 3D Bathroom
How accurate can a bathroom layout 3D from hand sketch be?
As accurate as your inputs. If you model to verified finish dimensions, use real product sizes, and validate a few key spans, you can achieve presentation-grade accuracy suitable for planning and client approvals. For construction, always confirm with site measurements and shop drawings.
Do I need exact dimensions for everything?
You need exact overall room sizes, door/window openings, and precise fixture sizes. Accessories can be approximate, but keep tile sizes and grout lines true to scale for credibility.
What if my sketch photo is skewed?
Use perspective-correction tools or re-shoot the photo square to the paper. Many apps let you set a scale line, which compensates for minor skewing.
Can I reuse the 3D model for multiple schemes?
Yes. Save a base model, then duplicate and swap finishes, fixtures, or door positions. Keep cameras and lighting consistent so changes are easier to compare.
Workflow Comparison: Pick the Right Path
| Workflow | Speed | Accuracy | Best For |
|---|---|---|---|
| Mobile app from sketch photo | Fastest | High (with scale set) | Homeowners, realtors, quick concept iterations |
| Manual tracing in 3D tool | Moderate | Very high | Designers who want granular control |
| Hybrid vector + 3D | Moderate/Slow | Very high | Complex geometry, documentation-ready models |
Quality Checklist Before You Share
- All critical dimensions match the sketch and site measurements.
- Toilet, vanity, and shower have proper clearances.
- Materials scaled correctly; grout lines realistic.
- Lighting balanced; no blown highlights or murky shadows.
- Camera heights and lens focal lengths set for realism.
- At least one plan view with dimensions and one hero perspective.
A Subtle, Phone-First Option
If you prefer a phone-based path, the iOS app Floor Plan to 3D converts black-and-white 2D floor plan photos into dimensionally faithful 3D rooms, making it simple to import your bathroom sketch, set scale, arrange fixtures, and export high-resolution renders for proposals.
Wrapping Up
Creating a bathroom layout 3D from hand sketch is about disciplined inputs and a streamlined process: clean sketch, correct scale, smart fixture placement, and believable materials and lighting. With the cheat-sheet clearances, a simple digitization method, and a reliable 3D workflow, you’ll turn pencil strokes into visuals that help you test layouts, align stakeholders, and move confidently toward build-ready decisions.
