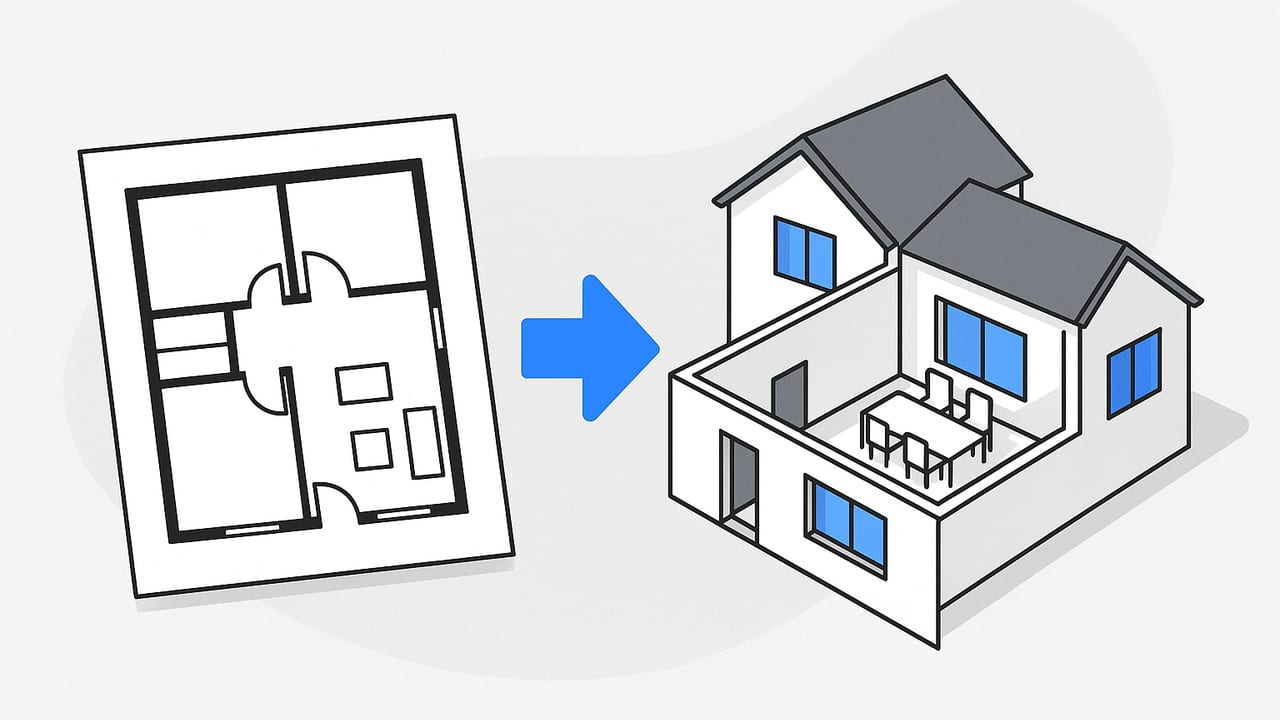
Architectural plan rendering turns a flat, 2D floor plan into a dimensional, navigable visualization that communicates space, light, and material—long before construction begins. Whether you’re an architect, interior designer, real estate marketer, or homeowner planning a remodel, mastering the workflow from plan to polished imagery ensures your visuals are both convincing and true to scale.
This guide provides a practical, end-to-end workflow for architectural plan rendering: preparing drawings, setting precise scale, modeling efficiently, lighting intelligently, and delivering reliable exports. It includes checklists, settings, and a sample pipeline you can adapt to your favorite tools.
What Is Architectural Plan Rendering?
At its core, architectural plan rendering is the process of interpreting a 2D architectural drawing—usually a black-and-white plan—into a 3D scene and producing images or animations that convey spatial intent. The goal is not just photorealism; it’s clarity, accuracy, and feedback. A useful render answers questions about layout, circulation, sunlight, and fit, while remaining faithful to measured dimensions.
“A good render is a conversation starter, not just a pretty picture.”
Overview: The Rendering Pipeline
Most successful pipelines follow a predictable sequence. Tailor these steps to your software stack (Revit, SketchUp, Rhino, Blender, 3ds Max, Archicad, or hybrids):
- Input prep: Clean the plan, ensure legibility, and define a scale reference.
- Scale and reference setup: Calibrate the 2D plan so one unit equals one real-world unit.
- Wall and structure modeling: Extrude walls, add slabs, and place openings.
- Stairs, doors, windows, rails: Insert parametric components with correct swings and clearances.
- Fixtures and furniture: Start with low-poly proxies; swap detailed assets later.
- Materials: Assign PBR materials with correct scale and UVs.
- Lighting: Establish sun/sky or HDRIs, then layer interior lights.
- Cameras: Block hero views, axonometric angles, and orthographic plates.
- Rendering: Balance samples, denoising, and resolution for speed vs quality.
- QA and corrections: Validate dimensions, fix artifacts, and finalize outputs.
Prepare the Plan for 3D
Clean Up the Input
- Use high-resolution scans: 300–600 DPI for raster plans; avoid phone photos skewed by perspective. If photographing, shoot perpendicular with even lighting.
- Increase contrast: If raster, boost contrast and levels so walls and symbols are crisp; remove smudges and notes not needed in 3D.
- Separate layers (if vector): In DWG/DXF, isolate walls, doors, windows, dimensions, text. Freeze non-geometry layers before import.
- Vectorize if needed: For clean scans, vectorization can speed tracing. Audit the output; fused corners or broken arcs can cause headaches later.
Define True Scale Early
Import the plan as a background or underlay and calibrate scale. Use a known dimension (e.g., overall width or a standard door of 0.90 m/3'-0"). After scaling, verify against two or more dimensions to avoid compounding errors. If no dimensions exist, infer from multiple references: door leaf, stair risers, or standard furniture sizes.
Modeling Strategies That Save Time
- Walls as objects, not lines: Use wall tools (thickness, height, layer) if your software supports them. For mesh workflows, extrude closed polylines, then add modifiers for baseboards or crown.
- Parametric openings: Doors and windows should cut host walls and preserve swings. Name and size them consistently: e.g., Door_090x210_RH.
- Work from big to small: Shell, slabs, stairs, partitions, then fixtures and furniture. Don’t start with details you’ll later move.
- Proxy assets first: Use bounding boxes or low-poly placeholders. Swap to high-quality assets at the end to keep the viewport responsive.
- Maintain a naming scheme: Level-Room-Element: L01_Living_Wall_North. This speeds selection, overrides, and batch edits.
- Bevel is realism: Add small chamfers or bevels to edges; perfectly sharp edges look fake and hinder specular highlights.
Materials: Keep It Physically Plausible
Adopt a PBR workflow with base color, roughness, normal, and optionally metalness and AO maps. Maintain consistent real-world scale in UVs: a 200 mm tile should be 200 mm in the model. Keep roughness within believable bounds; avoid pure black or pure white as they break energy conservation.
- Create a library: Common materials (plaster, oak, concrete, stainless steel) with preset roughness and bump strength.
- Use trim sheets: For repetitive moldings or paneling, trim sheets speed up detailing with a single, optimized texture set.
- Check albedo: Materials shouldn’t be brighter than about 0.9 or darker than 0.02; clamp ranges to reduce fireflies.
Lighting and Cameras That Tell the Story
Daylight
- Sun/sky model: Set correct geographic location, date, and time. For neutral studies, use equinox noon for balanced shadows.
- HDRI environments: Choose high-resolution HDRIs (8K+) with soft skies for interiors; rotate to guide key light into your hero spaces.
Interior Lighting
- IES profiles: Use manufacturer IES for downlights and sconces. Lower intensity than you think; let materials carry the luminance.
- Practical emitters: Create emissive planes behind fixtures for soft fill; combine with area lights for control.
Camera Choices
- Perspective vs orthographic: Use perspective for lifestyle hero shots (24–35 mm full-frame equivalent), and orthographic/axon for clear spatial reading.
- Eye height: 1.5–1.6 m for interiors. Keep verticals straight by enabling camera shift or two-point perspective.
- White balance: Target 5000–6500 K for daylight; match interior lights to 2700–3500 K. Mixed lighting can be artistic but complicates color accuracy.
Render Settings: Quality Without the Wait
Every engine differs, but these guidelines help you converge quickly.
| Scene Type | Resolution | Samples | Denoise | Typical Time |
|---|---|---|---|---|
| Sunlit interior | 3000 × 2000 | 600–1200 | ON (mid strength) | 4–12 min (GPU) |
| Evening interior | 3000 × 2000 | 1200–2500 | ON (higher strength) | 8–25 min (GPU) |
| Exterior daylight | 3500 × 2000 | 400–800 | ON (low) | 3–8 min (GPU) |
Turn on clamping to reduce fireflies (e.g., 10–15 for indirect). Limit bounces for interiors if your engine supports it: diffuse 2–3, glossy 2–3, transparency 8–16. Use adaptive sampling to concentrate effort in noisy areas like glossy reflections and shadow edges.
QA: Accuracy Before Aesthetics
- Scale check: Measure three distances across the model vs the plan; tolerance ±1% for most conceptual work.
- Door swings and clearances: Verify swing direction and minimum clear widths (e.g., 32 in/800 mm net clear).
- Ceiling heights: Confirm per room; align window heads and door heads where appropriate.
- Stair compliance: Consistent risers; check total rise and run match plan.
- Collision detection: Run a quick clash or visually inspect furniture vs openings and circulation.
- Light leaks: Seal wall-floor junctions; ensure no inverted normals.
- Material scale: Validate tile grout size, plank widths, and pattern direction.
Common Pitfalls and How to Fix Them
- Inconsistent line weights confuse tracing: Normalize or retrace walls with closed polylines before extruding.
- Curved walls become facets: Increase curve resolution or use true arcs/splines with proper segmentation.
- Backface rendering: Enable backface culling to spot flipped normals; recalc normals outward.
- Washed-out interiors: Lower albedo of large surfaces, add window portals/light linking, and reduce exposure rather than boosting lights.
- Overly dark renders: Check color management (use Filmic or ACES), then adjust exposure by 0.5–1.5 stops.
- Texture swimming: Apply real-world scale UVs and lock them with triplanar or box mapping where appropriate.
Sample Pipeline: From Plan Image to 3D in Blender
The following outline shows how to implement a quick plan-to-3D flow using Blender. Adapt the concepts to other tools if needed.
- Import the plan: Add the plan as an image empty in the top orthographic view. Set its real width in meters to calibrate scale.
- Trace walls: Use grease pencil or bezier curves to outline walls; convert to mesh; set thickness via solidify and extrude to height.
- Add openings: Model parametric door/window modules; use booleans or wall modifiers to cut clean apertures.
- Place floor and ceilings: One slab per level; small bevels at edges.
- Populate with proxies: Low-poly furniture to validate circulation; swap to final assets later.
- Lighting: Sun+Sky texture or HDRI; add portals if using path tracing for interior windows.
- Materials: Assign PBR with consistent scale; use a shared library for speed.
- Render: Set samples, denoise, and clamp; compose in the compositor for gentle contrast and vignette.
Optional: a tiny script to standardize your camera and render output.
# Blender Python: set consistent output and color management
import bpy
s = bpy.context.scene
s.render.engine = 'CYCLES'
s.render.resolution_x = 3000
s.render.resolution_y = 2000
s.cycles.samples = 1200
s.cycles.use_adaptive_sampling = True
s.view_settings.view_transform = 'Filmic'
s.view_settings.look = 'Medium High Contrast'
# 35mm lens and two-point verticals (via camera shift)
cam = s.camera.data
cam.lens = 35
cam.shift_x = 0.0
cam.shift_y = 0.02
Deliverables Clients Understand
- Orthographic colored plan: A top-down render with materials and soft shadows. Useful for marketing and circulation diagrams.
- Axonometric cutaway: Tilted top-down showing wall heights and relationships.
- Hero perspectives: 2–3 key views that tell the story of light, material, and proportion.
| Output | Use Case | Resolution | Notes |
|---|---|---|---|
| Web | Listings, portfolios | 2000–3000 px width | Optimize to < 1.2 MB; sRGB color space |
| Flyers, boards | 300 DPI at target size | Export TIFF/PNG; embed color profile | |
| Presentation | Slides, client reviews | 1920 × 1080 or 2560 × 1440 | High-contrast variant for projectors |
Speed Boosts for Tight Deadlines
- Template scenes: Pre-built daylight and evening templates with cameras, color management, and passes set up.
- Asset catalogs: Curated furniture packs with consistent scale and PBR quality. Tag assets by style and footprint.
- Snapping shortcuts: Master vertex/edge snapping and increment snapping at the correct grid (e.g., 0.1 m).
- Batch overrides: Use collections/layers to toggle LODs and holdout objects for sectional shots.
- Progressive drafts: Low-res, low-sample drafts early. Iterate camera and composition before dialing materials.
When to Automate
For rapid concepting, automation can jumpstart your scene. Modern tools interpret black-and-white plans, infer walls, place doors/windows, and preserve proportions. This is especially helpful for feasibility studies, quick client iterations, and real estate visualization where speed matters as much as fidelity. One example is the iOS app Floor Plan to 3D, which transforms 2D plans into navigable 3D and exports high-resolution imagery while keeping the layout true to the original design.
Conclusion
Architectural plan rendering is a craft that balances geometric accuracy with visual storytelling. Start with a clean, scaled plan. Model logically from structure to detail. Keep materials physically plausible, light with intention, and verify scale at every step. Use templates, proxies, and automation where they serve clarity and efficiency. When the process is disciplined, your renders will not only look compelling—they’ll answer the right questions and drive better design decisions.
