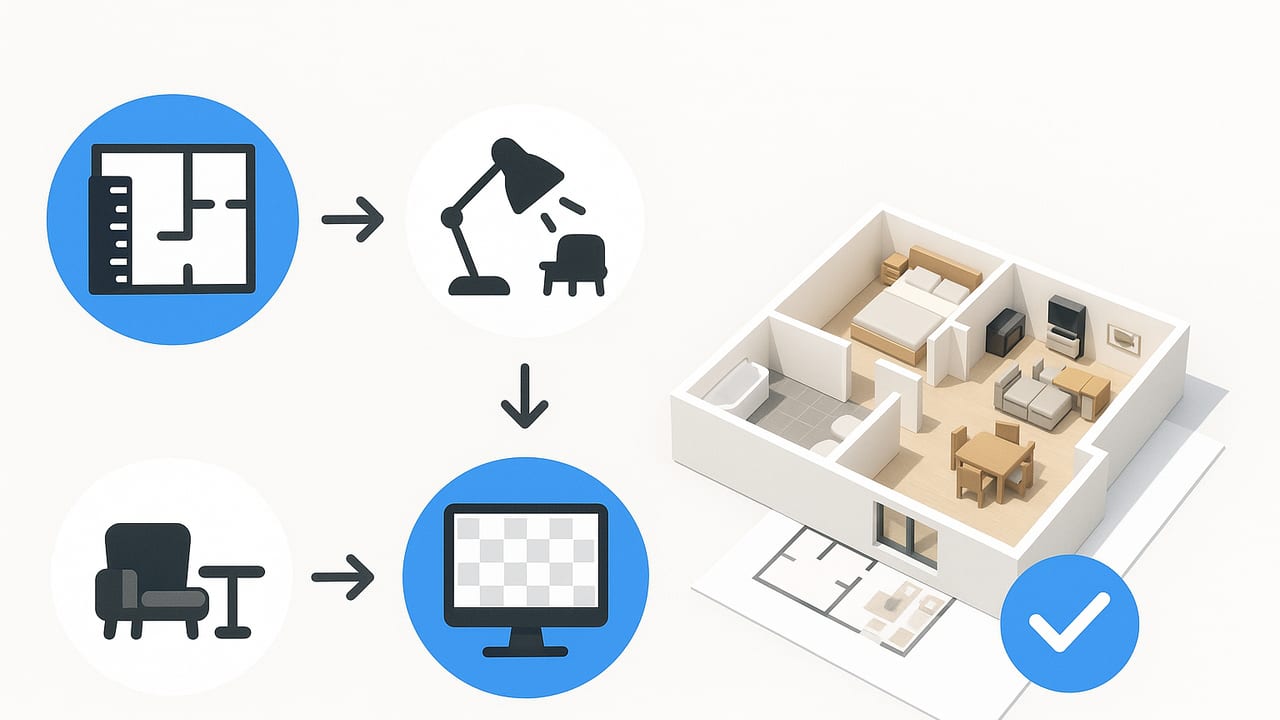
Turning a 2D apartment layout into a clear, convincing 3D visualization is one of the fastest ways to evaluate space, circulation, and furnishing decisions. Whether you’re planning a studio refresh or presenting options for a multi‑bedroom renovation, an apartment floor plan 3D model lets you test scenarios, verify scale, and communicate choices to clients and stakeholders with confidence.
This guide outlines a practical, accuracy‑driven process for moving from a black‑and‑white floor plan to a reliable 3D scene. You’ll learn how to preserve scale, place openings and fixtures correctly, choose materials and lighting that reveal the true feel of the space, and export deliverables that hold up under scrutiny.
Understand Your Input: The Essentials That Must Survive Conversion
Before you model, confirm that the source plan includes the information your 3D will rely on. Missing or unclear data is the number one cause of downstream fixes.
- Dimensions and scale: At least one known dimension per room (or a scale bar) is essential. If the plan is only proportionally accurate, decide a master reference dimension you trust.
- Walls, thicknesses, and structural elements: Note any thicker walls (likely load‑bearing) and columns. In small apartments, a 100 mm vs 150 mm wall can change furniture fit.
- Doors and windows: Record widths, heights, sill heights, and swing direction. Include sliding doors and pocket doors, which affect circulation differently.
- Ceiling heights and soffits: Height changes matter for storage, HVAC, and lighting. Flag beams and dropped areas early.
- Plumbing and fixed services: Kitchen plumbing points, bathroom stacks, and electrical panels reduce layout freedom—model them accurately.
Workflow: From 2D Plan to Apartment Floor Plan 3D
Use this step‑by‑step framework to minimize rework and maintain fidelity to the original plan.
1) Capture and clean the plan
- Scan or photograph flat: Keep the camera parallel to the sheet. De‑skew in an image editor if needed.
- Increase contrast: Boost contrast and remove smudges so wall lines remain crisp for tracing.
- Crop to the plan extents: Remove legends or title blocks that can confuse auto‑detection tools.
2) Normalize scale and units
- Set units first: Choose metric or imperial and stick with it throughout the project.
- Calibrate to a known length: Trace one dimension on the plan (e.g., a 3000 mm bedroom wall) and set it as your scale reference. Check a second dimension to verify.
- Accept tolerances: Establish a deviation budget (e.g., ±10 mm on internal dimensions) to keep expectations realistic.
3) Model the structural shell
- Trace external walls, then internal partitions: Apply correct wall thicknesses; don’t guess. If unknown, infer from door jamb details.
- Add columns, shafts, and risers: These often dictate furniture orientation and clearances.
4) Place doors and windows
- Respect swing and clearance: Verify door swings won’t conflict with cabinets or radiators. Model sliding doors as pocket or surface‑mounted as specified.
- Set sill and head heights: These inform daylight, views, and potential furniture placement below windows.
5) Define floor and ceiling heights
- Set consistent story data: Floor finish, slab thickness, and ceiling height should reflect the plan notes.
- Add soffits and beams: Even small drops impact perceived height in compact apartments.
6) Zone the plan for use and flow
- Public vs private: Separate entry/living from bedroom/bath zones to guide sightlines and screen placement.
- Circulation paths: Reserve at least 800–900 mm for main paths; more in two‑way zones like kitchens.
7) Furnish with measured blocks
- Start with minimum viable layout: Place only key items (sofa, bed, table, appliances), then refine.
- Use parametric blocks: Adjust dimensions to match real products you’re considering.
- Check clearances visually and numerically: Don’t rely on “looks right”—measure walkway widths, door swings, and reach distances.
8) Materials and surfaces
- Use PBR materials: Even subtle gloss or bump maps help reveal depth without garish reflections.
- Keep a controlled palette: Too many finishes make compact apartments feel busy; emphasize floor continuity to enlarge perceived space.
9) Lighting and exposure
- Orient to true north: Simulate real daylight for believable scenes and energy insights.
- Mix ambient and task lighting: Combine area lights with point sources (pendants, sconces) and keep color temperatures coherent.
- Tone mapping: Use a filmic curve; avoid blown highlights on white walls and ceilings.
10) QA and export
- Dimension cross‑check: Validate 3–5 key lengths against the plan before rendering.
- Render tests: Produce quick clay renders to evaluate geometry before assigning materials.
- Export deliverables: Create hero perspectives, an eye‑level walkthrough set, and an orthographic plan view.
Pro tip: Always keep a “verification view”—a top‑down orthographic with dimensions. If the apartment floor plan 3D matches here, your perspectives will hold up.
Typical Apartment Dimensions and Clearances
Use the ranges below as a starting point; adjust to local codes and building standards.
| Element | Minimum | Comfortable |
|---|---|---|
| Entry door clear width | 810 mm (32 in) | 915 mm (36 in) |
| Interior door clear width | 760 mm (30 in) | 810 mm (32 in) |
| Main circulation path | 800 mm (31.5 in) | 900–1000 mm (35–39 in) |
| Bed side clearance | 600 mm (24 in) | 760–900 mm (30–35 in) |
| Dining chair pull‑back | 600 mm (24 in) | 760–900 mm (30–35 in) |
| Kitchen work aisle (one cook) | 900 mm (35 in) | 1050–1200 mm (41–47 in) |
| Kitchen work aisle (two cooks) | 1050 mm (41 in) | 1200–1350 mm (47–53 in) |
| Toilet centerline to side obstruction | 380 mm (15 in) | 450 mm (18 in) |
| Shower interior | 800 × 800 mm (31.5 × 31.5 in) | 900 × 900 mm (35 × 35 in) |
| Wardrobe door swing clearance | 600 mm (24 in) | 760 mm (30 in) |
Camera Strategy: Show the Space, Not the Lens
- Use 24–35 mm equivalent lenses: Wider than 24 mm distorts scale; tighter than 35 mm hides context.
- Keep verticals vertical: Use two‑point perspective to avoid leaning walls.
- Anchor with diagonals: Position cameras to reveal depth along circulation paths, not straight into a wall.
- Eye level: 1500–1600 mm camera height for most interiors helps realism.
Lighting Recipes for Reliable Apartment Floor Plan 3D Renders
- Daylight study: One HDRI environment with sun matching project latitude, plus portal lights at windows to control noise. White balance ~5500 K.
- Evening mood: Lower ambient; emphasize warm interior fixtures (2700–3000 K). Add subtle bounce cards (invisible planes) to lift dark corners.
- Sales/portfolio: Balanced mix—soft daylight plus key practicals. Target average interior illuminance 150–300 lux for living spaces.
File Formats and Deliverables
Package outputs so clients and collaborators can use them immediately.
- Still images: PNG or high‑quality JPEG at 3000–4000 px on the long edge. Include a top‑down orthographic plan render.
- 360 panoramas: 8K equirectangular JPEGs for web viewers; note north orientation in filenames.
- Floor plan overlays: A semi‑transparent 3D floor overlay on the original 2D plan helps validate accuracy.
- Naming convention: Project_Room_ViewType_Rev## (e.g., WillowApt_Living_PerspA_Rev03).
Common Pitfalls and How to Avoid Them
- Uncalibrated scale: Skipping the scale step compounds errors everywhere. Always calibrate early and verify a second dimension.
- Door swings ignored: Even one wrong swing can break a circulation path; verify in plan and 3D.
- Ultra‑wide cameras: They make small apartments look unrealistic and mislead decisions about furniture size.
- Over‑bright whites: White walls can clip highlights. Use slightly off‑white materials and filmic tone mapping.
- Material mismatch: A glossy ceiling or overly reflective floor inflates perceived brightness and alters mood—match real finishes.
- Furnishing without clearance checks: Always measure from edge to obstruction, not centerline to wall.
QA: A Lightweight, Repeatable Checklist
Consider keeping a small JSON checklist with pass/fail and notes. It keeps apartment floor plan 3D projects consistent across teams.
{
  "project": "Apt_12B",
  "scale": {
    "calibrated_to_mm": true,
    "reference": "Living room west wall 4200 mm",
    "tolerance_mm": 10
  },
  "shell": {
    "ext_walls_thickness_mm": 200,
    "columns_verified": true
  },
  "openings": {
    "doors": "All swings verified against plan",
    "windows": "Sill 900 mm; heads 2100 mm"
  },
  "heights": {
    "floor_finish_mm": 20,
    "ceiling_clear_mm": 2600,
    "soffits": "Kitchen bulkhead 2300 mm"
  },
  "furnishing": {
    "blocks_scaled": true,
    "clearances_ok": ["corridor 900 mm", "bedside 700 mm"]
  },
  "lighting": {
    "day_hdr": "Overcast_06.hdr",
    "wb_kelvin": 5500
  },
  "views": ["Top_Ortho_Dim", "Living_Persp_A", "Bedroom_Persp_B"],
  "render": {
    "tone_map": "filmic",
    "res_px": 3600
  }
}
Advanced Tips for Tight Spaces
- Use built‑in modules: In micro‑apartments, wall beds, fold‑down tables, and modular sofas reduce idle footprints; model hinge arcs and open states.
- Mirror to test: Mirroring a layout quickly exposes asymmetries and alternate furniture orientations.
- Multiphase cameras: Create scene states (day/evening/clean whitebox). Stakeholders process design intent faster when lighting and materials vary.
A Repeatable Naming and Layer Strategy
Keep your scene lightweight and auditable.
- Layers: 00_Shell, 01_Openings, 02_Fixtures, 03_Furniture, 04_Lighting, 05_Cameras, 06_Dimensions.
- Versions: Save iterative milestones (v01_shell, v02_openings, v03_furnish) so you can roll back quickly.
- Color codes: Assign subtle viewport colors per layer to spot miscategorized objects at a glance.
Putting It All Together
The most trustworthy apartment floor plan 3D models are built on three pillars: verified scale, disciplined placement of openings and fixtures, and lighting that reflects real conditions. If you calibrate early, measure often, and validate with orthographic overlays, you’ll avoid the classic traps of distorted perspectives and misleading clearances. From there, thoughtful camera work and restrained materials will communicate layout intentions clearly, even in compact homes.
If you prefer a streamlined, mobile‑first workflow to convert black‑and‑white plans into 3D while preserving dimensions, the iOS app Floor Plan to 3D can help you go from scan to shareable, high‑resolution renders with minimal setup.
