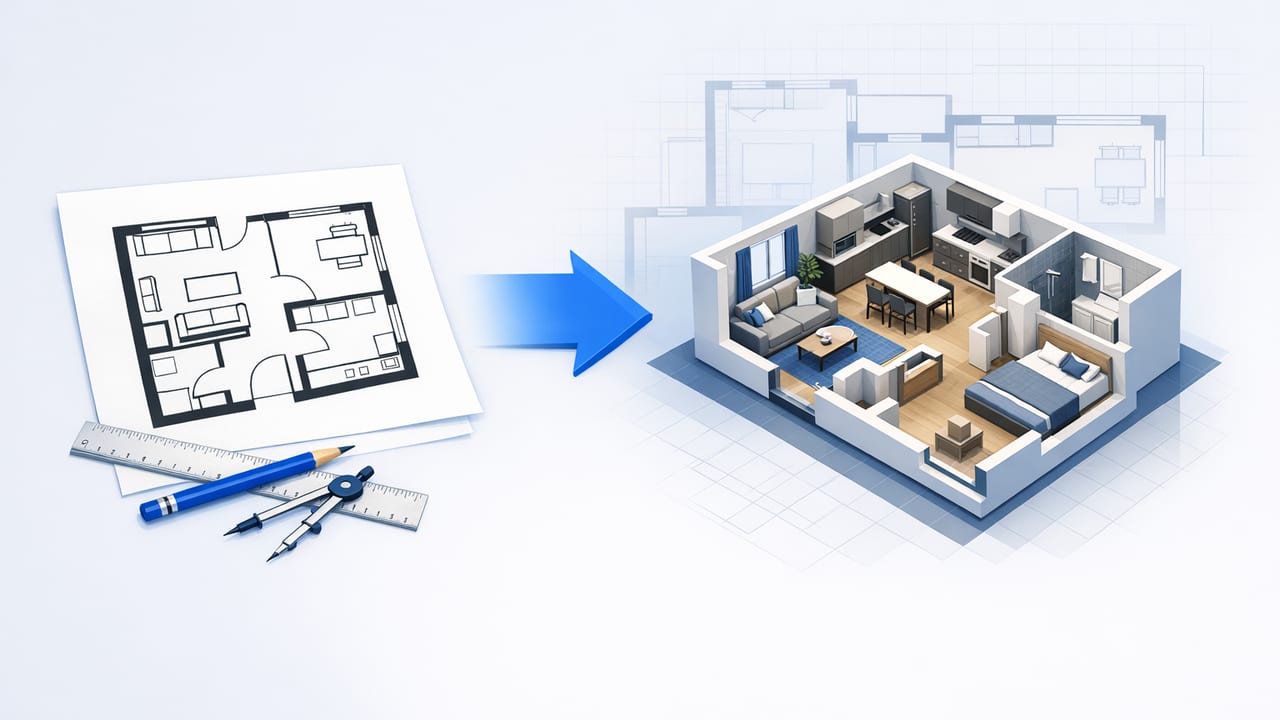
The promise of ai floor plan to 3d conversion is simple: take a flat, black-and-white drawing and quickly turn it into a 3D space you can walk through (at least visually). The reality is slightly more nuanced. AI can accelerate 3D modeling dramatically, but the output quality still depends on how the floor plan is drawn, how it’s captured (photo vs scan vs PDF), and how you validate what the AI inferred.
This guide explains how AI interprets 2D plans, what makes a floor plan “AI-friendly,” the most common failure points, and a practical workflow for producing dimension-true 3D renders you can use for room planning, remodel decisions, or architectural visualization.
What “AI floor plan to 3D” actually means
When people say “AI converts a floor plan to 3D,” they often imagine a fully automated pipeline that reads symbols perfectly and produces a complete model with materials, furniture, and lighting. Most tools today do something more specific:
- Detect geometry: identify walls, rooms, openings, and sometimes stairs from lines and symbols.
- Reconstruct topology: decide which spaces connect and where doors/windows sit on a wall.
- Infer scale: use written dimensions (best case) or heuristics (riskier) to size walls and rooms.
- Generate a 3D shell: extrude walls, cut openings, and create floors/ceilings.
- Optional enrichment: apply default materials, place basic fixtures, or create a photoreal-style render.
The key takeaway: AI typically gets you to a fast, editable 3D baseline. You still need a short validation pass to ensure accuracy and to align the model with your purpose (layout testing vs presentation rendering).
How AI reads a 2D floor plan (in plain English)
Most AI-based floor plan conversion combines computer vision and structured reasoning. The system tries to turn pixels into meaning:
- Image cleanup: straighten the plan, remove noise, boost contrast, and correct perspective if it’s a photo.
- Line and shape detection: find long parallel lines (walls), rectangles (doors/windows), and repeated symbols (fixtures).
- Text extraction: read dimension strings (e.g., “12'-6\"”) and room labels (e.g., “Kitchen”).
- Constraint solving: reconcile conflicts (e.g., a door symbol that doesn’t match wall thickness) using rules learned from datasets.
- 3D assembly: extrude walls to a default height (or read notes), then cut openings and place elements.
Practical implication: the cleaner your inputs (straight, high contrast, legible dimensions), the less the AI must guess—and the closer your 3D model stays to the original design intent.
The inputs that produce the best results
Not all “floor plans” are equal. A crisp PDF export from CAD will typically outperform a photo of a printed plan under warm lighting. Use the table below to choose the best source you have.
| Input type | Pros | Common issues | Best use |
|---|---|---|---|
| Vector PDF (from CAD/BIM) | Clean lines, consistent symbols, often dimensioned | Layers may include furniture/annotations that confuse detection | Highest accuracy conversion, fast validation |
| High-res scan (300+ dpi) | Good contrast, minimal distortion | Fold lines, skew, faint text | Reliable general workflow |
| Phone photo | Fast and convenient | Perspective distortion, glare, shadows, lens warp | Quick concepting; validate dimensions carefully |
| Screenshot / low-res image | Easy to share | Aliasing, unreadable dimensions, broken line continuity | Only if nothing else is available |
Prepping a floor plan so AI doesn’t “hallucinate” structure
AI doesn’t usually hallucinate in the same way text models do, but it can misinterpret ambiguous marks and “force” a coherent structure. Before conversion, do a quick prep pass:
1) Ensure the plan is square and high contrast
- Crop to the plan boundary and remove extra margins when possible.
- Rotate so walls are near-horizontal/vertical (small skews can break wall detection).
- Increase contrast so walls are clearly darker than the background.
2) Reduce visual clutter
- If you can, use a version with fewer annotations (revision clouds, dense notes, hatch patterns).
- Beware heavy furniture blocks that overlap walls—AI may mistake them for partitions.
3) Make scale explicit
The strongest driver of accuracy is real-world scale. Ideally, your plan includes dimensions. If not, you’ll need to provide at least one known measurement (e.g., a wall length) so the model can scale correctly.
A practical workflow for accurate AI floor plan to 3D conversion
Use this workflow whether you’re planning furniture layouts, pitching a remodel concept, or generating architectural visualization assets.
- Choose the best source: CAD/PDF > scan > photo.
- Clean up the input: crop, straighten, enhance contrast.
- Run the AI conversion: generate the initial 3D shell.
- Validate geometry: check wall continuity, room closures, and opening placement.
- Lock scale: confirm at least 2–3 critical dimensions (overall width/length, a key room, and one opening).
- Adjust defaults: wall height, thickness, door swings, window sill height (if your tool supports it).
- Stage for purpose:
- For room planning: add simple furniture volumes and circulation space.
- For presentations: add materials, lighting, and consistent camera angles.
- Export: use high-resolution images for decks, proposals, or client approvals.
The most common errors (and how to fix them)
Even strong AI workflows tend to fail in predictable ways. Here are the issues that matter most—and how to diagnose them quickly.
Walls merge or break apart
- Cause: low resolution, faint lines, or thick hatch patterns that hide corners.
- Fix: increase contrast; use a higher-res scan; re-crop to exclude legend blocks and notes.
Doors/windows appear in the wrong spot
- Cause: symbol ambiguity (different drafting conventions) or overlapping dimensions.
- Fix: confirm openings against the plan; move or reassign openings manually; prioritize overall room connectivity.
Rooms don’t close (missing boundaries)
- Cause: open plan areas, half-walls, or gaps where walls should meet.
- Fix: decide the modeling intent: either keep it open, or add the missing boundary based on the drawing notes.
Scale is off by 5–15%
- Cause: no dimensions to anchor scale; camera perspective distortion in photos.
- Fix: set a known measurement (e.g., an exterior wall); if using photos, capture from directly above or use a scan.
Accuracy checks that take under 10 minutes
To keep your 3D model dimension-true, validate a small set of measurements instead of trying to verify everything.
- Overall footprint: confirm total width and length.
- One “anchor” room: verify a main room (living room or master bedroom) matches plan dimensions.
- Openings: confirm one door width and one window width (common standards can mask errors).
- Wall thickness: ensure interior vs exterior walls aren’t swapped (a common visual mismatch).
If any of these are wrong, fix scale and wall classification before you spend time on materials or furniture.
Room planning in 3D: simple rules that prevent bad layouts
Once the model is accurate, 3D helps you evaluate layouts faster than 2D. A few practical rules keep your plan livable:
- Circulation first: keep primary walkways clear (especially entry-to-living and kitchen-to-dining paths).
- Door clearance: ensure doors can swing without colliding with furniture.
- Sightlines: place tall objects (bookcases, wardrobes) where they won’t block light or views.
- “Real” furniture sizes: model the actual sofa depth, bed size, and table clearances—not optimistic placeholders.
Naming and organizing outputs for teams (a lightweight standard)
If you’re generating multiple options, establish a consistent naming convention so exports stay searchable. Here’s a simple pattern you can adapt:
project-name__level-1__option-b__view-livingroom__v03.png
project-name__level-1__option-b__view-kitchen__v03.png
project-name__level-1__option-c__axonometric__v01.png
This tiny habit reduces confusion when you share drafts with clients, contractors, or collaborators.
When to use AI conversion vs manual 3D modeling
AI shines when you need speed, iteration, and a strong starting point. Manual modeling still wins when the project is highly detailed or non-standard.
- Choose AI for: early design exploration, furniture planning, quick stakeholder alignment, and fast presentation renders.
- Choose manual for: complex roof lines, unusual curved walls, intricate millwork, engineering-grade documentation, or highly detailed BIM deliverables.
Frequently asked questions
Do I need dimensions on the plan?
It’s strongly recommended. Without dimensions, the AI must infer scale, which increases the chance of proportional drift. If dimensions aren’t available, provide at least one known measurement to anchor the model.
Can AI handle different drafting standards?
Often yes, but mismatches happen—especially with door/window symbols and wall poche styles. Expect to do a quick pass to confirm openings and wall thickness.
Is photorealism necessary for decision-making?
Not always. For room planning, clear geometry and accurate scale matter more than textures. For proposals and marketing, materials and lighting become more important.
Putting it all together
An effective ai floor plan to 3d workflow is less about pressing a magic button and more about reducing ambiguity: provide a clean plan, anchor scale, validate a few critical measurements, and then iterate in 3D with intent. When you treat AI as a fast model-building assistant—and keep a short accuracy checklist—you can move from a 2D drawing to confident layout decisions and presentation-ready visuals with far less effort than traditional modeling.
If you want to experiment with this workflow on an iPhone, you can try an app like Floor Plan to 3D to generate and export high-resolution 3D renders from black-and-white plans.
