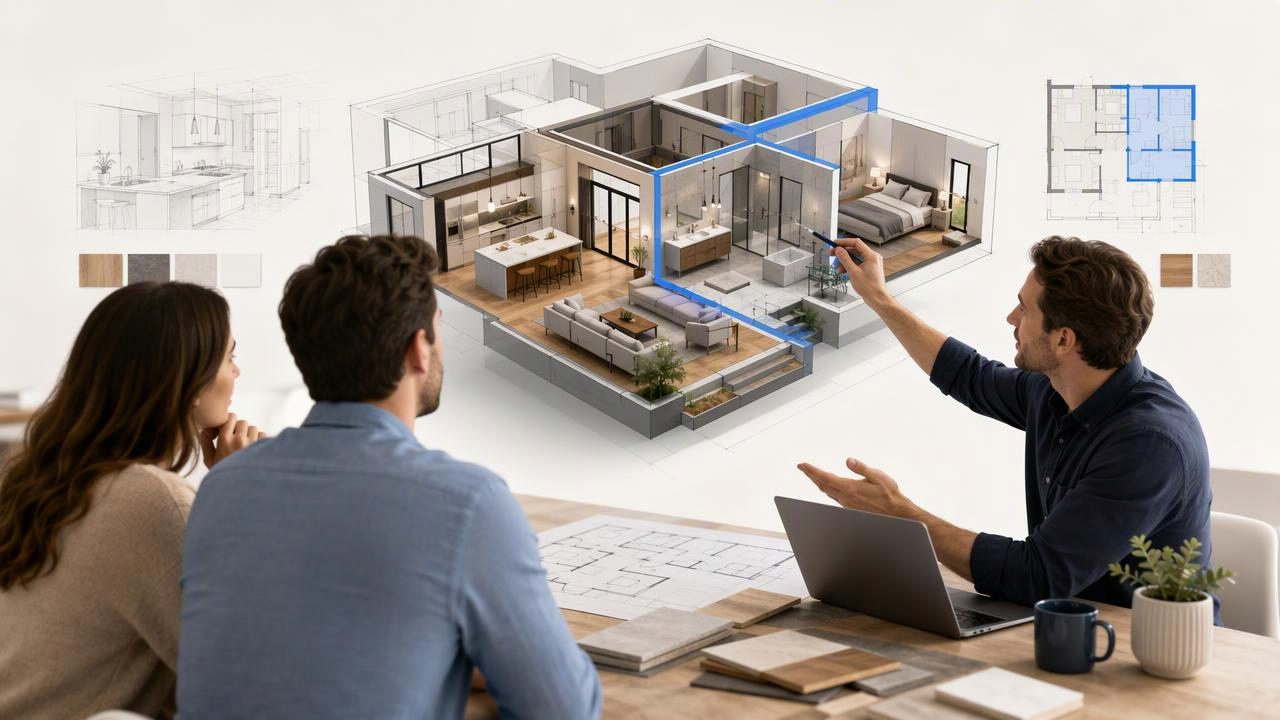
A remodel proposal can be accurate, detailed, and professionally priced yet still leave a homeowner uncertain. Written scopes, finish schedules, sketches, and floor plans explain what is changing, but many clients cannot easily picture how those changes will feel in the finished space. That gap can slow approvals, create avoidable revisions, and lead to different expectations about the final result.
3D visualization for remodel proposals helps bridge that communication gap. A clear visual concept can show the relationship between rooms, the intended furniture arrangement, the possible location of a kitchen island, or the impact of opening a wall. It gives homeowners, designers, contractors, and property stakeholders a shared starting point for discussing the proposal before work begins.
The key is to use visualizations as decision-support materials—not as construction documents. A 3D image can make a proposal easier to understand, but it should be reviewed alongside measured plans, site conditions, selections, and professional drawings where they are required.
Why Remodel Proposals Need More Than Plans and Pricing
Most remodel proposals combine several information types: an existing floor plan, a scope of work, allowances, product selections, and a budget. Each document serves an important purpose. However, clients often need to mentally combine all of them to understand the intended result.
For example, a proposal may state that a dated kitchen will receive:
- New cabinet runs along two walls
- A larger island with seating
- Relocated appliances
- New flooring through the kitchen and dining area
- Updated lighting and a warmer color palette
That is a useful scope, but it does not necessarily answer the questions a homeowner is most likely to ask: Will the island leave enough walking space? Will the room feel more open? Can four people sit there? Does the new layout still connect naturally to the dining area?
A 3D concept cannot confirm code compliance, precise clearance, or constructability. It can, however, make the proposed direction much easier to discuss. When clients can see the general layout and style, feedback becomes more specific: “Keep the island, but reduce the seating,” or “We prefer the lighter cabinet option.”
What 3D Visualization Can Clarify in a Remodel Proposal
The strongest visuals answer a defined decision question. Rather than producing images only because they look polished, connect every image to an item that needs client alignment.
| Proposal question | Helpful 3D visualization | What it can help clarify |
|---|---|---|
| Should the wall be opened? | Existing and proposed room views | Visual connection, light flow, and the perceived openness of adjacent spaces |
| Does the furniture plan work? | Furnished layout concept | Conversation zones, seating direction, and how the room may be used |
| Which finish direction fits best? | Two style variations of the same layout | Differences in mood, contrast, material character, and visual warmth |
| How will the exterior refresh look? | Front-elevation or exterior photo concept | Potential changes to paint, trim, planting, entry details, or façade emphasis |
| What is included in each option? | Annotated option boards with images | The visual distinction between a base scope and an upgraded alternative |
For remodel proposals, comparison is often more valuable than a single attractive image. A client may not know whether they want a galley kitchen or a peninsula layout until they can review both options in a similar visual format.
A Concrete Example: Presenting a Small Kitchen Remodel
Consider a 1980s kitchen that is closed off from a compact dining room. The homeowners want more storage, an informal place for two people to eat, and a lighter look. The proposal includes removing a partial wall, adding a peninsula, replacing cabinets, and continuing new flooring into the dining area.
Instead of attaching only a plan and a written scope, the remodeler can present three focused visuals:
- Existing-condition reference: A photograph or simple plan that identifies the partial wall, current appliance positions, and restricted circulation.
- Proposed layout concept: A 3D view showing the opened connection to the dining room, peninsula seating, cabinet placement, and the general relationship between the two rooms.
- Finish comparison: The same proposed view shown with a light-oak-and-cream direction and a darker painted-cabinet direction.
This presentation does not tell the client that the generated peninsula is exactly 36 inches deep or that every cabinet will be built to the proportions shown. Instead, it supports a practical conversation: Does the peninsula feel like the right choice? Is two-seat seating enough? Does the lighter scheme better suit the dining room? Should the opening remain partially framed?
After the client selects a direction, the team can move forward with measurements, detailed cabinetry information, structural review if needed, and final specifications. The visualization has done its job by helping the client make an informed early-stage decision.
Build a Visual Story Around the Proposal
A good remodel visualization should not appear as an isolated rendering at the end of a PDF. It works best when it follows the same logic as the proposal itself: current conditions, design intent, scope options, and next decisions.
Start with the problem being solved
Write one or two plain-language statements before introducing the imagery. For instance: “The current kitchen separates cooking from dining and offers limited landing space near the refrigerator.” This context helps clients evaluate a design based on the problem it addresses rather than reacting only to finishes.
Show the proposed design intent
Use a visual that highlights the major spatial idea. In a living room remodel, that may be a clearer furniture grouping around a focal wall. In a bathroom, it may be the shift from a cramped tub enclosure to an open shower concept. Keep the viewpoint useful; a dramatic angle is less valuable than one that reveals the decision at hand.
Separate fixed decisions from exploratory ideas
Label images carefully. If the location of a new opening is part of the approved scope, state that. If wall color, pendant fixtures, or lounge chairs are illustrative, say so. This distinction reduces the risk that a client assumes every accessory or material shown is included in the price.
Helpful label: “Concept image for layout and style discussion. Final materials, dimensions, fixtures, and construction details are subject to field verification and approved specifications.”
How to Use 3D Images Without Overpromising Accuracy
Visual realism can create an unintended problem: clients may see an image as a guarantee. Set expectations early and repeat them in the proposal when appropriate.
A floor plan conversion or room redesign image may preserve important visible cues from its source, such as room labels, apparent proportions, and layout relationships. Even so, it is not a measured CAD or BIM model. A clear source plan does not guarantee that generated geometry, object placement, ceiling heights, or dimensions will be construction-accurate.
Use these practices to keep the proposal responsible:
- Compare the visual with the source plan. Check room connections, door locations, windows, major walls, and labeled spaces before sharing it.
- Do not use rendered dimensions for ordering or installation. Confirm all measurements on site and through the appropriate drawings.
- Identify conceptual finishes. A rendered stone, paint color, or flooring pattern should not replace a product selection or sample approval.
- Document exclusions. If structural work, engineering, permits, lighting design, or custom fabrication are not included, make that visible in the proposal.
- Use professional review where required. Construction decisions must account for local codes, existing conditions, and qualified trade or design input.
These limitations do not make visualization less useful. They make it more useful because everyone understands what the images are intended to communicate.
Present Options Without Creating Scope Confusion
Multiple options can help clients choose, but only when each option is clearly connected to scope and price. A visual proposal should never make an upgraded concept look like the standard package by accident.
One effective approach is to organize alternatives around named choices:
- Option A: Refresh. Retain the basic layout and update finishes, lighting, and furniture placement.
- Option B: Reconfigure. Include the refresh work plus a revised kitchen or room arrangement.
- Option C: Expand. Include the reconfiguration plus an addition, wall relocation, or exterior change.
For every option, pair the image with a short description of what is shown, what is included, and what still needs confirmation. Avoid presenting too many style variations at once. Three clear choices are usually easier to review than eight loosely related renderings.
Review Questions to Ask Before Sending the Proposal
A quick review can catch mismatches between the visual and the written scope. Ask:
- Does the image show the same rooms and major changes described in the proposal?
- Have doors, windows, walls, and circulation paths been checked against the source plan or room photo?
- Are visual-only items clearly distinguished from contracted materials and work?
- Do option labels match the pricing and allowance sections?
- Does the image encourage a useful client decision rather than imply unverified construction details?
It is also wise to include a short “client feedback” section. Invite comments on layout, style, priority upgrades, and features that matter most. Specific prompts turn a vague reaction—such as “It feels off”—into actionable feedback.
Make Visuals Part of Better Renovation Decisions
3D visualization for remodel proposals is most valuable when it improves communication, not when it attempts to replace professional planning. Used thoughtfully, it helps clients understand a proposed layout, compare design directions, and approve a concept with greater confidence. It can also help project teams identify questions earlier, before selections and site work make changes more costly.
For teams that need to turn a floor plan into a visual concept for proposal discussions, Floor Plan to 3D & Home Redesign’s guide to floor plan to 3D concepts explains how source plans can be used for renovation previews. Review every output against the original plan, and rely on verified measurements and qualified documentation for final construction decisions.
