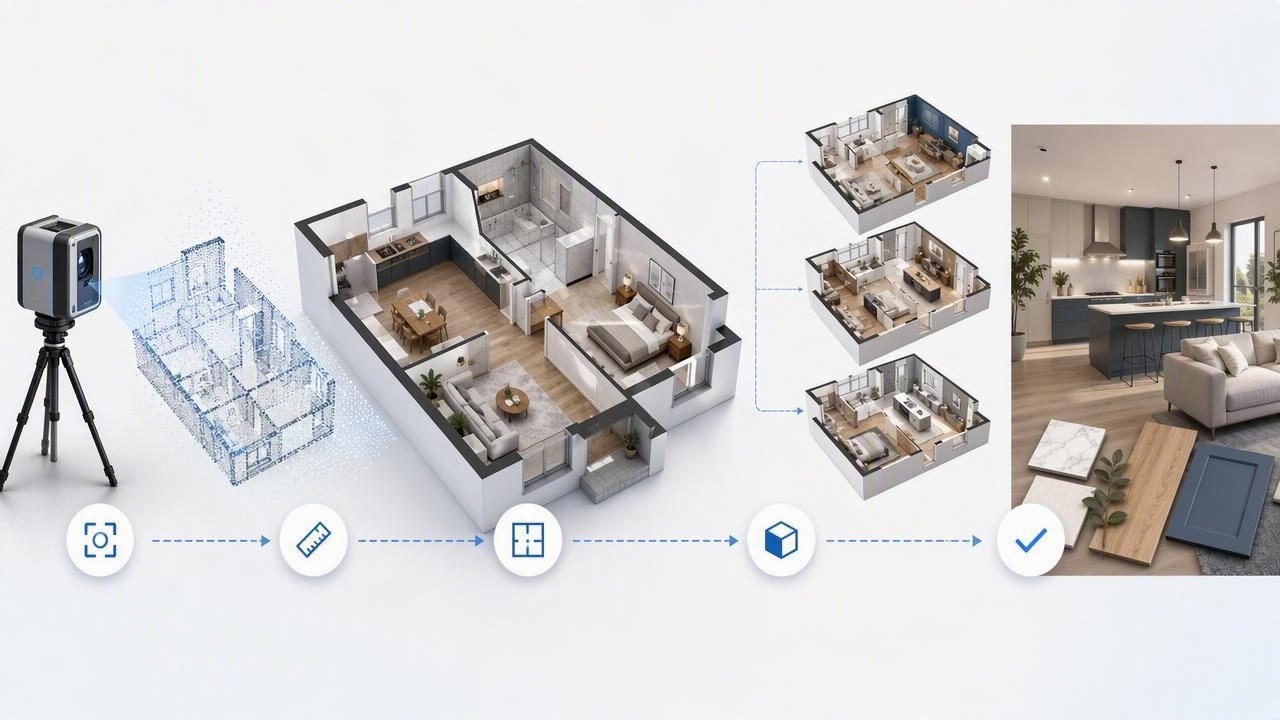
A 3d floor plan is more than a nice visualization—it’s a decision tool. When you can see walls, doors, windows, and circulation in a simple 3D view, you spot problems early: tight clearances, awkward furniture placement, blocked sightlines, or a remodel idea that looks great in your head but fails in real space.
This guide walks through an accuracy-first workflow to go from a paper plan, blueprint, or PDF to a reliable 3D model, then use AI-assisted room planning and redesign previews to validate renovation choices before you spend on labor and materials.
Why a 3D floor plan changes renovation planning
Traditional 2D plans are precise, but they’re not always intuitive—especially for homeowners, clients, or stakeholders who don’t read drawings daily. A 3D floor plan bridges that gap by making scale, proportion, and flow immediately understandable.
- Fewer surprises: Catch clearance issues (door swings, hallway pinch points) early.
- Faster iteration: Swap layouts and compare options without redrawing from scratch.
- Better communication: Share a clear visual with contractors, partners, or family.
- More confident spending: Align major purchases (cabinets, sofa, appliances) with real dimensions.
Step 1: Start with the cleanest possible floor plan
Floor plan conversion tools and AI room planners perform best when the input is clear. If your source is messy, you’ll spend time correcting walls, openings, and labels later.
Best input types (ranked)
- Vector PDF (clean lines, readable dimensions)
- High-resolution scan (300+ DPI)
- Phone photo (acceptable if well lit and square to the page)
Quick cleanup checklist
- Crop to the plan boundary (remove notes, title blocks if they clutter).
- Increase contrast so walls and openings are distinct.
- Rotate so walls are horizontal/vertical (reduces detection errors).
- Make sure room labels and dimensions are legible.
Rule of thumb: If you can’t quickly measure from the image without guessing, the conversion tool will probably guess too.
Step 2: Lock scale and proportions (the non-negotiable step)
The most common reason a 3d floor plan becomes unusable is incorrect scale. You might end up with a “nice render” that’s wrong by 5–10%, which is enough to derail cabinetry, furniture layouts, and door clearances.
How to validate scale in minutes
- Choose one known dimension (e.g., overall width of the house, a labeled wall length, or a standard door width).
- Set the scale using that dimension in your tool/app.
- Cross-check 2–3 more dimensions in different parts of the plan (a bathroom width, hallway, bedroom).
- Confirm door/window positions match the original plan (misplaced openings break layouts fast).
Simple scale math (when you need it)
If you’re converting from an image and your software uses pixels, you can compute a pixel-to-real-world factor using a known measurement. Here’s a compact example:
# Given: a known wall measures 4200 mm in reality
# and that wall spans 840 pixels in the image
mm_per_pixel = 4200 / 840  # = 5 mm per pixel

# Now convert any pixel measurement to mm
wall_px = 560
wall_mm = wall_px * mm_per_pixel  # 2800 mm
You don’t need to do this manually if your tool supports “set scale by reference,” but understanding the concept helps you troubleshoot when something feels off.
Step 3: Rebuild key architectural elements in 3D (prioritize what matters)
Not every detail must be perfect for renovation decisions. Focus on elements that affect space planning and cost.
High-impact elements to model accurately
- Walls and thickness: Especially load-bearing walls or anything you might remove.
- Door swings: They dictate usable space and furniture placement.
- Windows: Impact daylight, privacy, and where tall furniture can go.
- Stairs: A small change can cascade into headroom and code issues.
- Plumbing cores: Kitchens/baths become expensive when you move drains/vents.
What you can simplify early
- Trim profiles and decorative moldings
- Minor wall niches
- Exact lighting fixture models (use placeholders)
Step 4: Use AI room planning to test layout scenarios
Once the 3d floor plan is dimension-true, AI-assisted room planning becomes useful: you can generate layout suggestions and then judge them against your constraints (clearances, circulation, storage, sightlines).
Three renovation questions an AI room planner can help answer
- Can we open this space without creating dead zones? Try removing a wall and compare traffic flow from entry to kitchen to living area.
- Will the furniture actually fit? Place real-size sofas, beds, and dining tables to confirm walkways.
- Which layout is more future-proof? Test a home office conversion, nursery scenario, or aging-in-place routes.
Clearance numbers to keep in mind
Exact standards vary by region and use case, but these practical targets help you sanity-check:
- Main walkways: aim for ~900–1100 mm where possible
- Behind dining chairs: ~900 mm for comfortable pull-out and passage
- In front of kitchen appliances: enough to fully open doors + stand comfortably
Step 5: Generate redesign previews (interior, exterior, and staging)
A common pitfall: a layout works, but the space still feels “off.” This is where redesign previews help—testing style, materials, and lighting without committing. Keep the workflow grounded: treat visuals as options, not instructions.
Interior redesign: what to experiment with
- Material swaps: flooring, wall paint, cabinet fronts
- Color temperature: warm vs cool lighting and how it changes perception of size
- Storage surfaces: built-ins vs freestanding furniture
Exterior refresh: prioritize “big read” changes
- Primary siding color and trim contrast
- Front door style/color
- Simple landscape massing (hedges, trees) for scale
Empty-room staging: how to avoid misleading visuals
- Use furniture sized to the room (avoid default oversized sets).
- Keep ceiling heights realistic; exaggerated heights distort feel.
- Show at least one view that includes doors/windows for orientation.
Step 6: Choose the right output: images, annotated views, or both
Different stakeholders need different deliverables. Contractors tend to want clarity and dimensions; homeowners and decision-makers often want visuals and options.
| Output type | Best for | Include | Watch out for |
|---|---|---|---|
| 3D perspective renders | Concept approval, style direction | 2–4 key angles per room | May hide clearance issues if angles are flattering |
| 3D floor plan (top-down) | Layout comparisons, furniture fit | Room labels, major dimensions | Looks “simple,” but must be scale-true |
| Annotated 2D plan | Contractor discussions, scope alignment | Demolition notes, key measurements | Less intuitive for non-technical audiences |
| Before/after boards | Decision meetings | Materials, color palette, render snapshots | Can overemphasize style vs function |
Common mistakes that make a 3D floor plan unreliable
- Trusting auto-detected walls without verification: Always cross-check with dimensions.
- Ignoring wall thickness: It affects room sizes and kitchen/bath layouts.
- Forgetting door swings: A door can erase an entire usable corner.
- Mixing units: mm vs inches mistakes can silently scale everything wrong.
- Over-focusing on finishes too early: Confirm layout first, then aesthetics.
A practical mini-workflow: compare two kitchen layouts in under an hour
- Import the plan and set scale from one labeled wall.
- Confirm openings (kitchen door, windows over sink, pantry door).
- Duplicate the scene to create “Option A” and “Option B.”
- Place appliance blocks (fridge, range, dishwasher) with realistic widths.
- Check clearances in front of appliances and along main paths.
- Export a top-down 3D floor plan + two perspective views per option.
- Decide based on constraints (traffic flow, storage, plumbing moves), not just looks.
FAQ: 3D floor plan planning and conversion
Is a 3D floor plan accurate enough for construction?
A 3d floor plan is excellent for planning and communicating intent, but construction typically requires code-compliant drawings and site verification. Use 3D to reduce mistakes early, then confirm with a professional as needed.
What if my original floor plan has no dimensions?
You’ll need at least one reliable reference (e.g., a measured wall, standard door width you can verify on-site, or a known overall footprint). Without a reference, any 3D model is a best guess.
How many renders do I really need?
For decision-making, fewer is better: 1 top-down 3D floor plan per option, plus 2–4 perspective views that show circulation and key transitions (entry-to-living, kitchen-to-dining, etc.).
Closing thoughts: accuracy first, visuals second
The fastest way to make a 3d floor plan genuinely useful is to treat it like a measurement tool first and a mood tool second. Lock scale, verify openings, test furniture and circulation, then explore redesign previews for style and staging. That sequence keeps your renovation grounded in reality—and makes approvals much easier.
If you’re looking for an iOS workflow that converts a black-and-white plan into clean 3D renders while preserving layout details for planning, Floor Plan to 3D & Home Redesign is one option worth exploring.
